 Developers
 Components
 Openflexo-core
 Technology-Adapters
 Openflexo Modules
Tutorial 5 : Federating Excel Documents
1. Purpose of this tutorial
The objective of this tutorial is to give an overview of the Openflexo Excel technology adapter. More precisely it provides information about Excel roles and actions and illustrates how to use them.
The tutorial is composed of the following sections:
- Part I: Setup the project
- Download Openflexo
- Load Excel resources within Openflexo
- Create a Project and a Viewpoint
- Part II: Working with Excel
- Working with Excel concepts
- Create a Virtual model that relies on an Excel sheet listing information about customers
- Create a Flexo concept of Customer that relies on an Excel row in this listing
- Working with Excel behaviors
- Create action to retrieve and create customers within Openflexo from rows in the sheet.
- Create action to add new customers
- Part III: Federating Excel workbooks
- Create Company Sheet
- Create Company concept
- Federate sheets
- Part IV: Advanced Features
- Working with Styles
- Style of a row
- Style of a cell
- Working with formulas
As illustrated below, at the end of the tutorial you should have two separated Excel sheets one with customers information and the other one with companies information. Openflexo provides to you a support to re-interpret as Customers and Companies Excel information disseminated over cells and rows, and manipulate them (coloring rows representing particular Customers, or adding new Customers etc…).

2. Introduction
Before starting the tutorial it is important to present Excel concepts available within Openflexo. As illustrated in the diagram below ExcelWorkbook is the main concept, it is generally stored as an Excel file with the extension .xls or .xlsx, Openflexo supports these two. An ExcelWorkbook contains a set of ExcelSheets, which has a name and a position within its ExcelWorkbook, and is made of ExcelRows. An ExcelRow has an index in the ExcelSheet and owns a set of ExcelCells. An ExcelCell is associated to an ExcelRow and a column index. It has a value which can be a String, an Integer, a Formula, or a Boolean. Both ExcelRow and ExcelSheet have some Graphical styles(background styles, foreground styles, Font etc…).

3. Part I : Setup the project
3.1 Download Openflexo
As a preliminary phase, you should get a recent Openflexo distribution (Openflexo Maintainer 1.8.x)
Download it on:
3.2 Load excel resources within Openflexo
Launch Openflexo, and choose the Openflexo Modeller module.
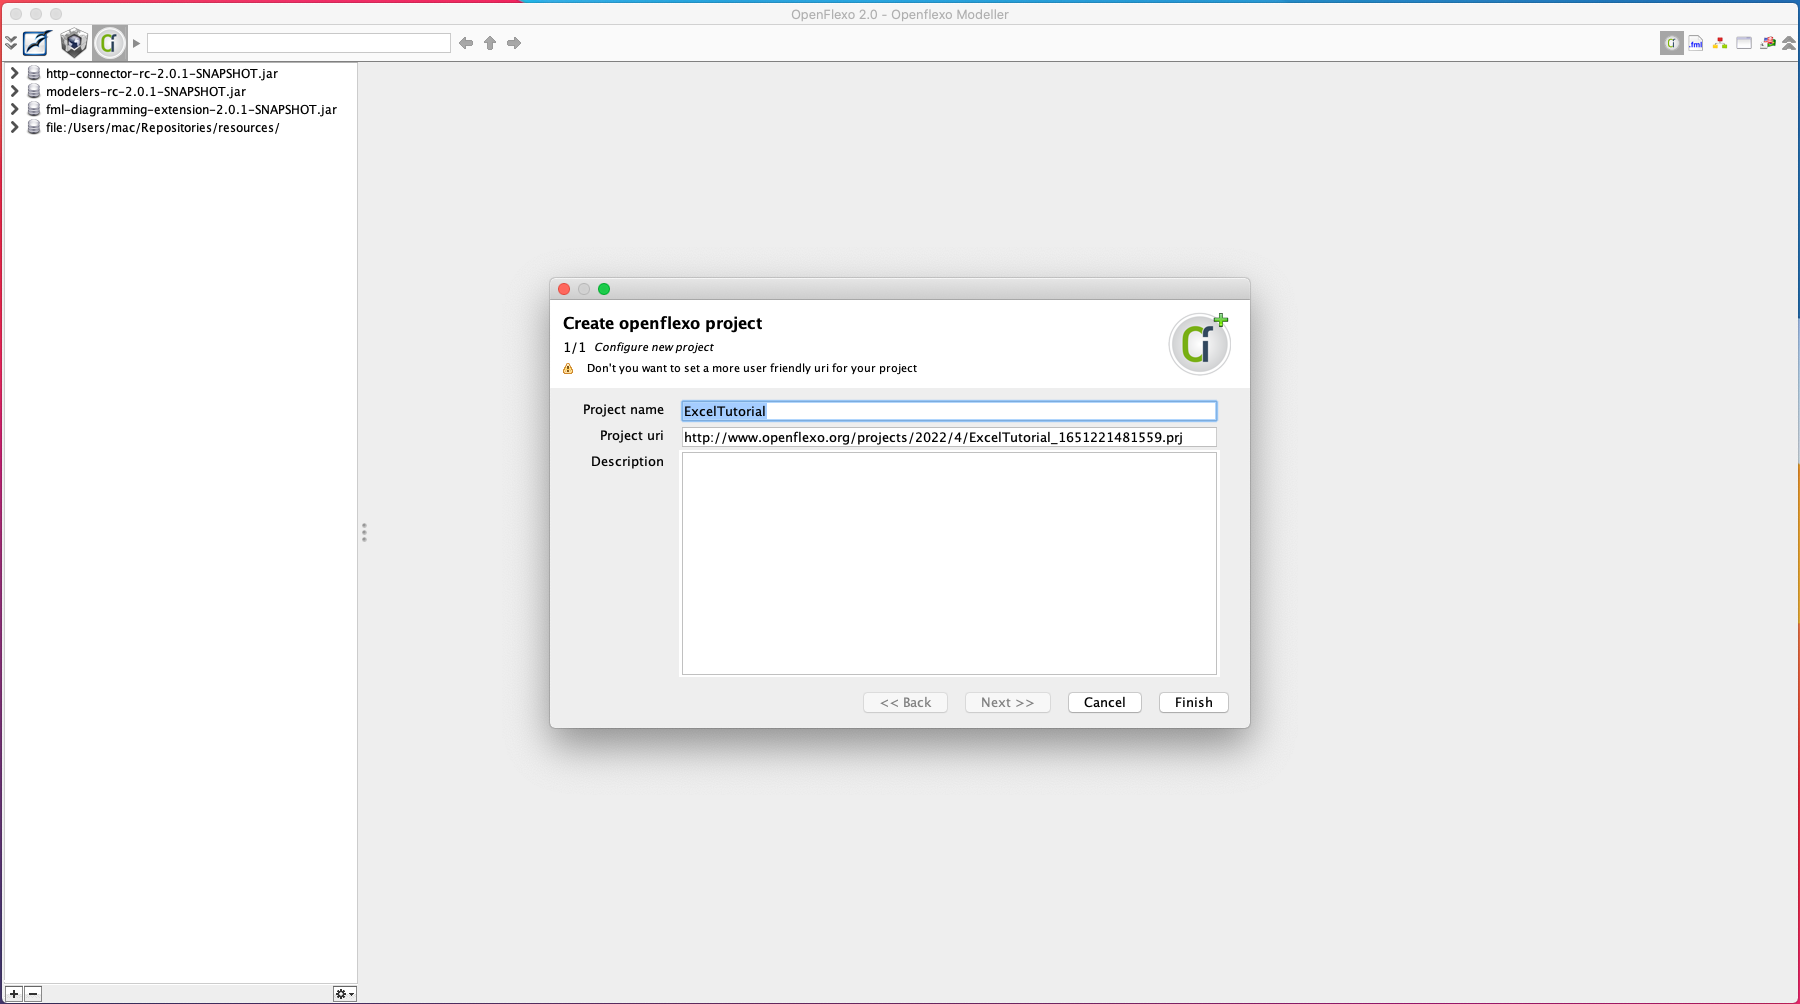
Create new project give it a name then click on Finish
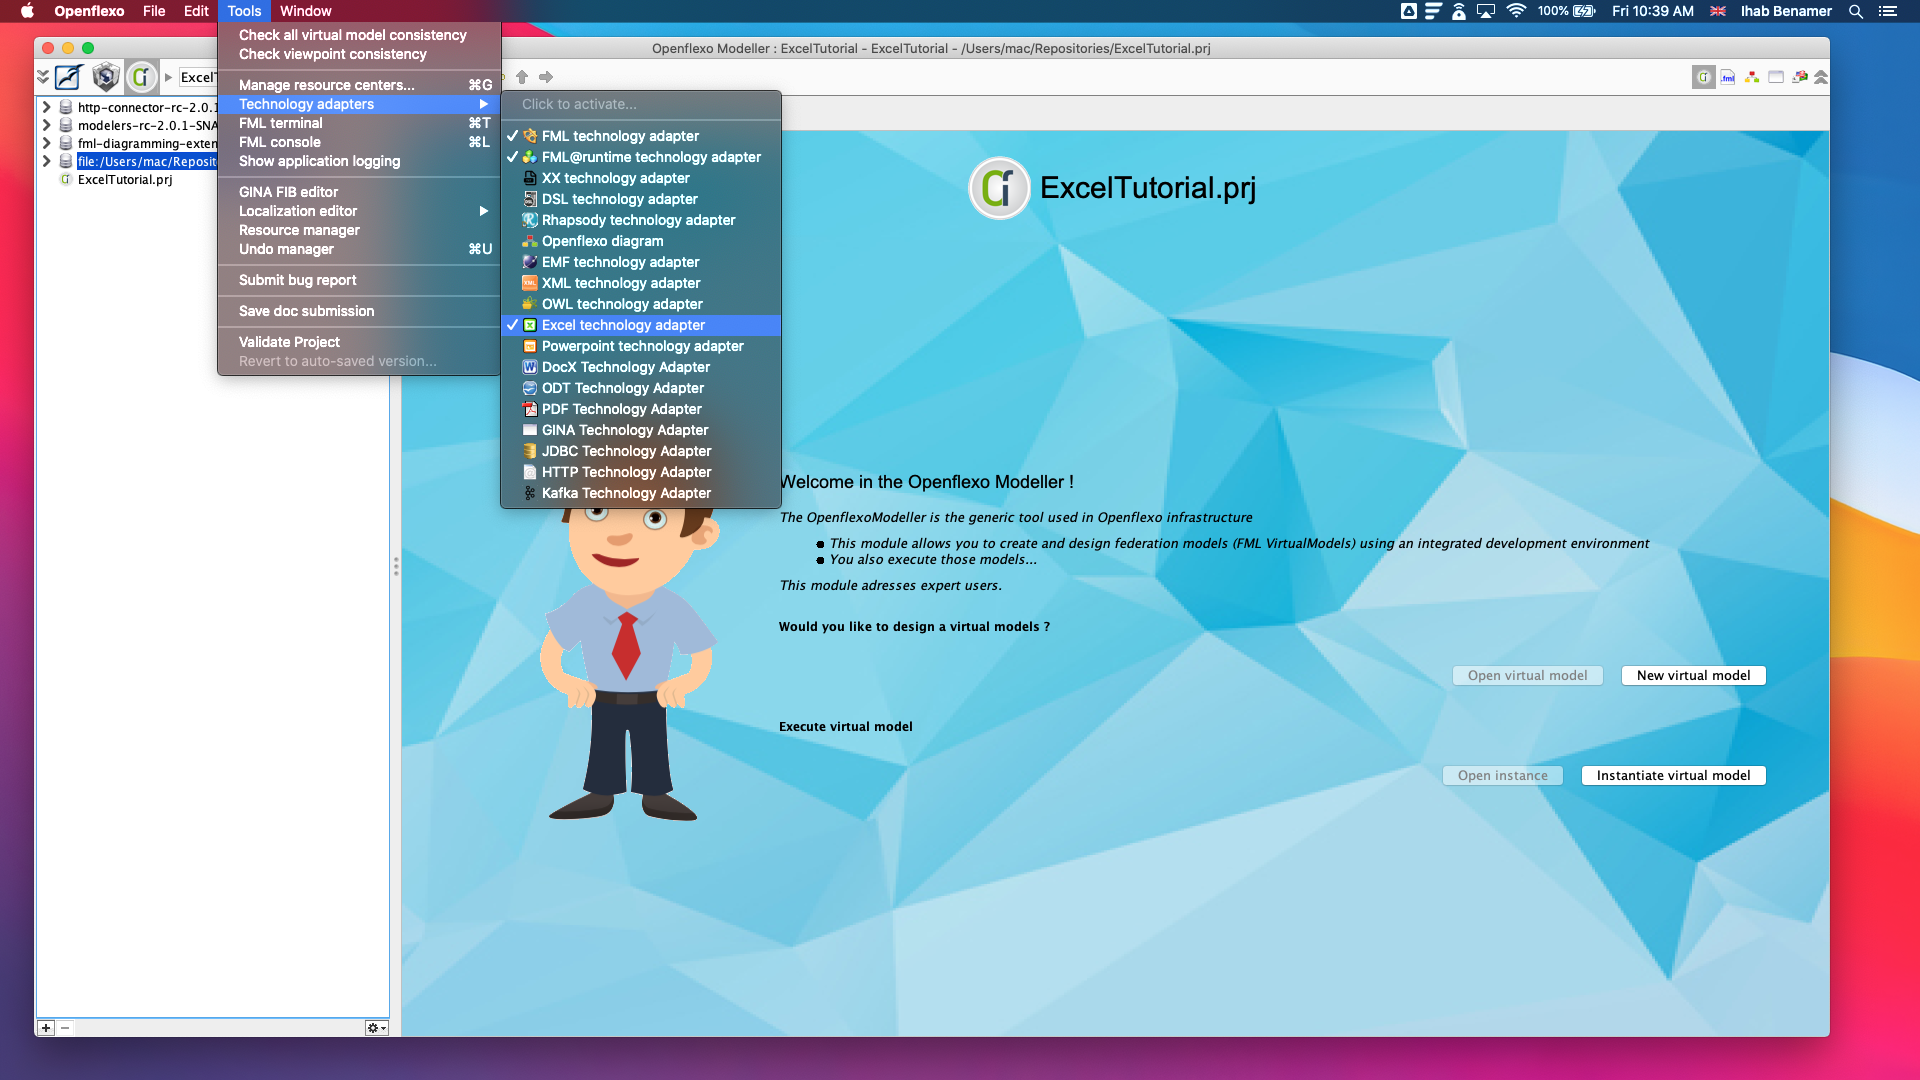
Once your project is opened, go to Tools menu > Technology adapters and make sure that Excel technology adapter is checked.
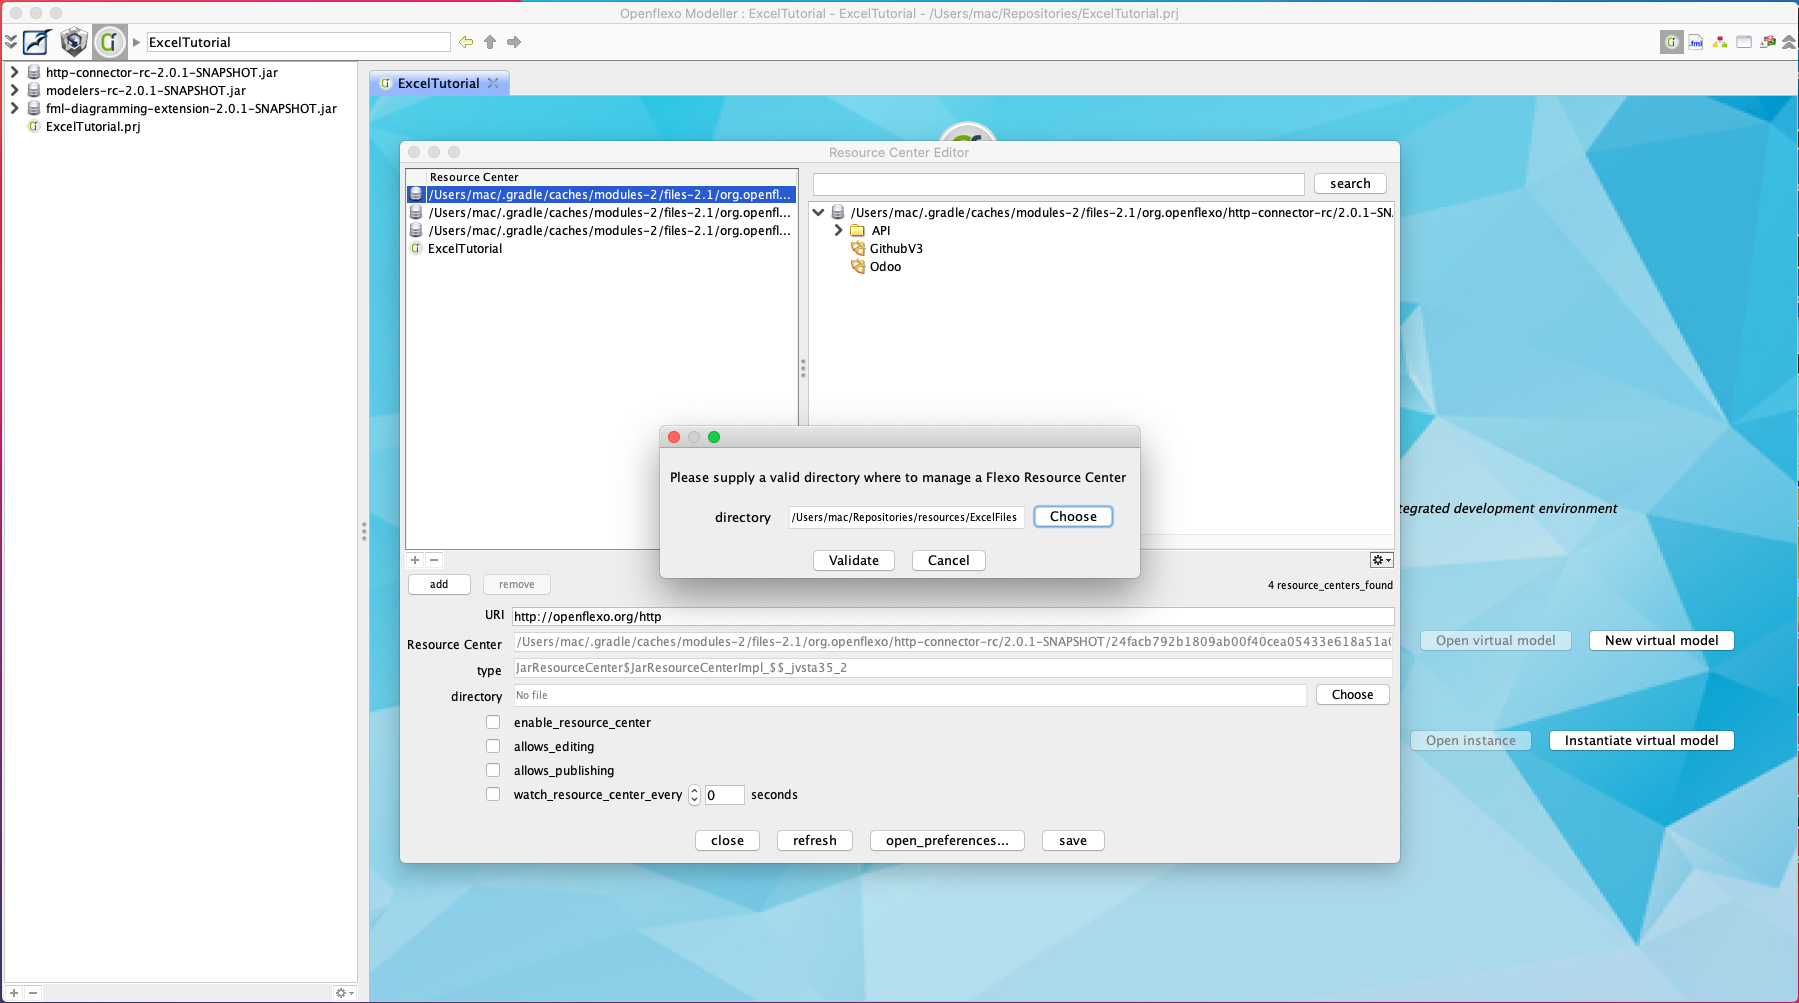
Then choose Manage resource centers.

Unzip Excel files ExcelFiles.zip in you file system and click on Add the folder “ExcelFiles” you have previously unzipped.
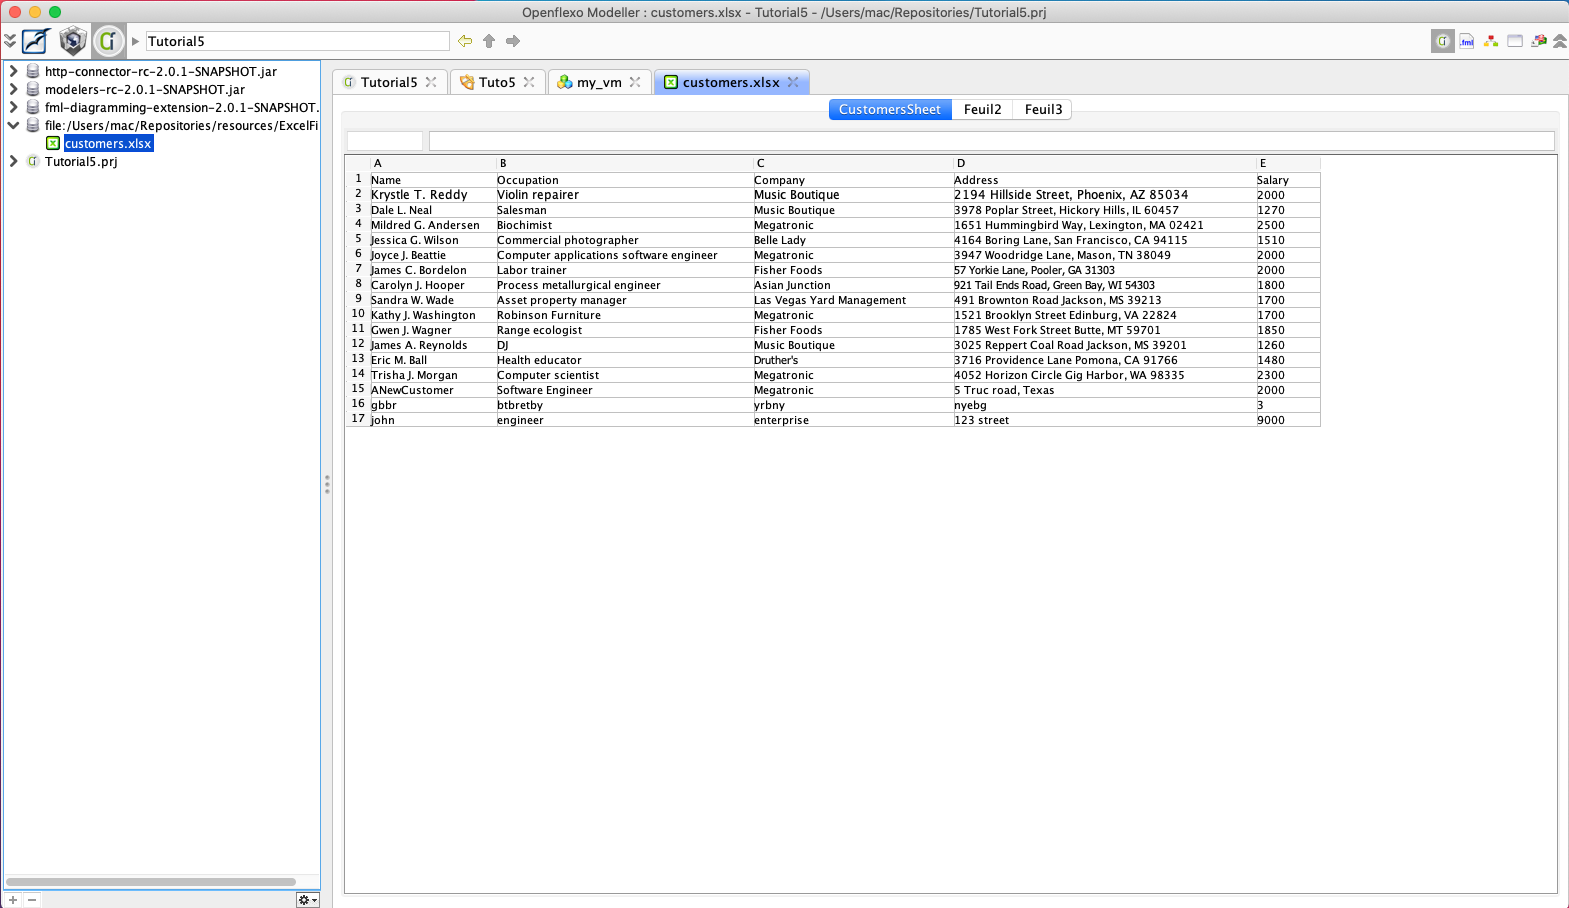
Save and close the panel, normally a file is now visible in the left browser panel, click twice on the file customers.xlsx to open it, you should have something like this:
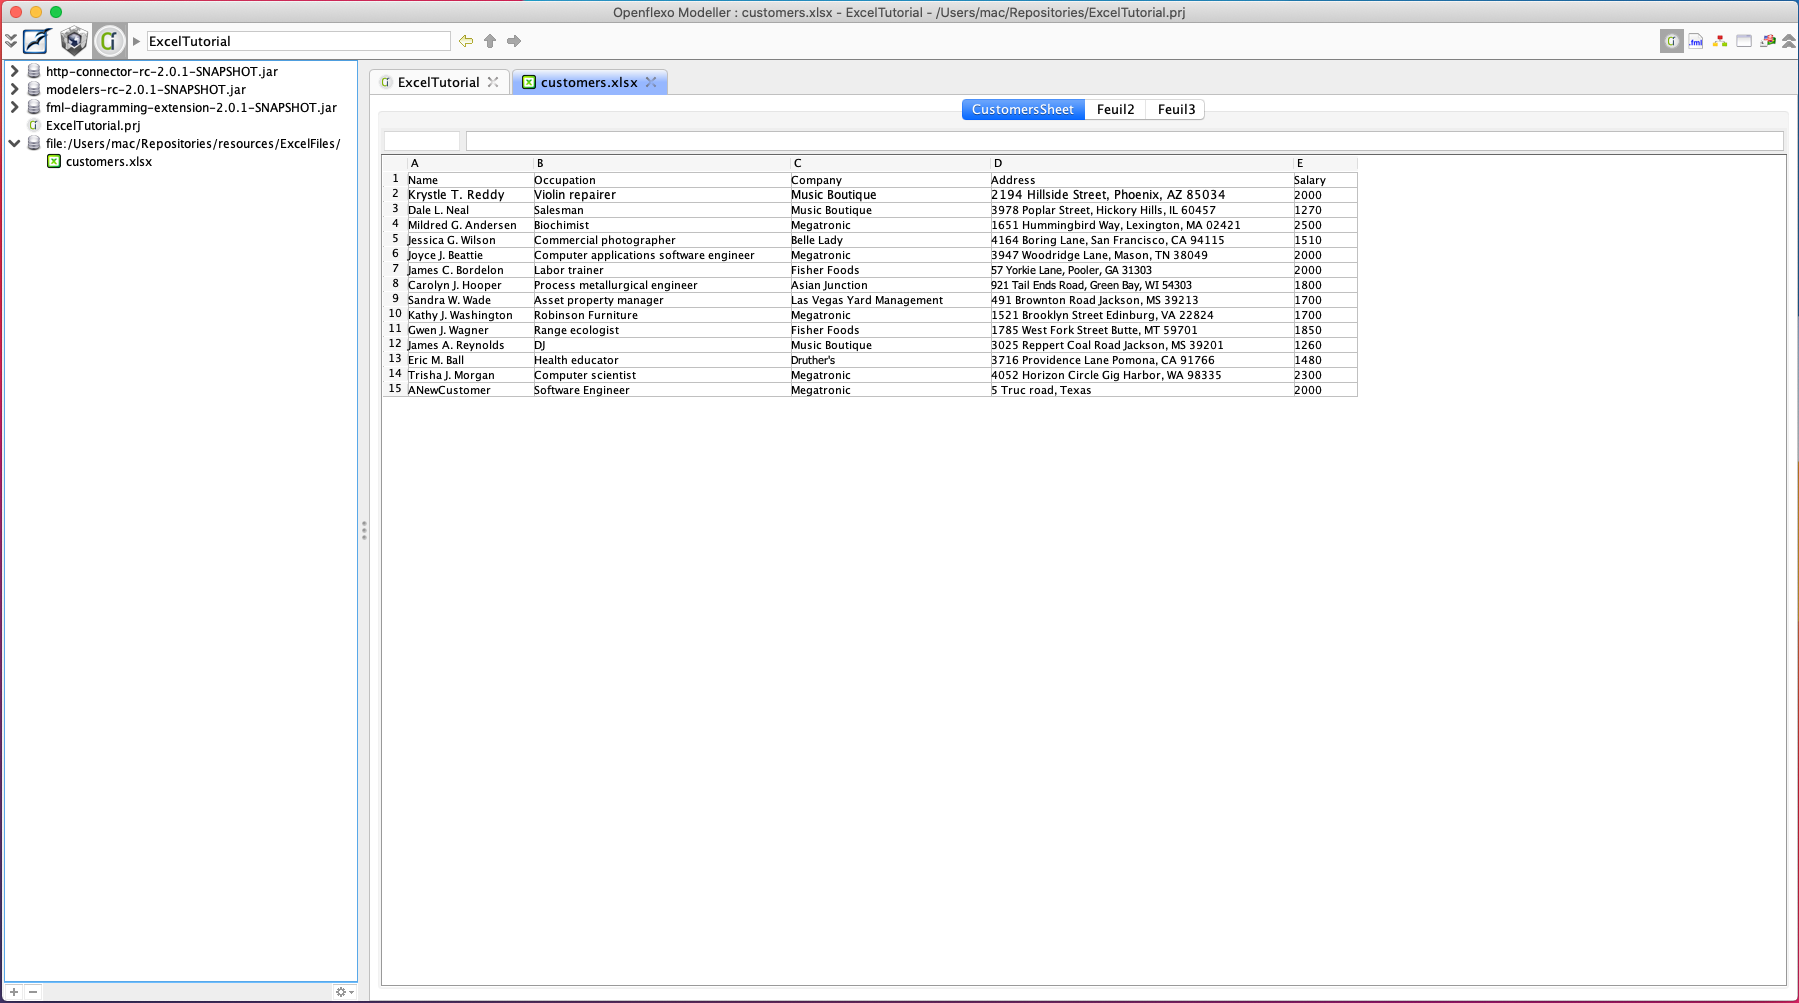
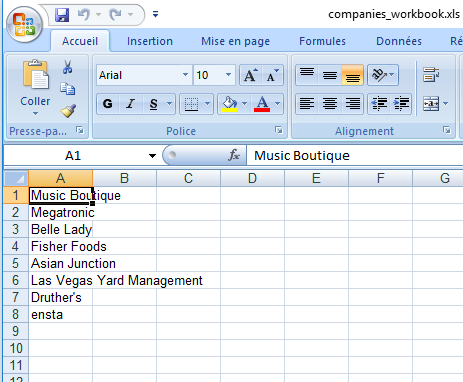
Excel files cannot be edited directly here but it gives a short overview of what the content of the file is. The customers sheet is made of 5 columns, a name, an occupation, a company, an address and a salary, and each row matches with a customer. Well done are able to read Excel resources from Openflexo, now let’s go for federation!
3.3 Create a Project/Viewpoint
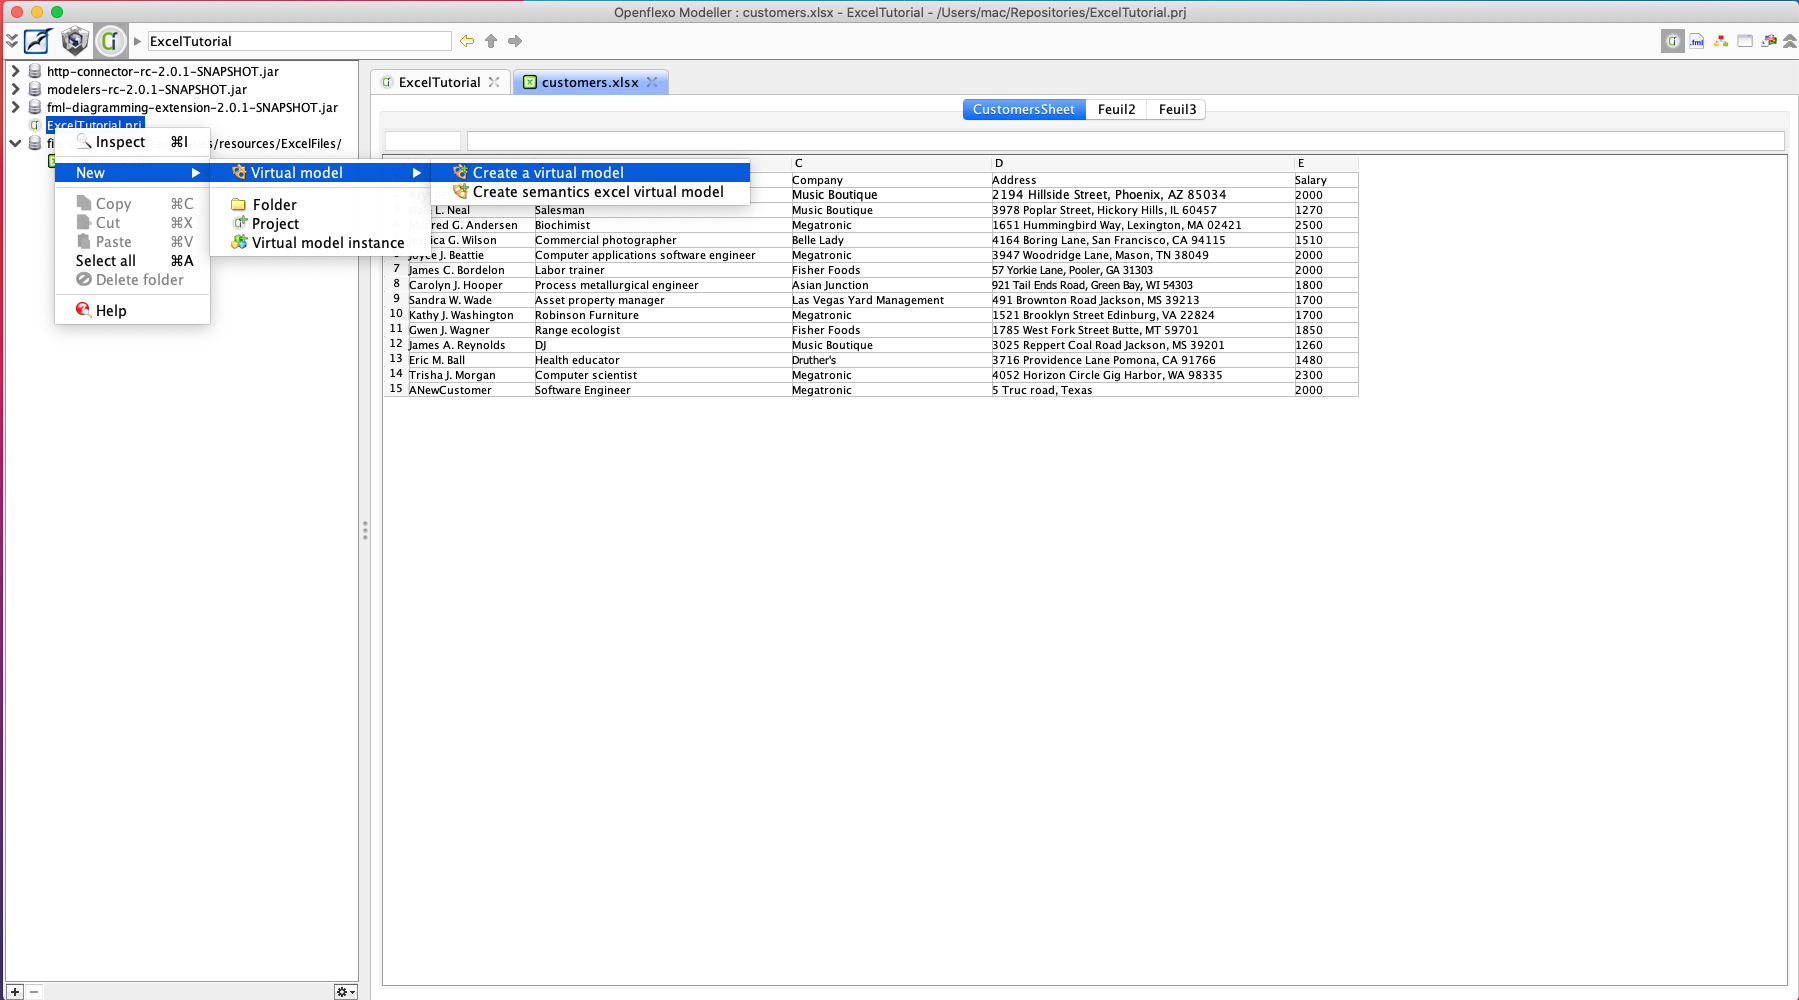
Right click on your project from the left sidebar then click Create a virtual model.
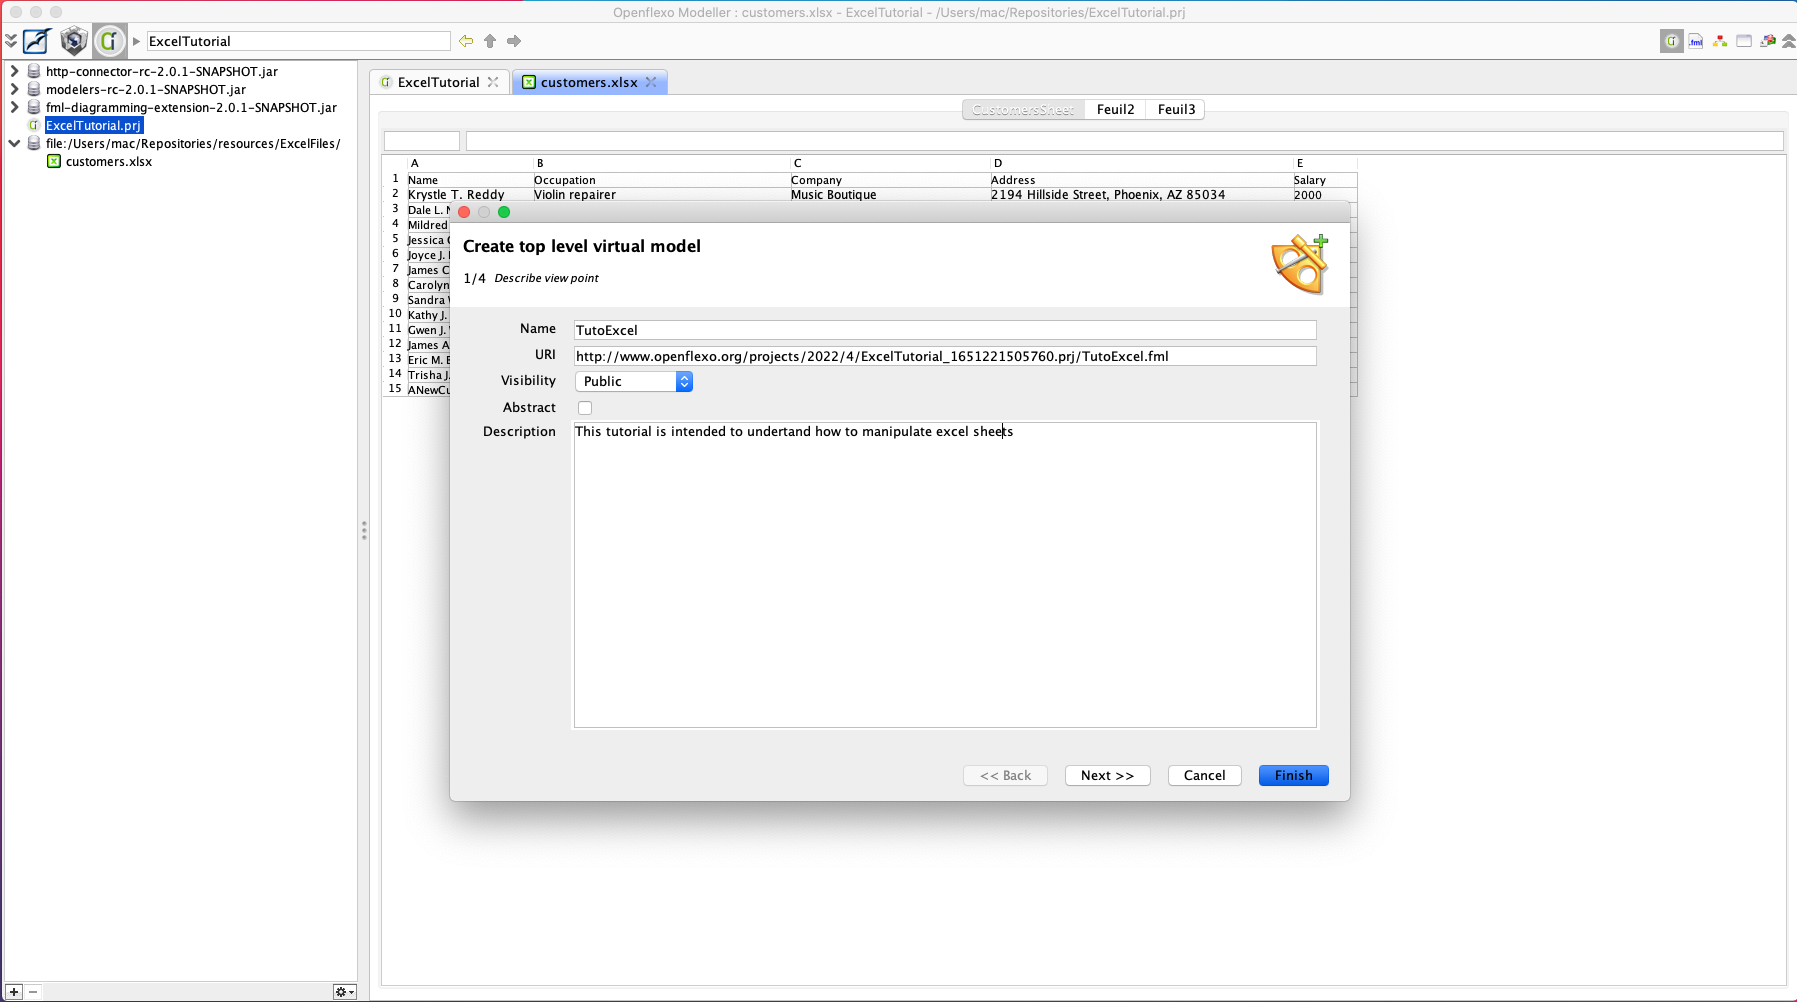
Give it a name then click Finish.
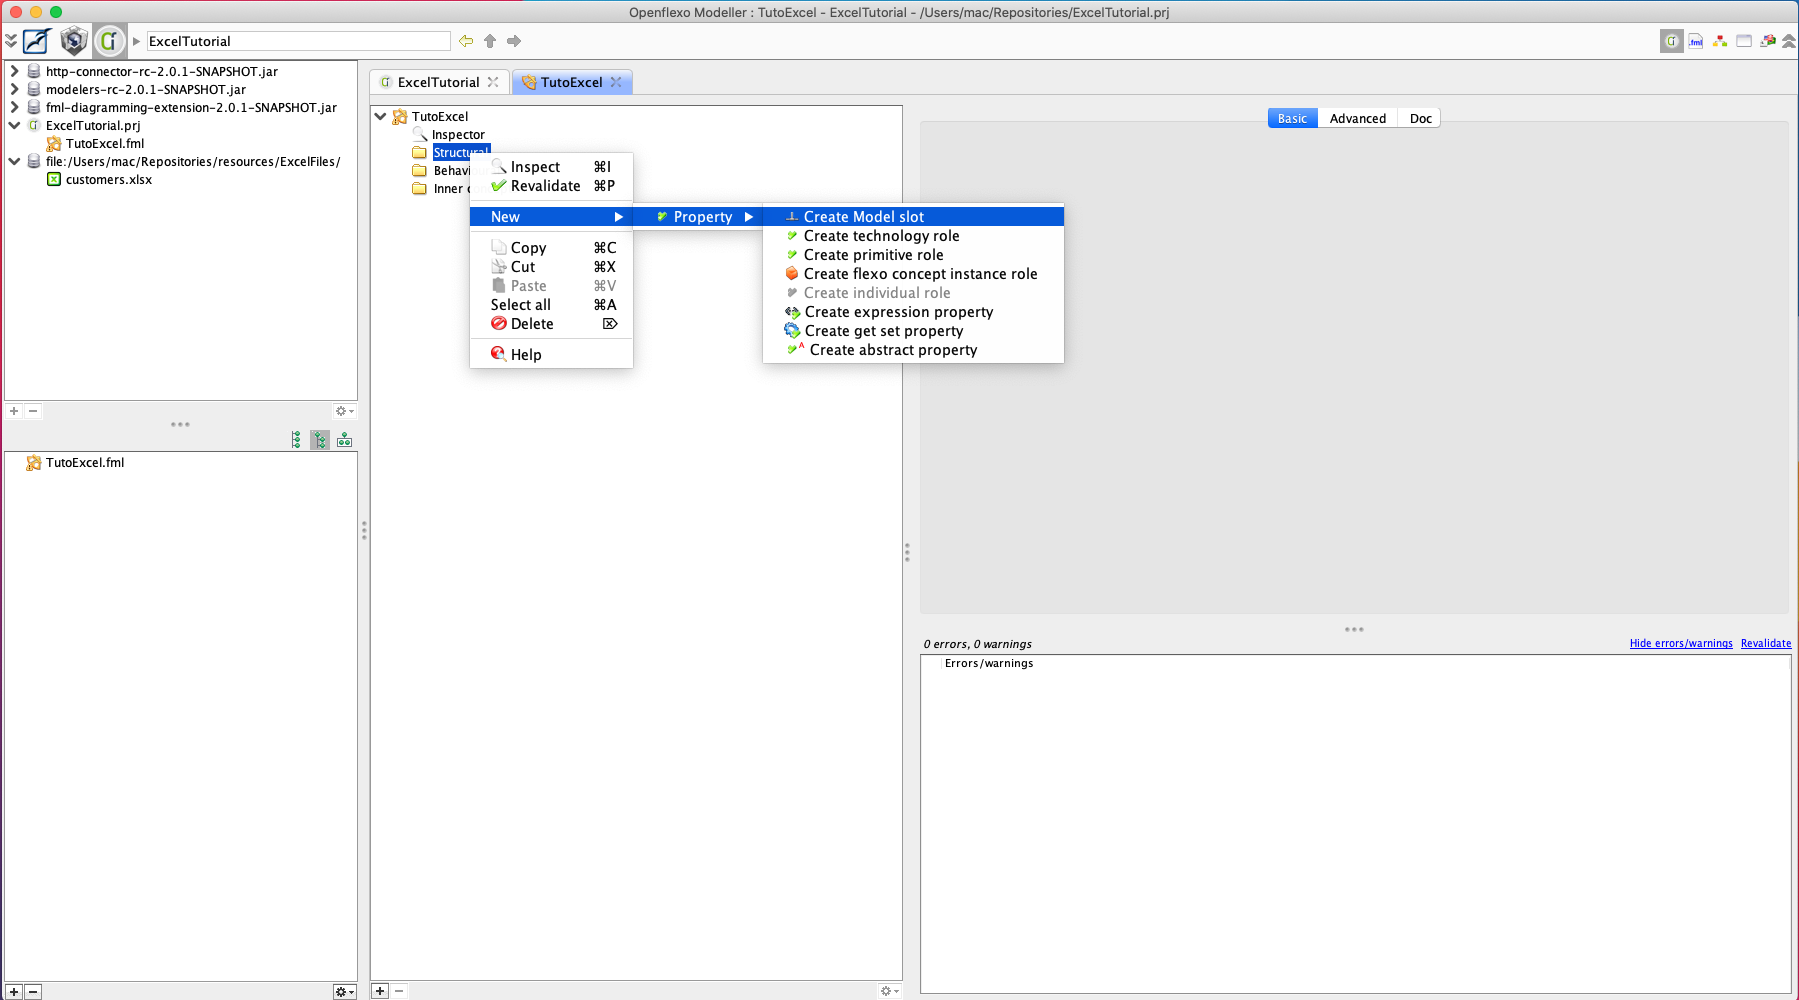
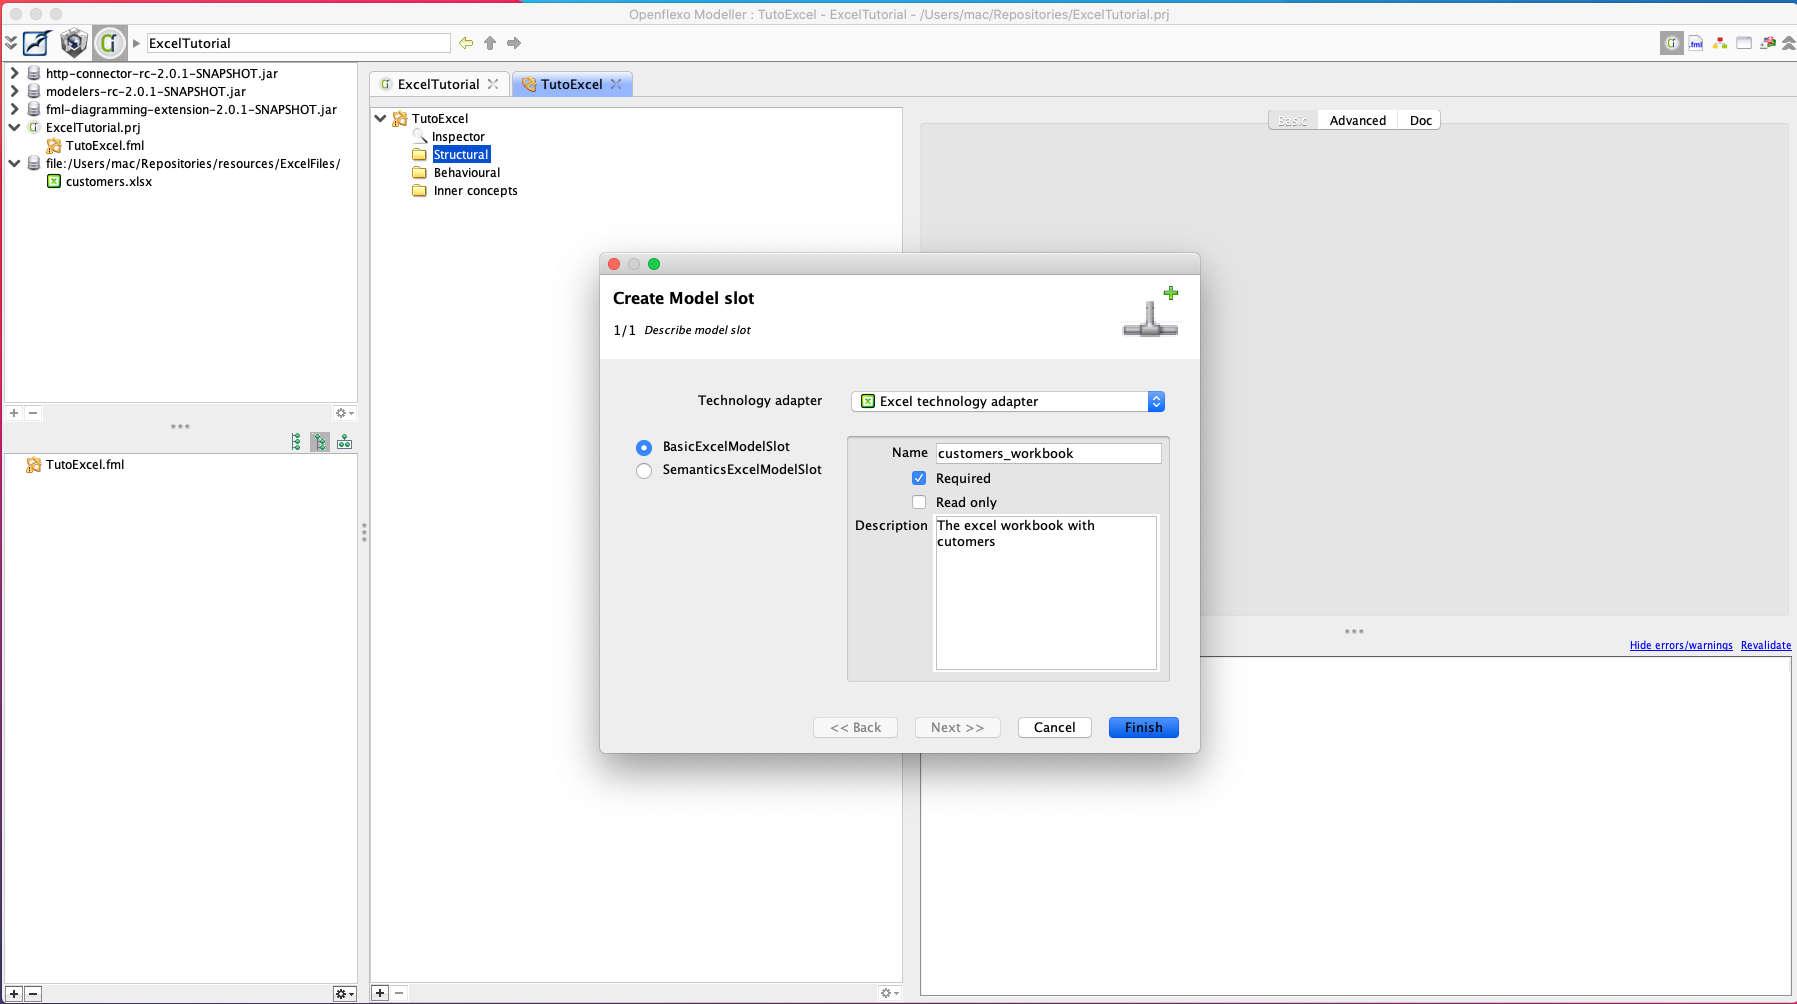
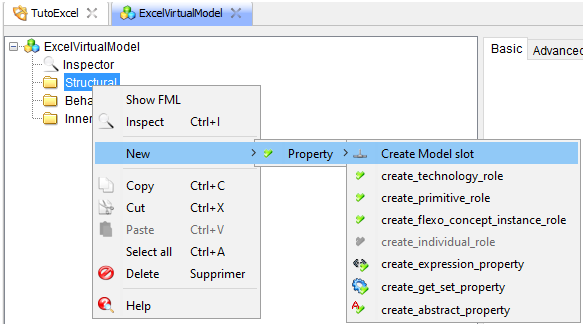
Now create a ModelSlot for this Virtual model to later reference the customers Excel file. To do that right click on the Structural folder in the Virtual model view and select New > Property > Create Model Slot .
Here we can choose between two kind of Excel ModelSlots. As a remainder an Excel ModelSlot represents a connection point to a real Excel resource (generally it is an Excel file). Each kind of ModelSlot provides its own interpretation of an Excel resource. A Basic Excel ModelSlot interprets an Excel file in its most simple form, as a set of sheets containing cells organized in rows and columns. However other kind of interpretations (called here semantics model slots) can be made, for instance rows can be directly interpreted as clients or bills… In that case one must provide its own Excel structure. This tutorial focuses only on the Basic ModelSlot . Select this kind of ModelSlot and set its name and a description.
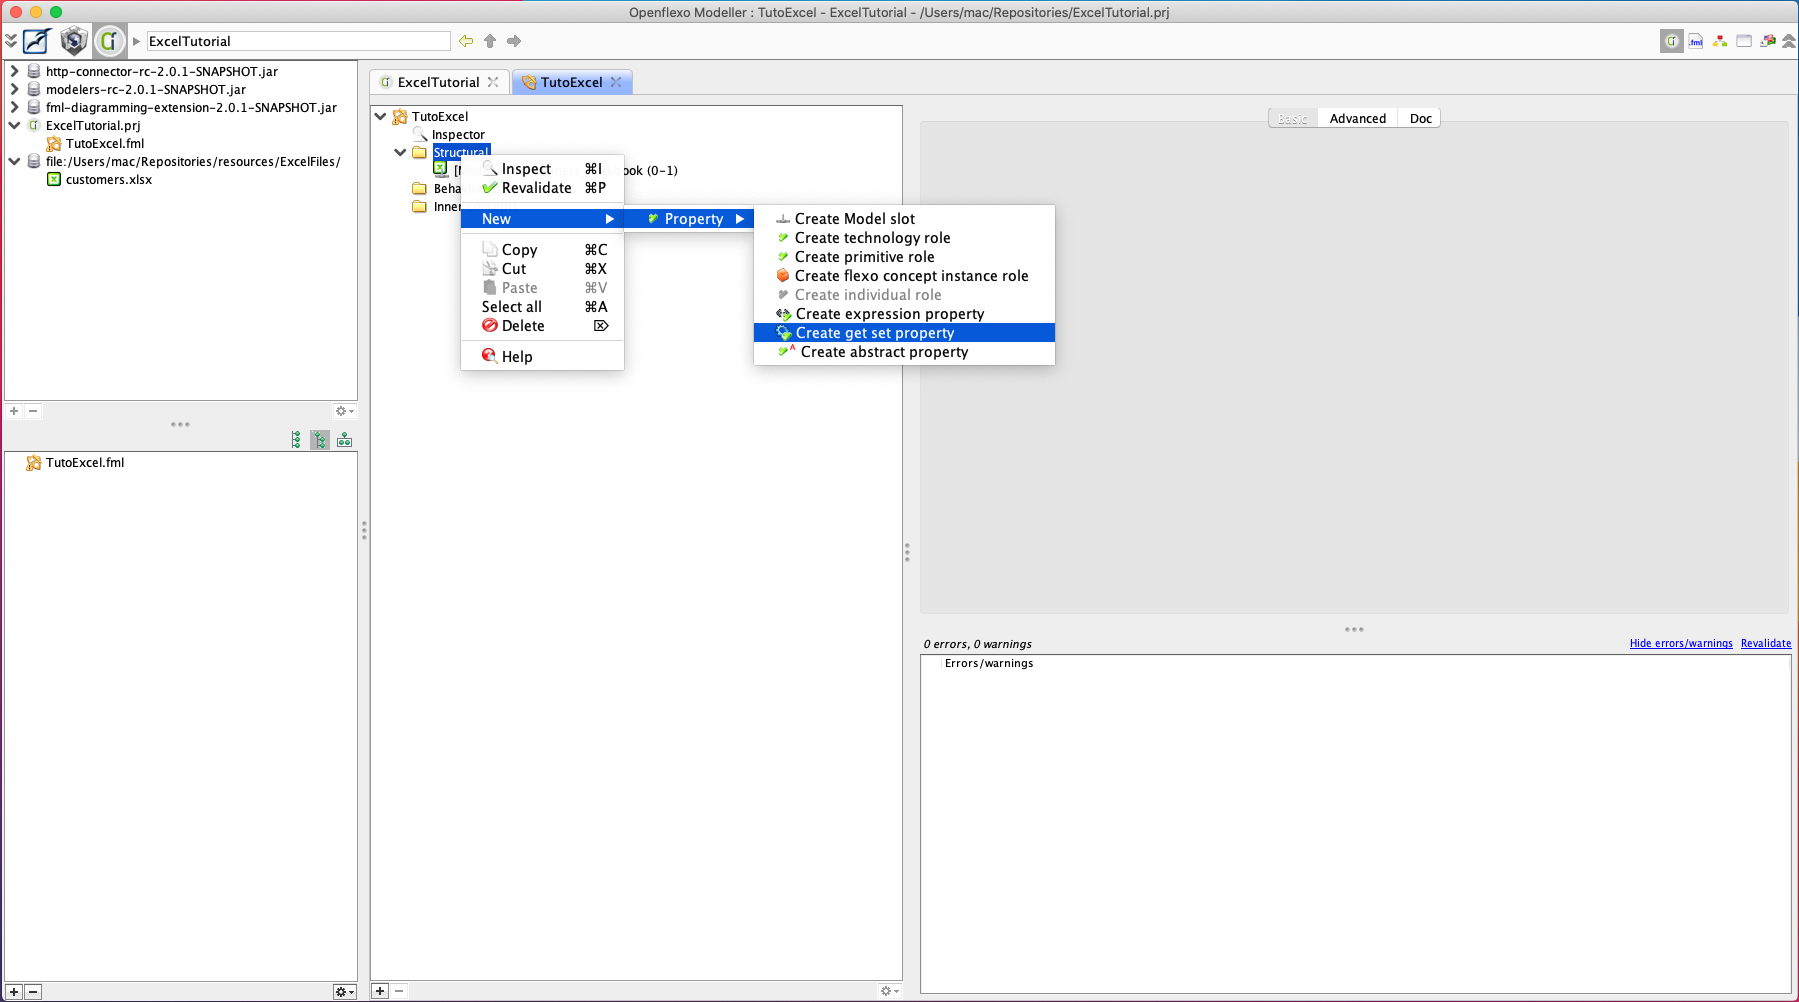
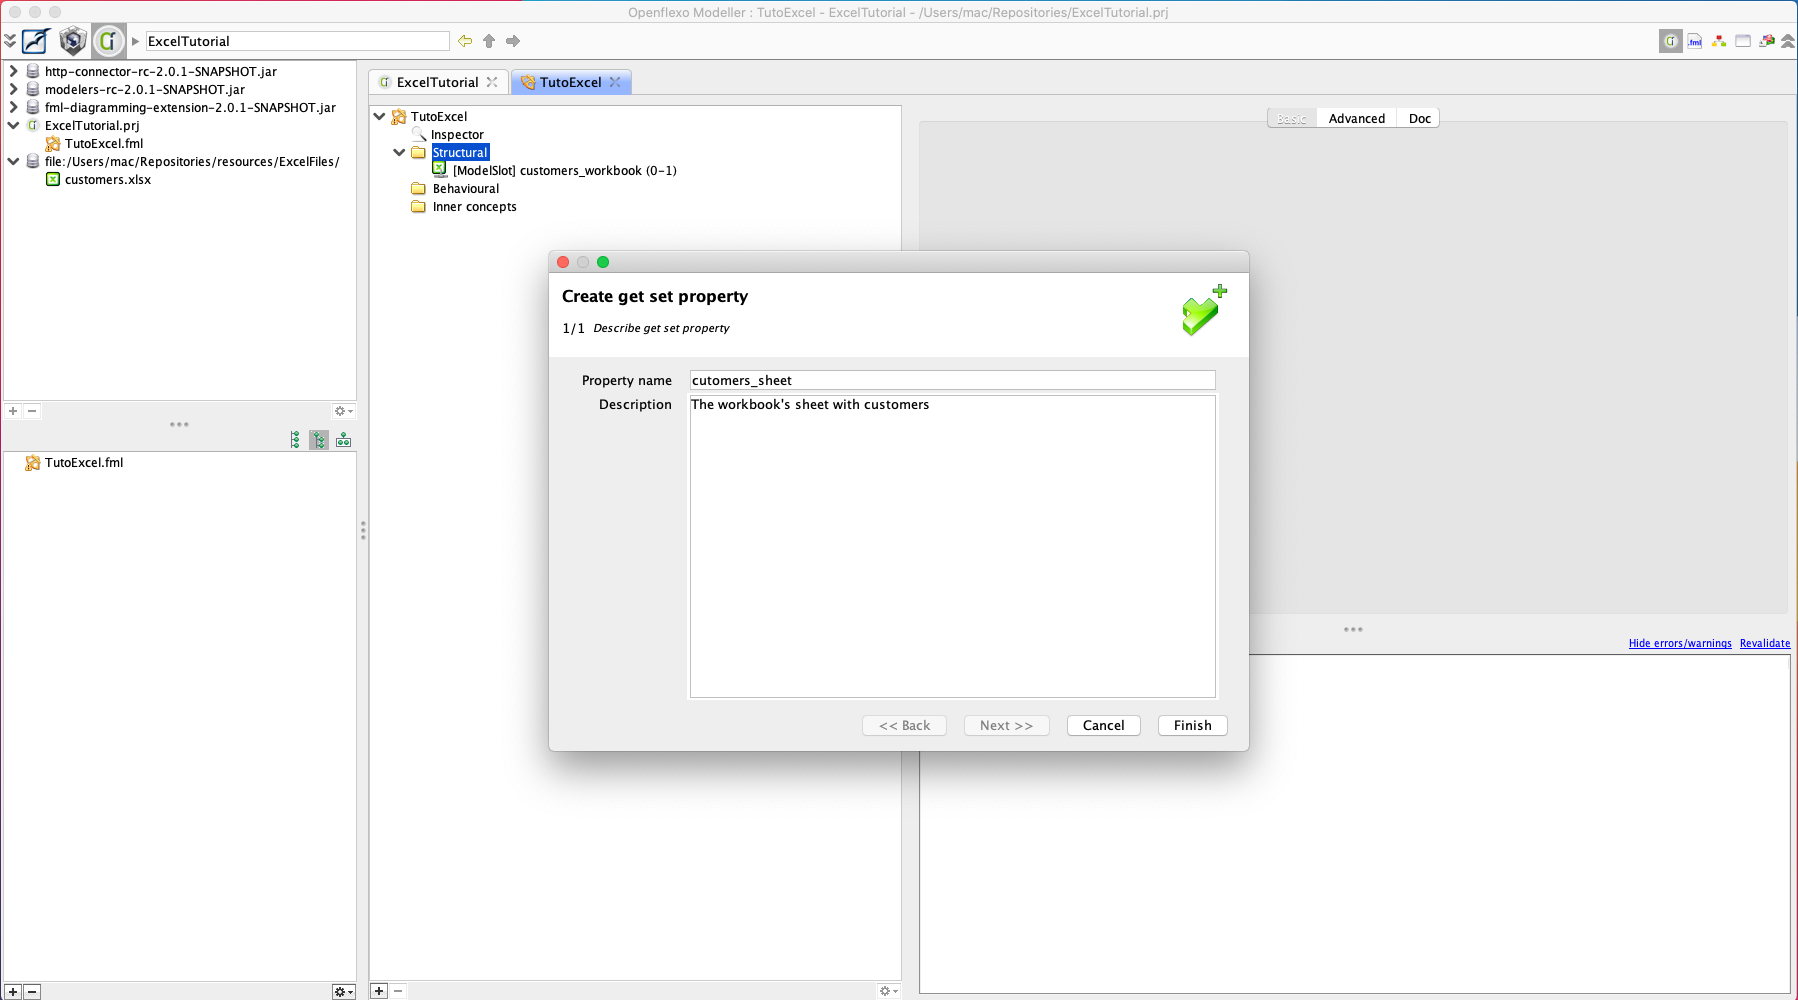
As a workbook is made of several sheets we need to retrieve the customers sheet. Define a property to return this sheet by right clicking on the Structure folder , then new > Property > create get/set property customer. When the Get operation of this property will be invoked, a graph of actions will be executed and a value will be returned(here we expect an excel sheet).
Give a name like customers_sheet, then click Finish.
Program the GET behavior of this property, to do that click on the + and add action in Get control Graph.
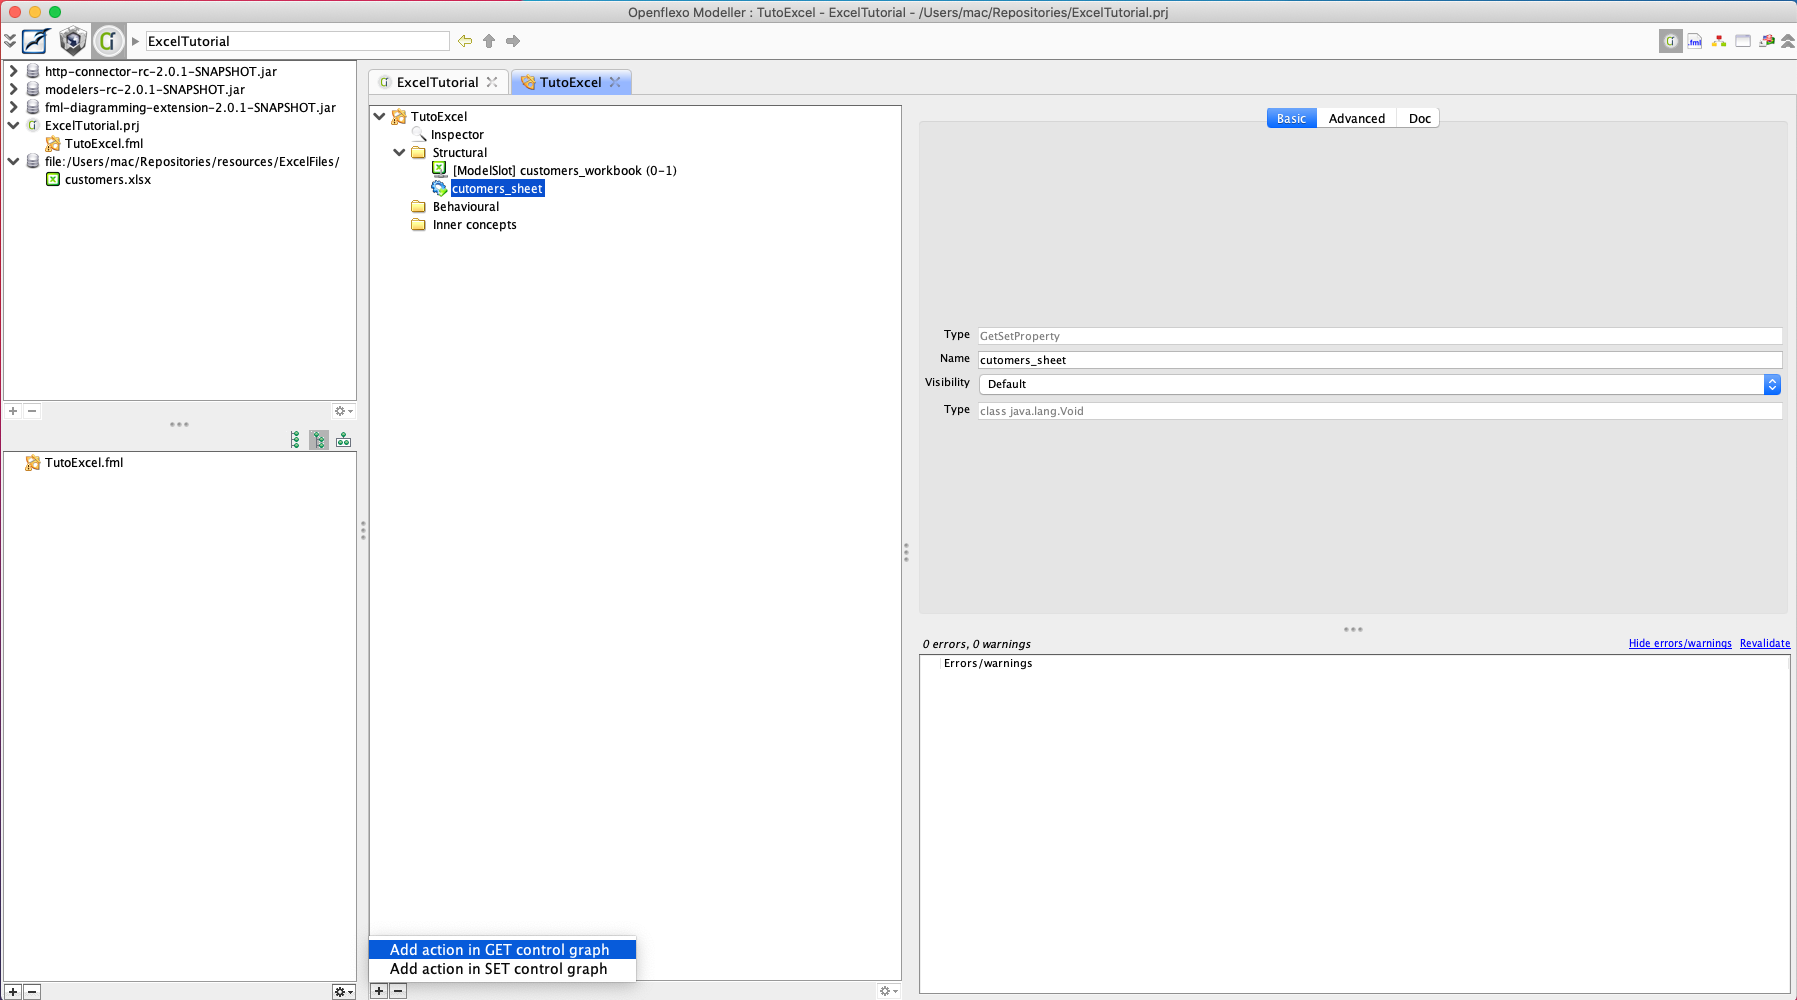
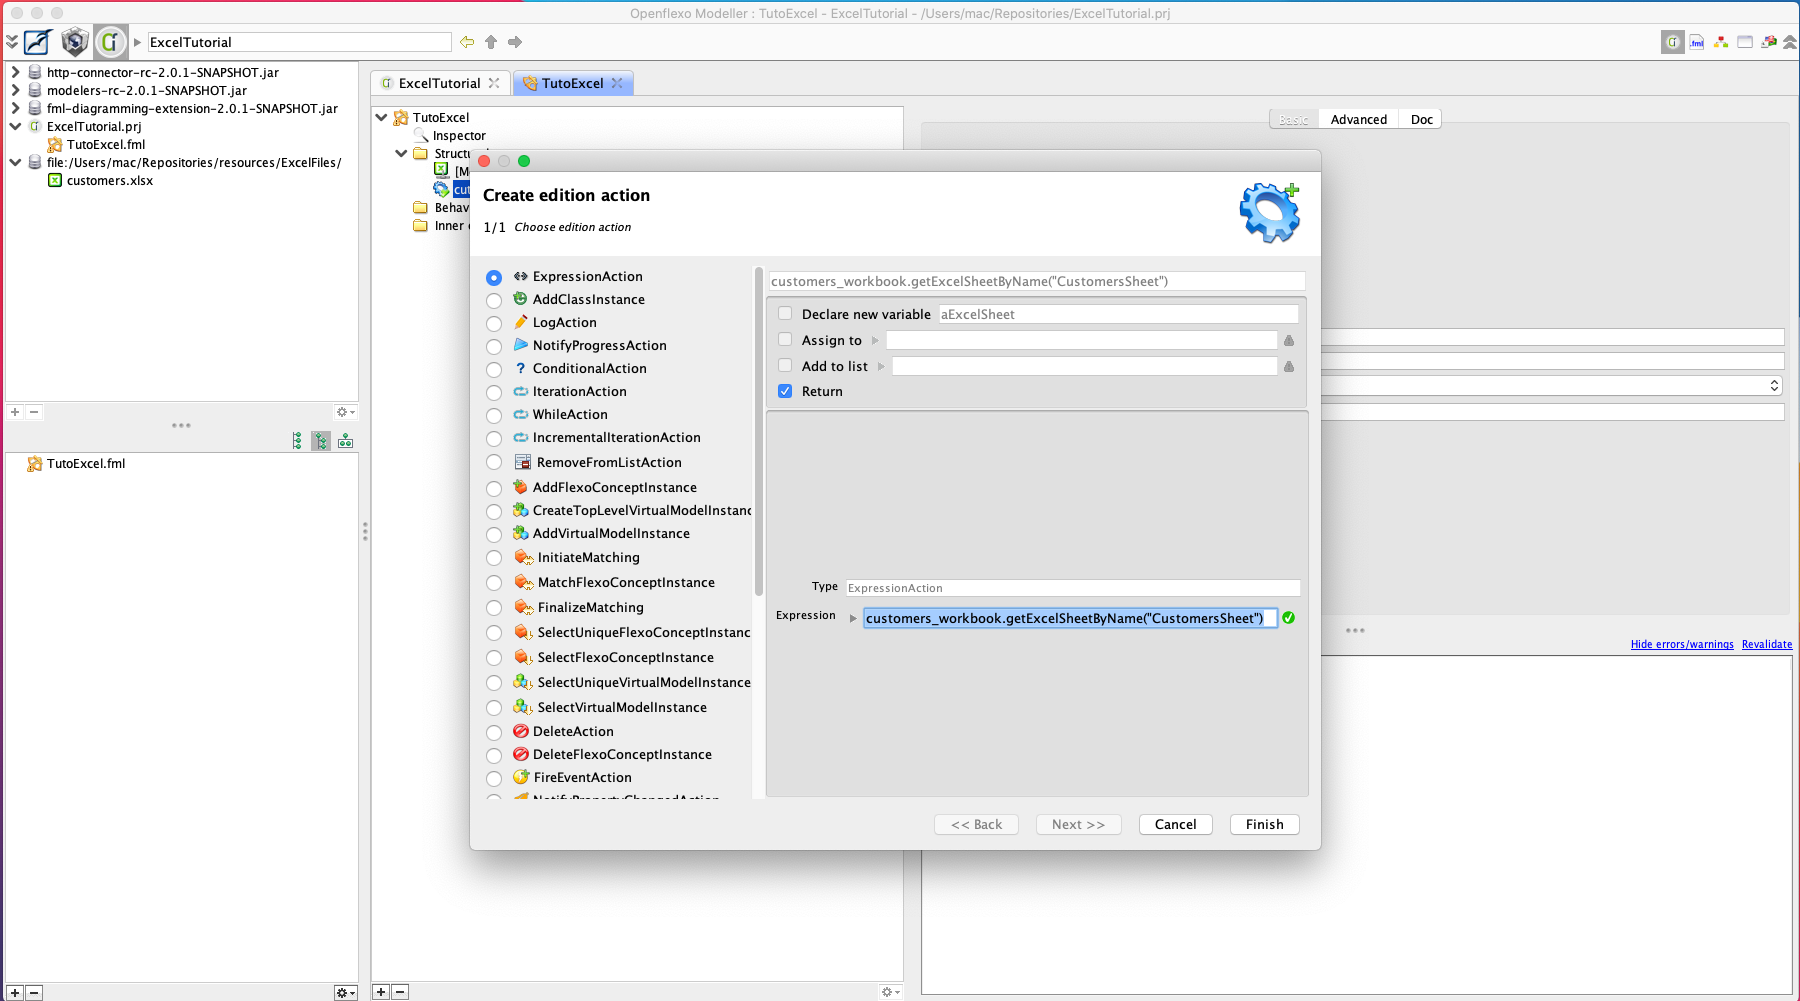
Then select Expression Action , check return (to return the Sheet), set the expression customers_workbook.getExcelSheetByName(“CustomersSheet”) (to see the getExcelSheetByName() expression you have to open the specify complex binding button ), which means you select the first Excel sheet named CustomerSheet in the customers_workbook. An alternative would be to select a sheet using its position(represented as an integer value) in the workbook, for instance using the expression: customers_workbook.getExcelSheetAtPosition(0) , be careful 0 is the index of the first sheet in the list.
Click on Finish.
Now whenever you need to access to the Excel sheet related to customers use this property.
4 Part II: Working with Excel
In this part we will learn how to create a new Flexo concept that relies on an Excel row. Then we will see how to create some behaviors.
4.1 Working with Excel concepts
4.1.2 New Customer Concept
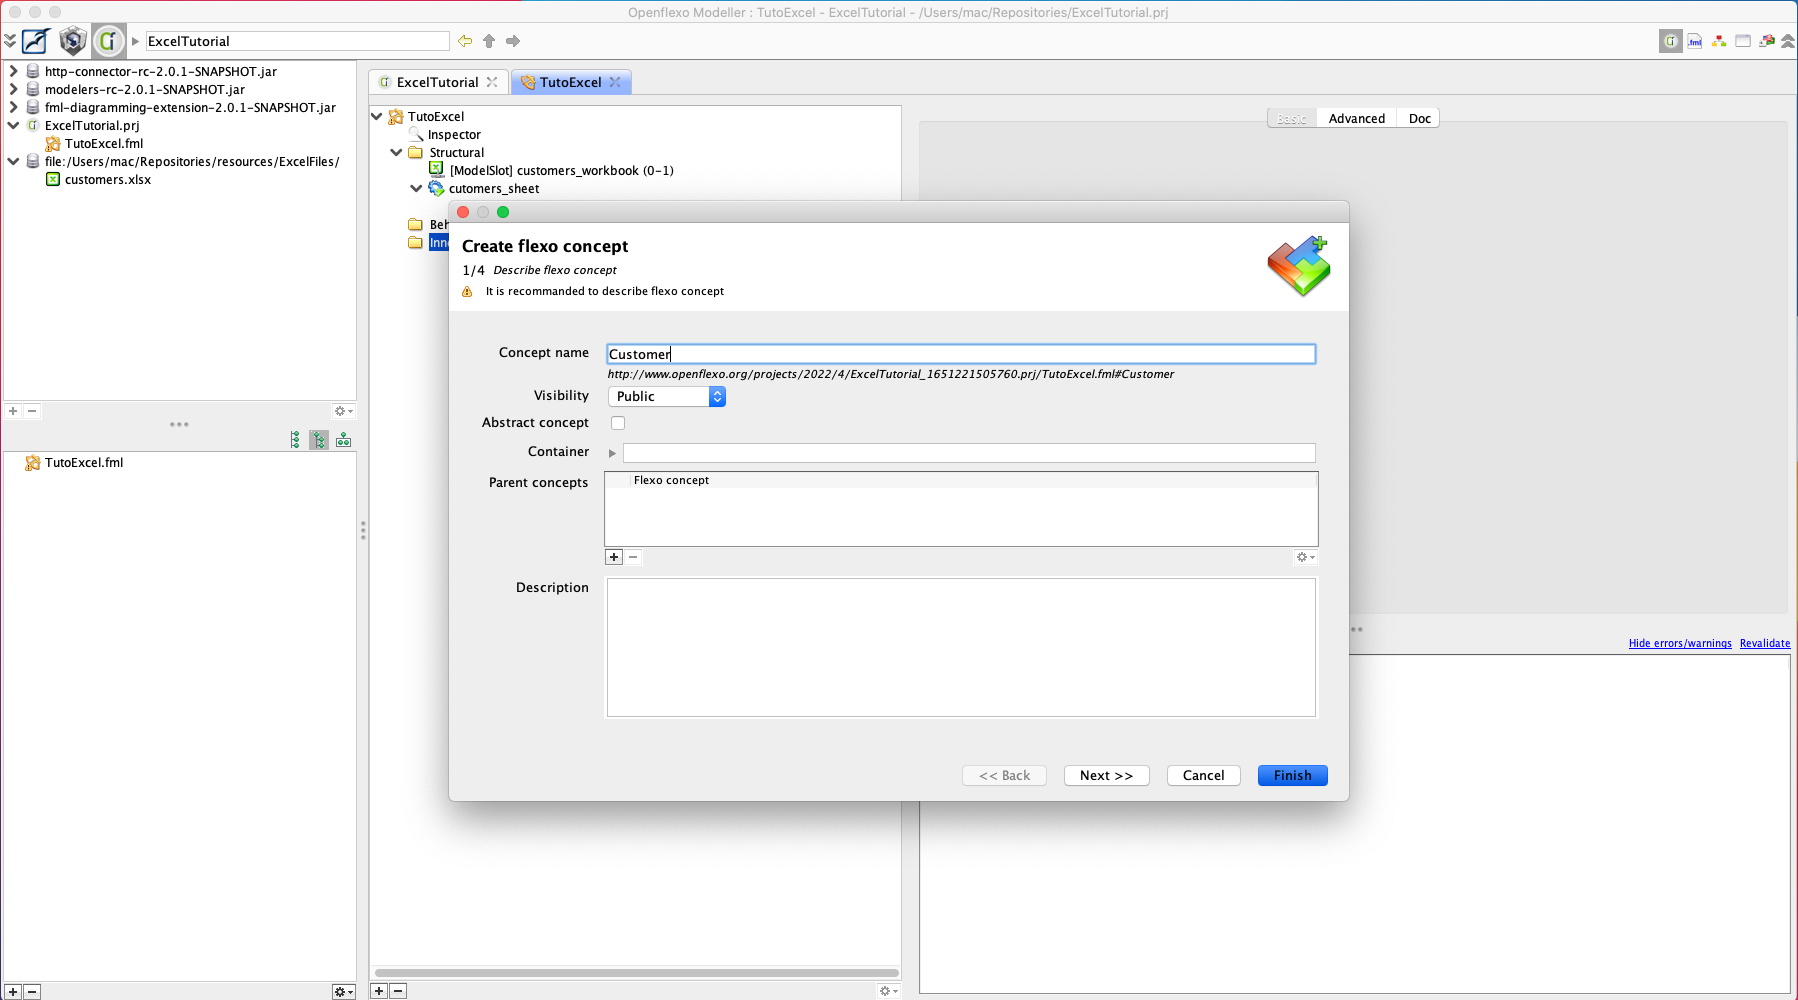
Create a new Flexo Concept. Right click on the virtual model Inner concepts > new > flexo concept.
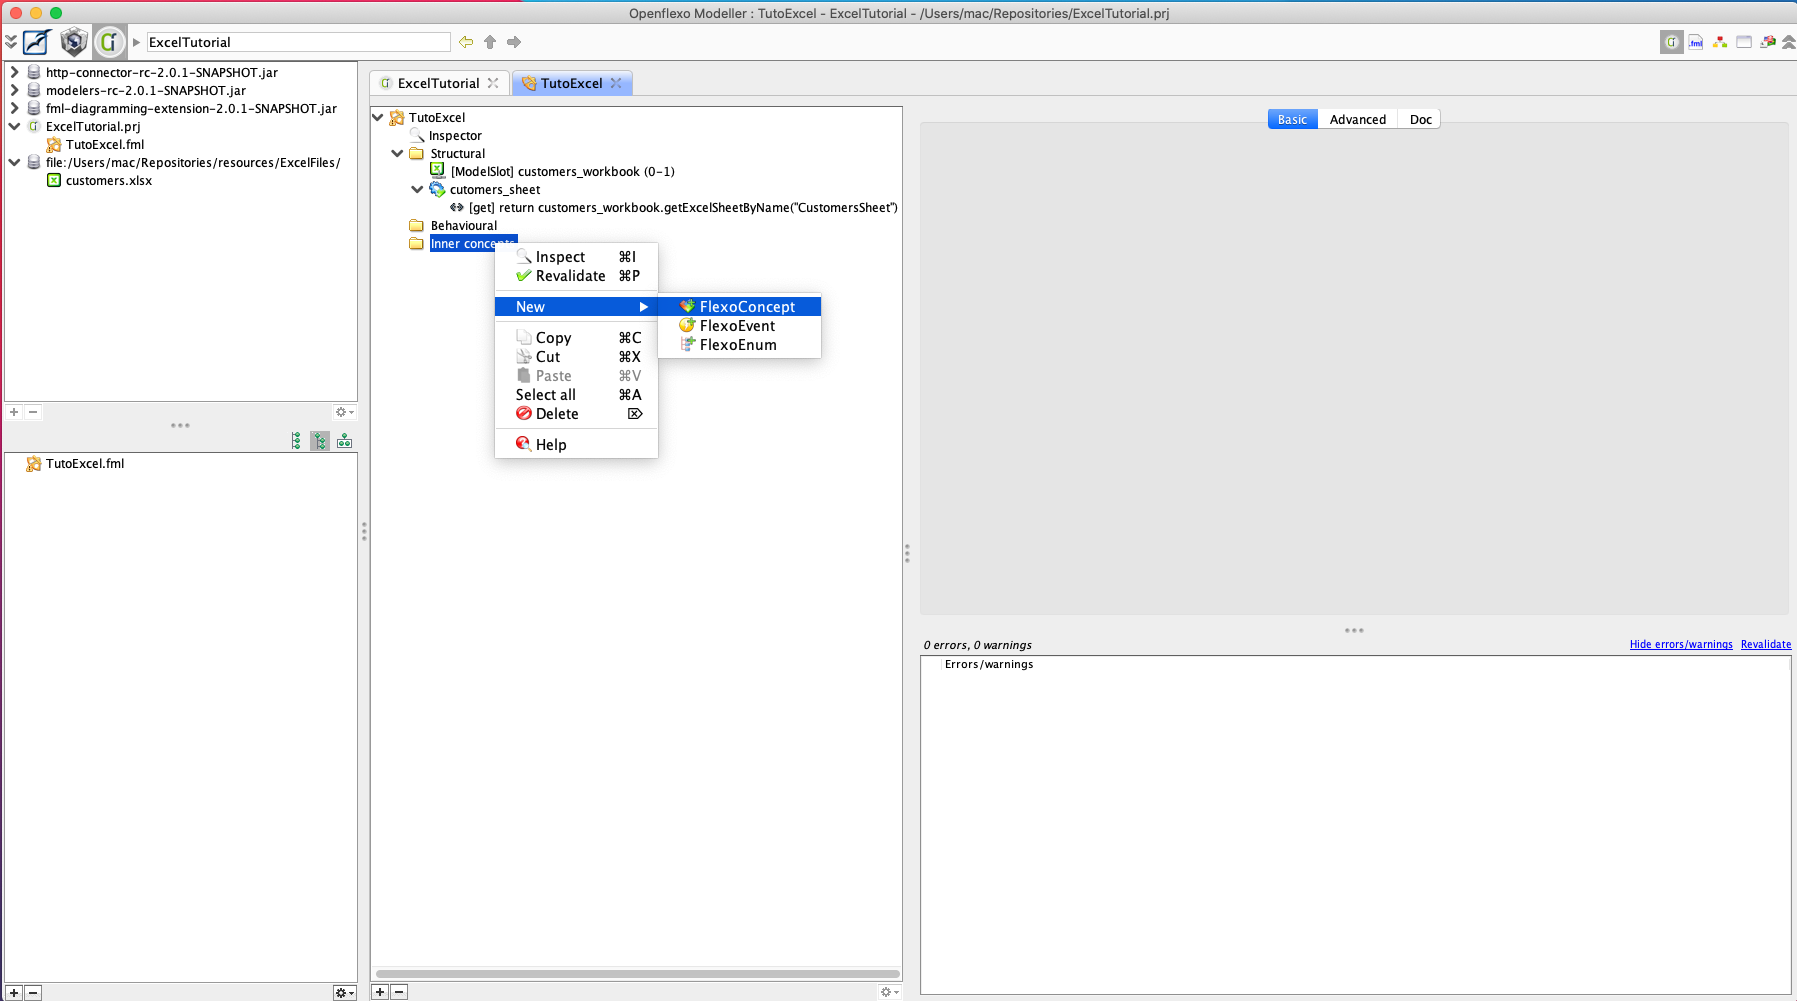
Give a name Customer , and a description.
4.1.2 New Customer Roles
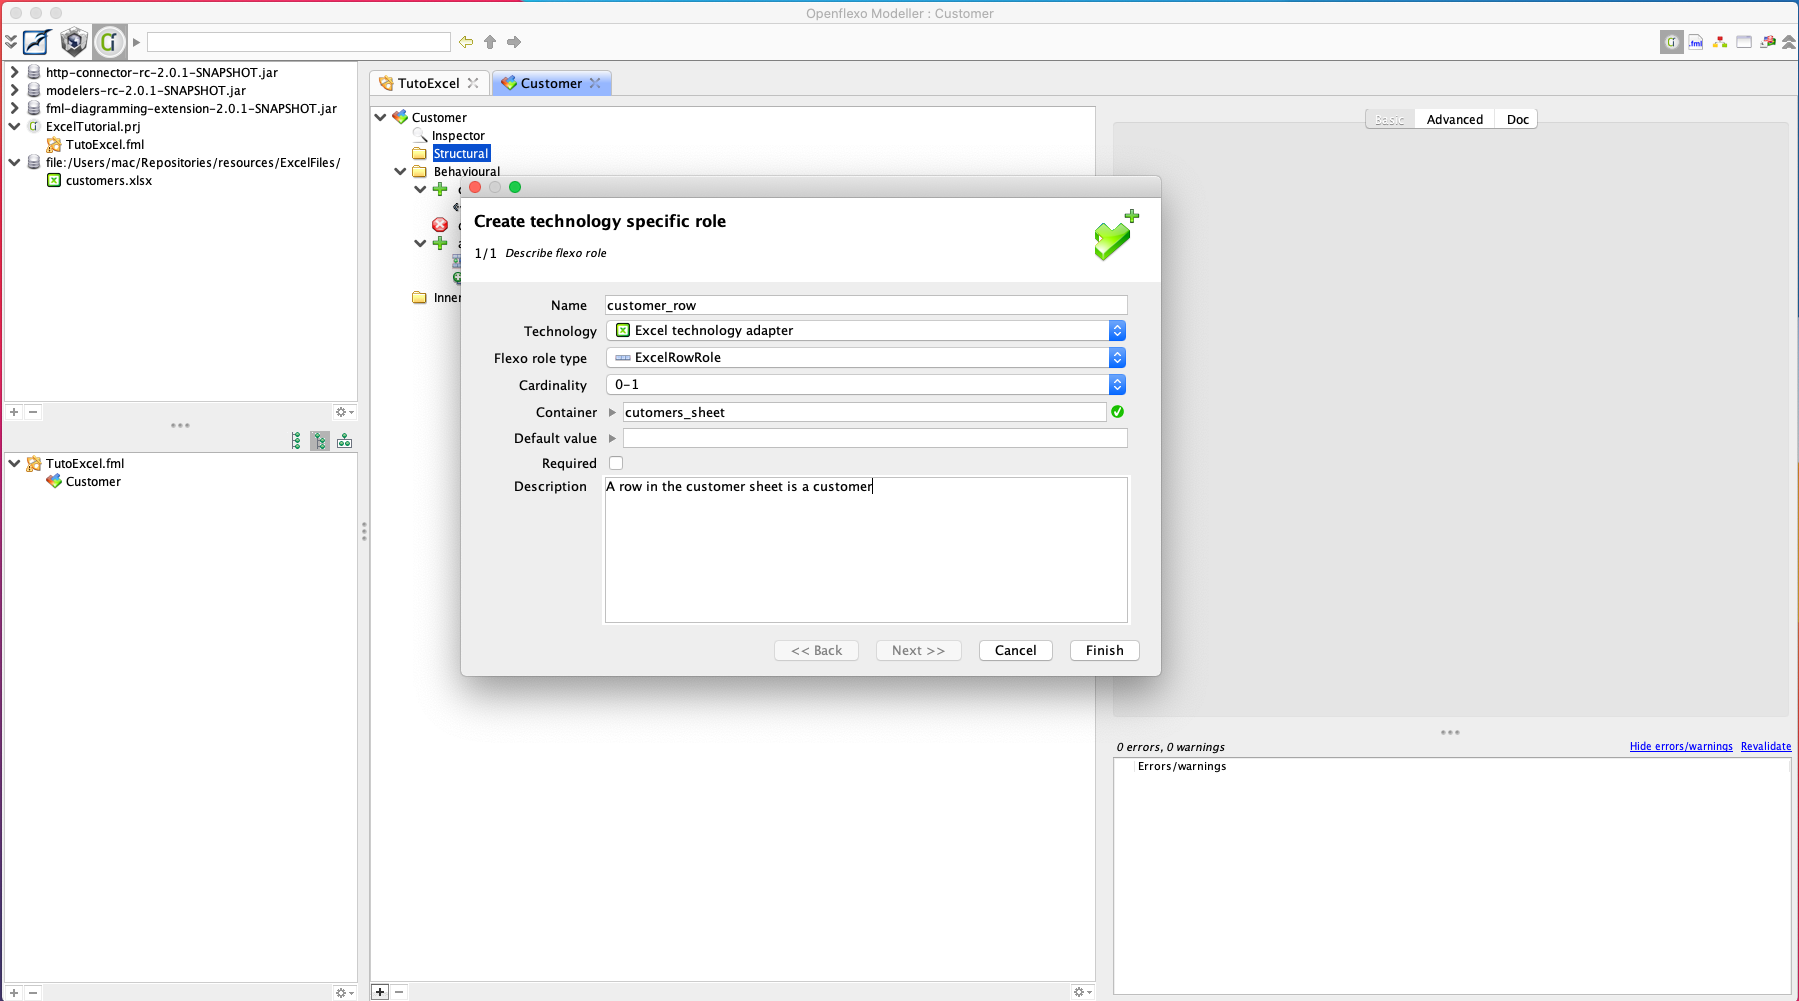
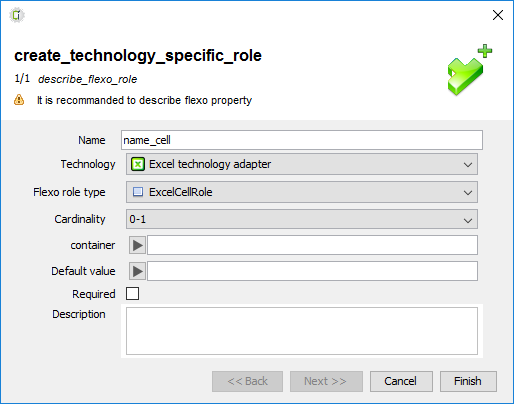
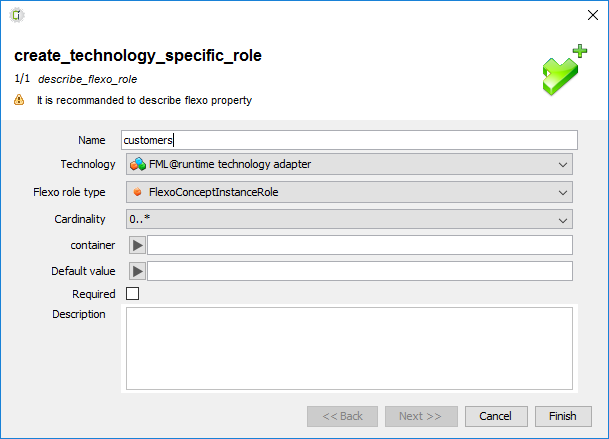
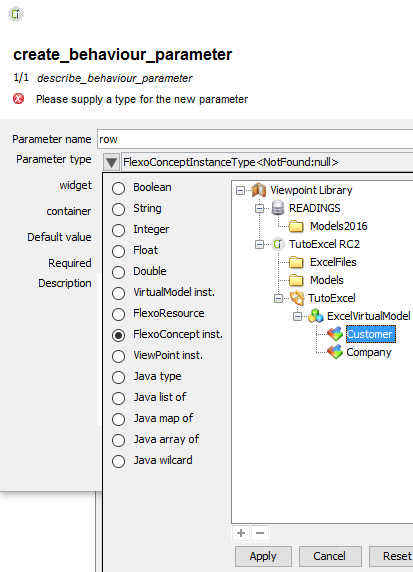
Once it is created and opened, associate this concept to a row within the Excel customers sheet. To do that right click on the structural folder , new >property >create_technology_role.
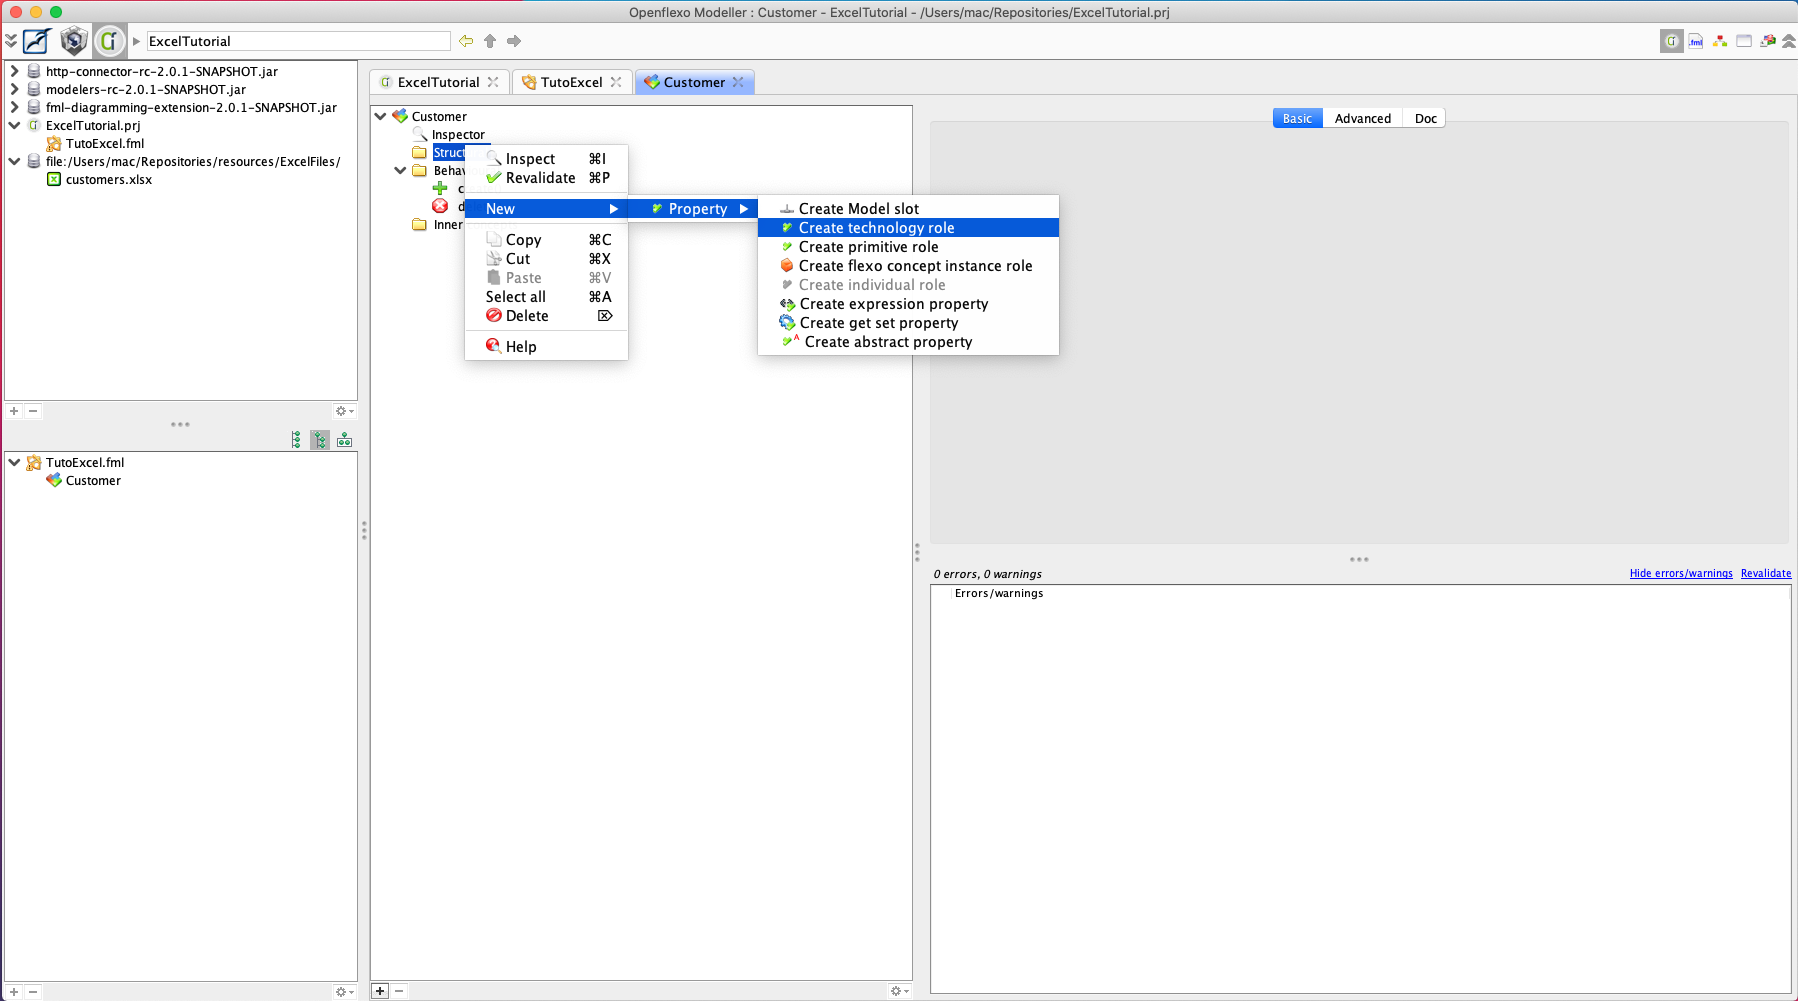
In the wizard panel set the name of the role customer_row , set the technology adapter Excel , the type row and a description.
4.2 Working with Excel behaviors
A Customer is represented as a row in the Excel sheet. Now let’s see how to create a new instance of Customer Flexo Concept. There may be different scenarios, instantiate a new Customer from an existing row and therefore link the Customer to the existing row, or instantiate a new Customer and add a new row.
4.2.1 New concept instance from a row
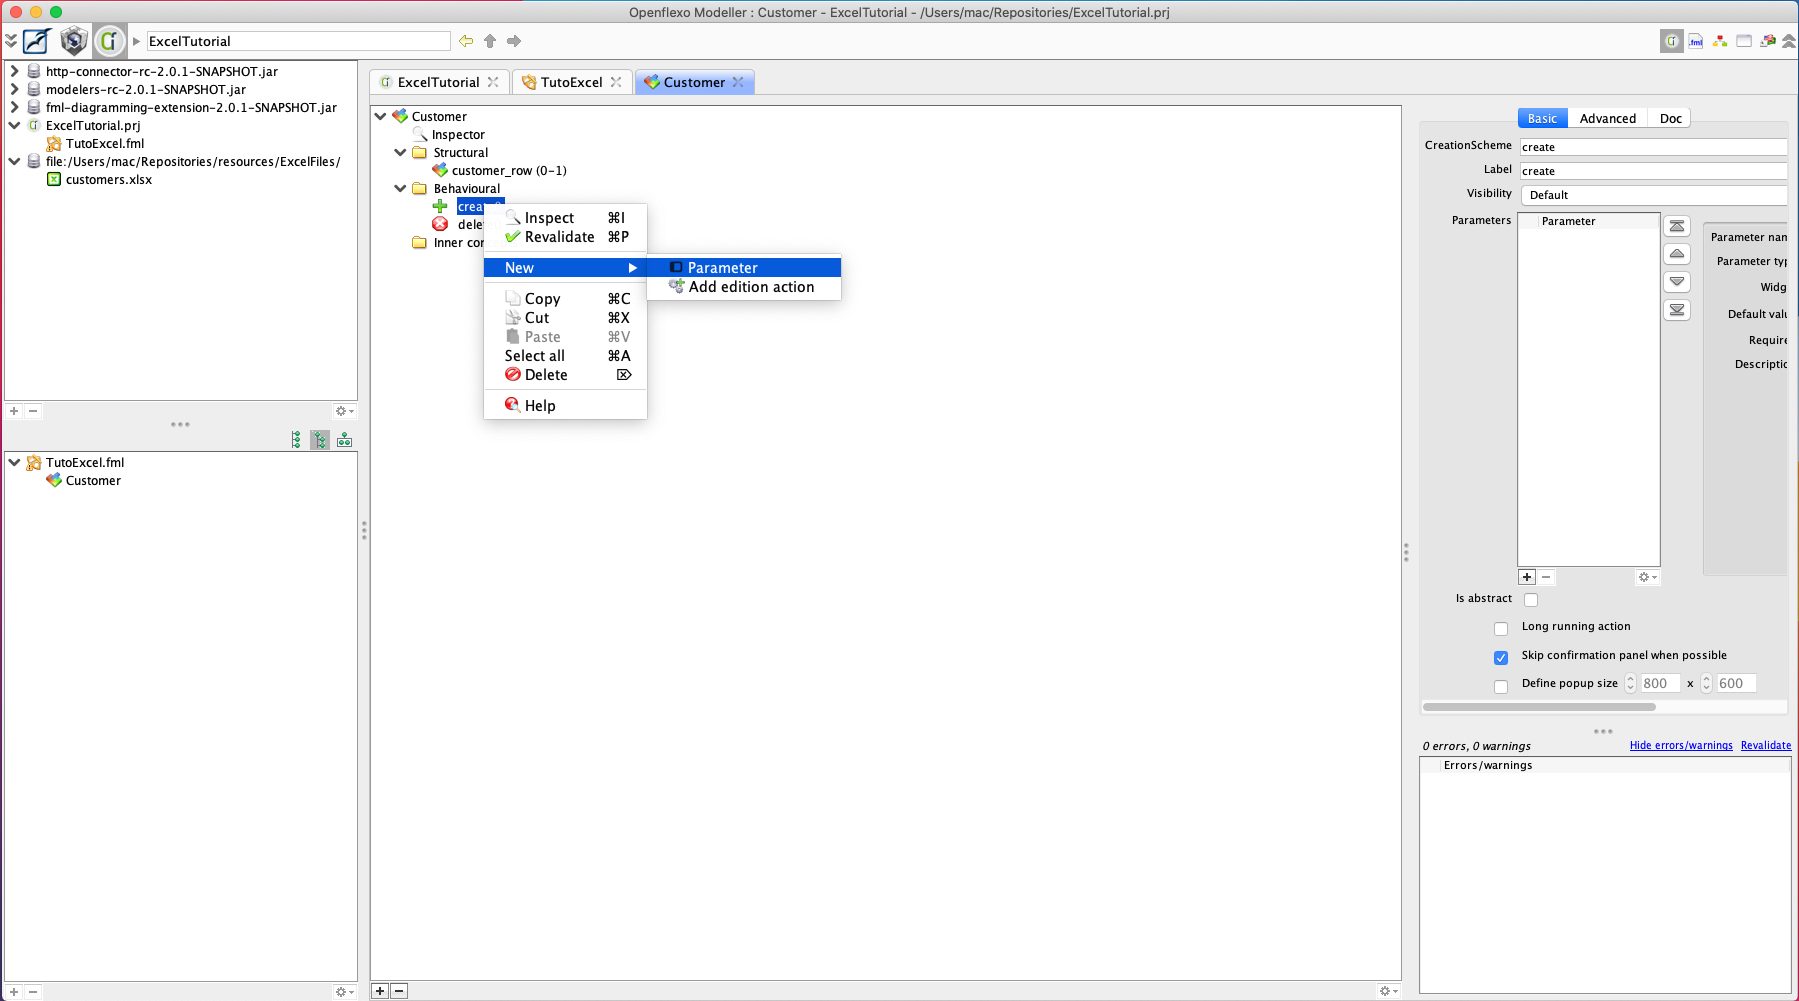
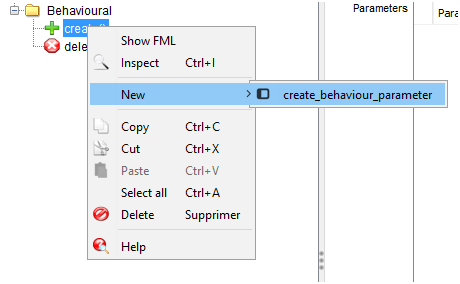
Let’s create an action to instantiate a new Customer from an existing row. For that we must use a Creation Scheme that aims is to instantiate a Flexo concept. Normally a default Creation Scheme is created when you declare the Customer Flexo concept, so we can reuse it, select it. According some parameters, a scheme executes sequential actions. Create the parameter by right clicking on the create action then choose new > Parameter .
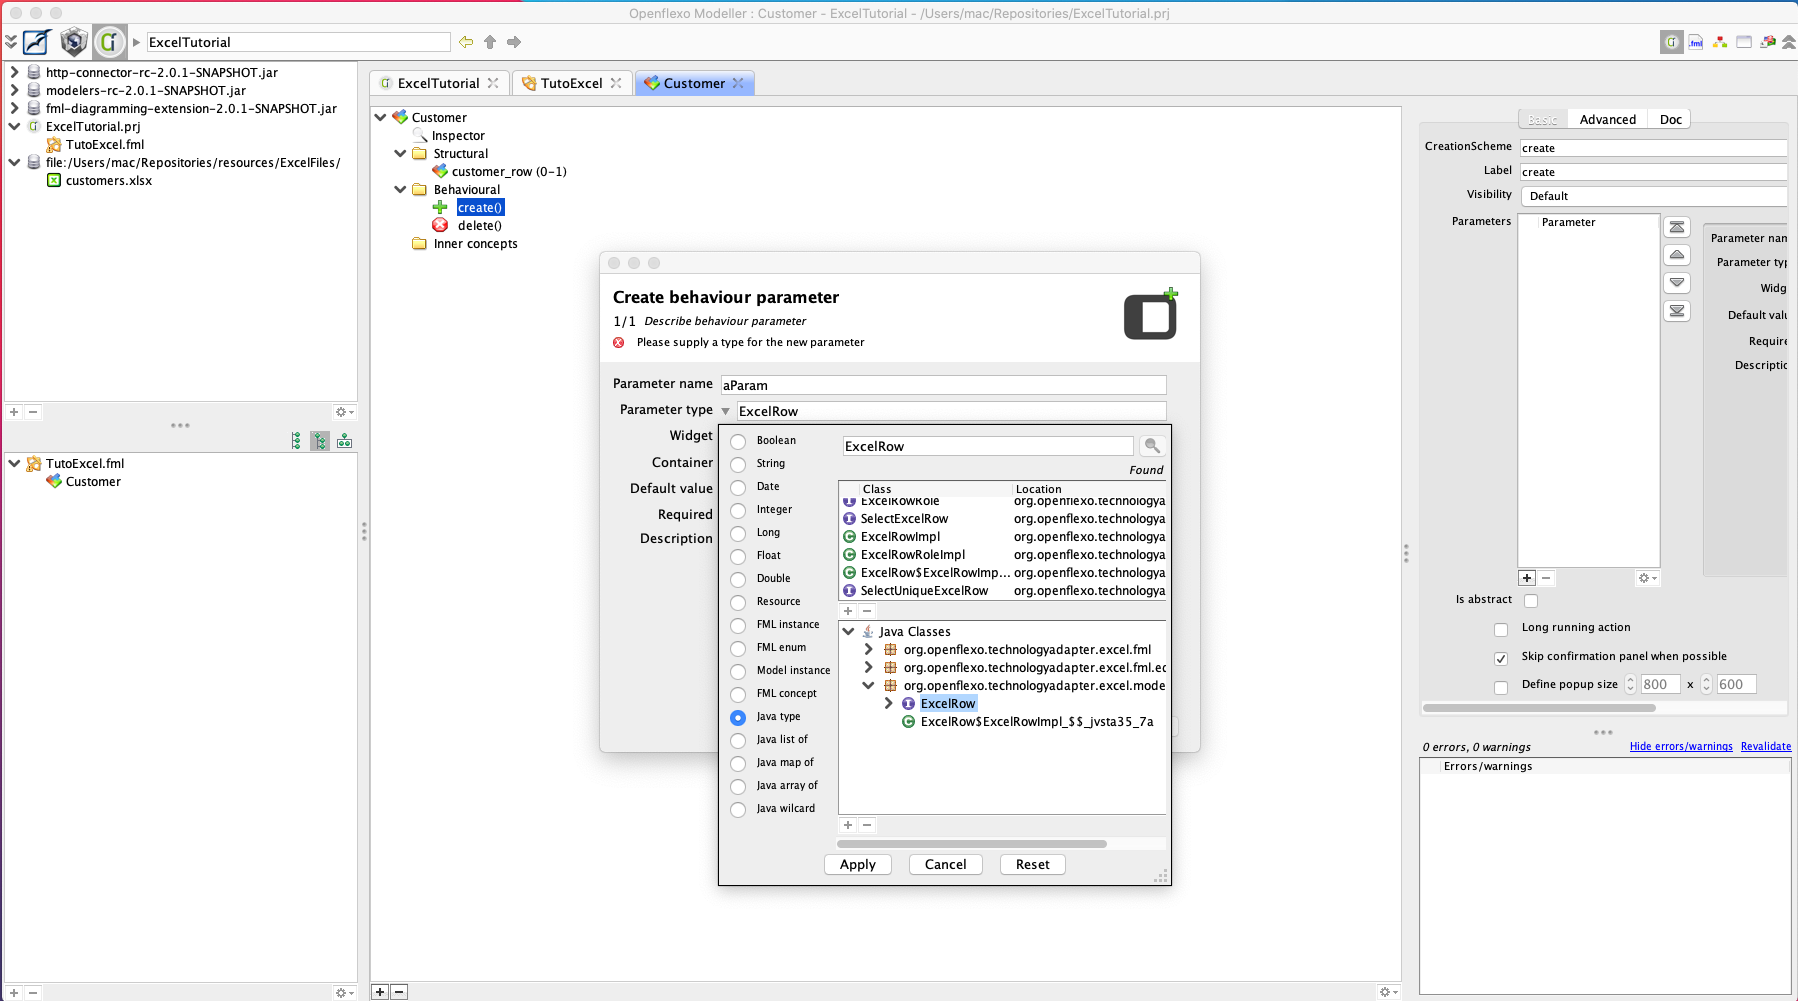
Select the type of parameter, in our case this is an Excel row , and set its name for instance row_parameter and then Finish.
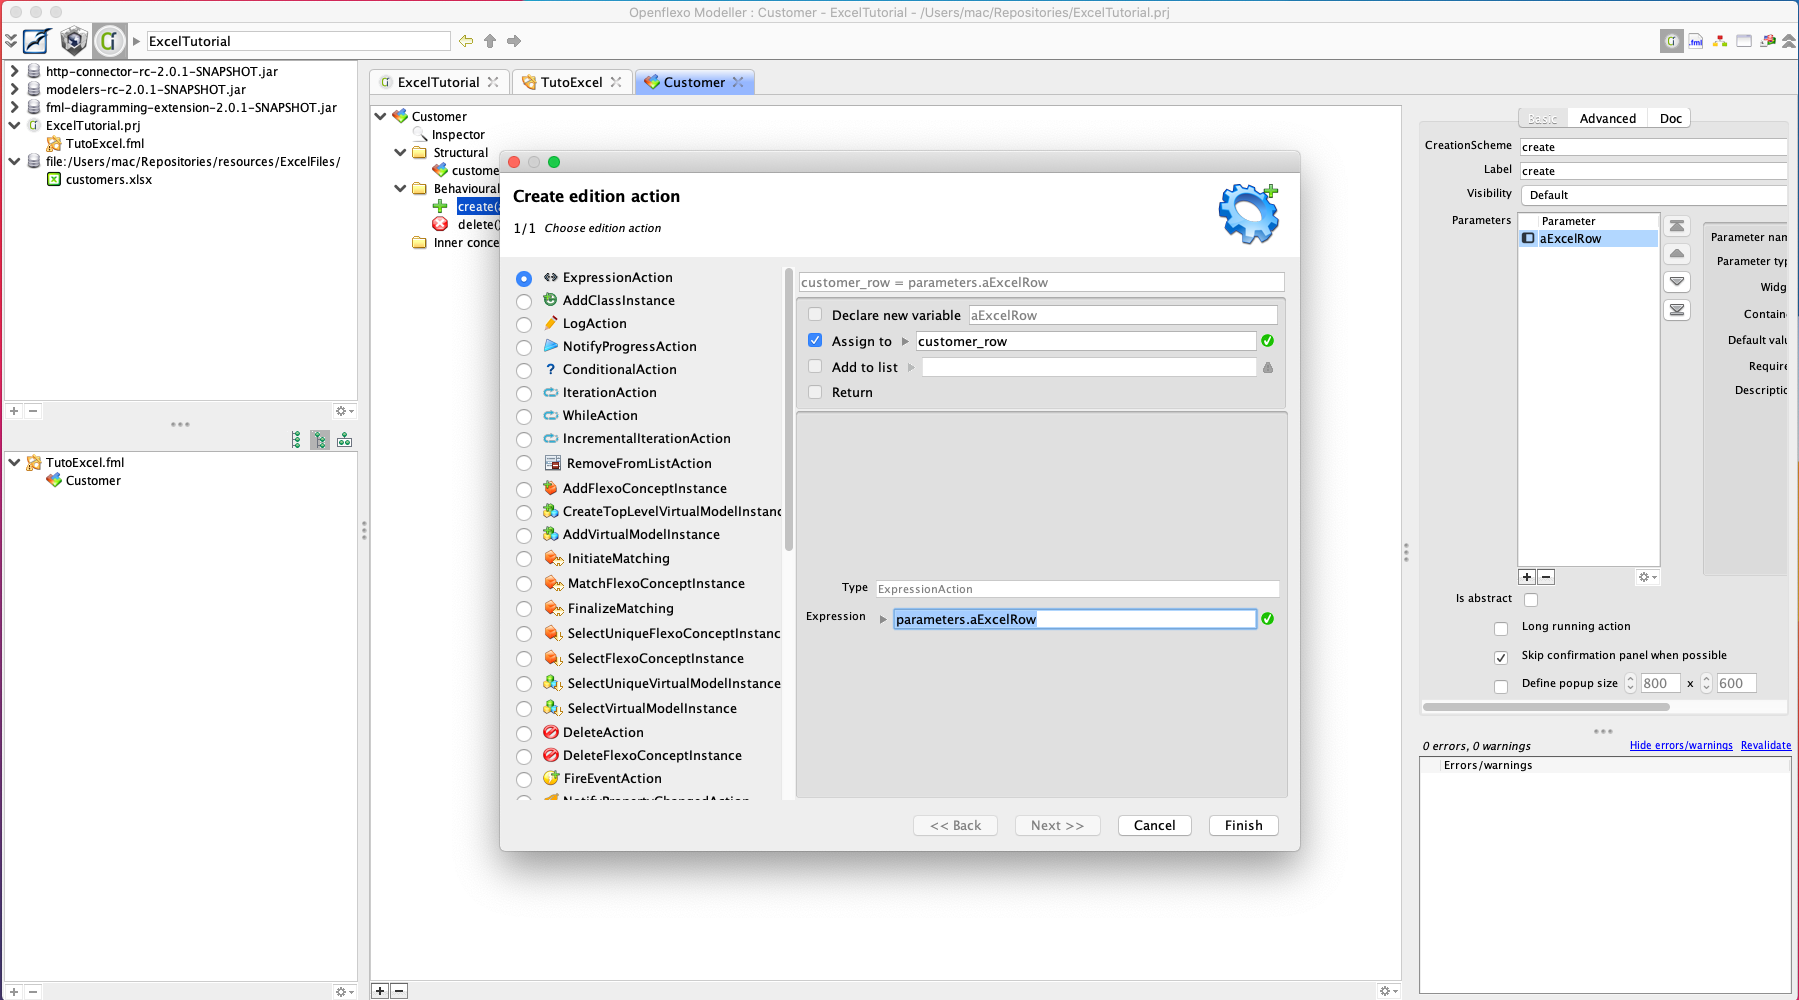
Now assign the parameter value to the row role, to do that right click agon on the create action and choose Add edition action.
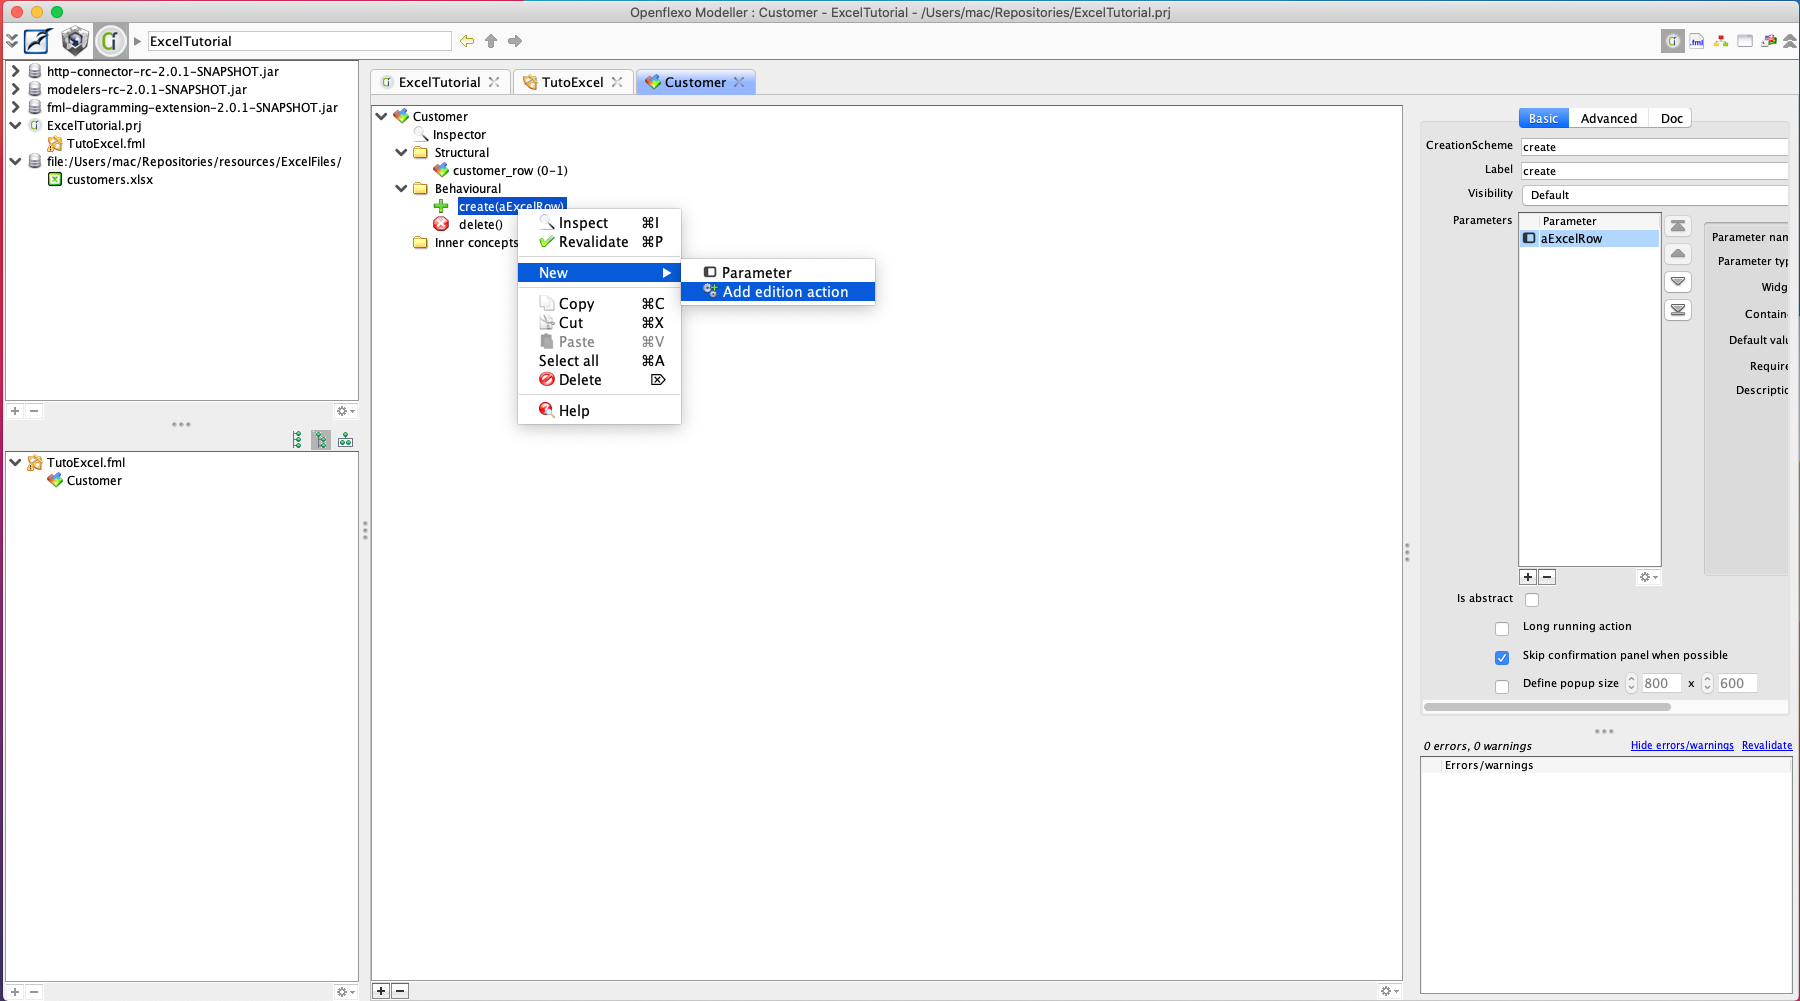
From the popup choose Expression action. Fill the expression parameters.row_parameter (the value to be assigned), and assign it to the customer_row role the Finish . The scheme design is done.
4.2.2 Add new customers
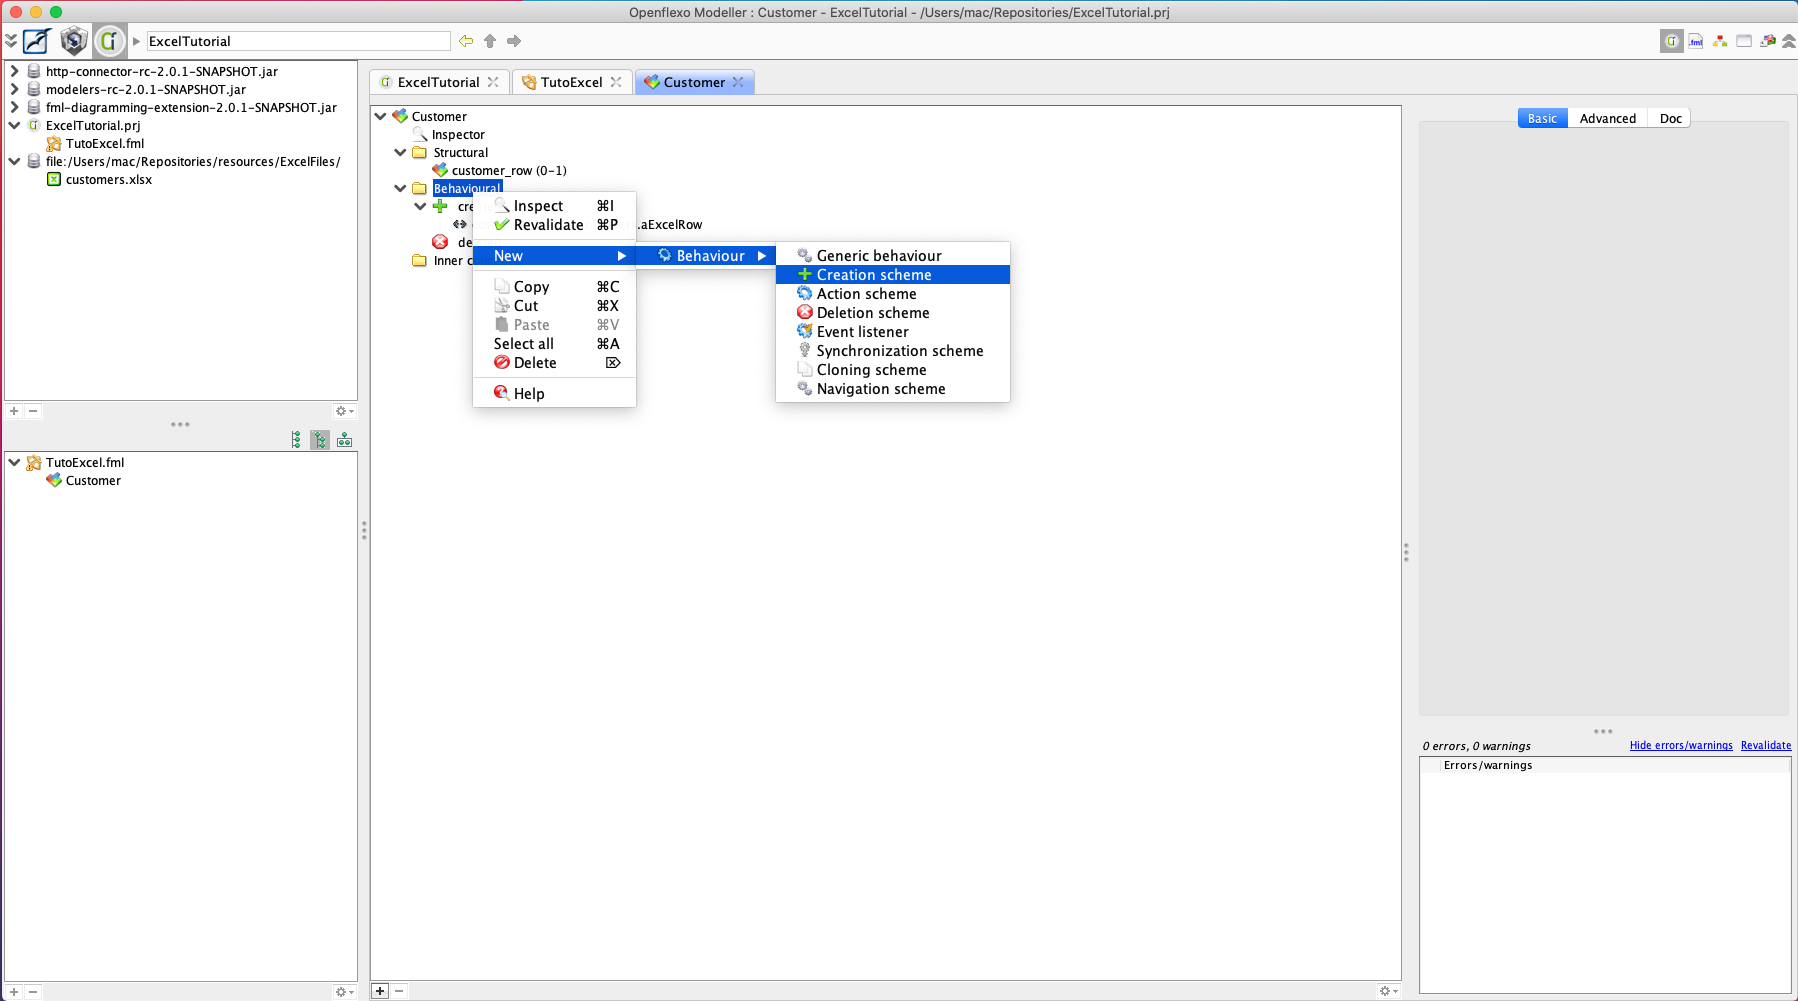
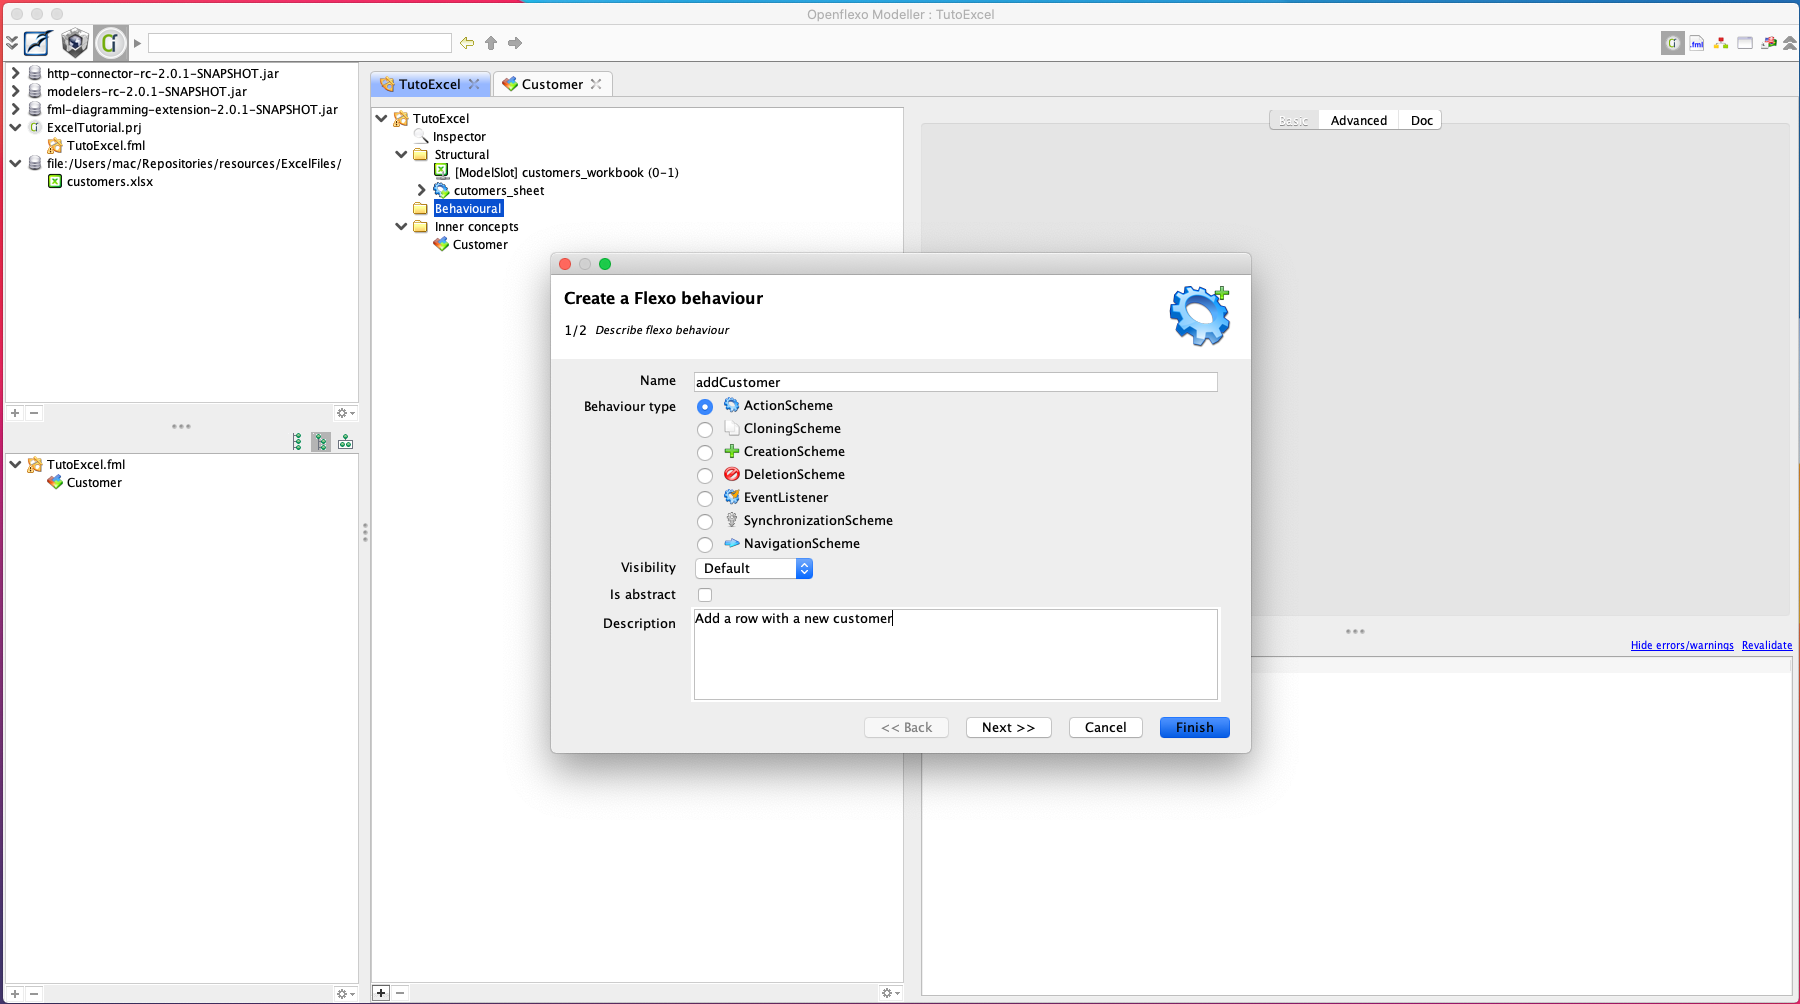
The second action instantiates a new Customer and creates a new row in the sheet. Compared to the last Creation Scheme, there is one main difference, the row doesn’t exist yet. Therefore the user have to provide some information ie. the name, the occupation, the company, the address and the salary. Create a new Creation Scheme , right click on Behavioral folder > New > flexo_behavior . Then select Creation scheme.
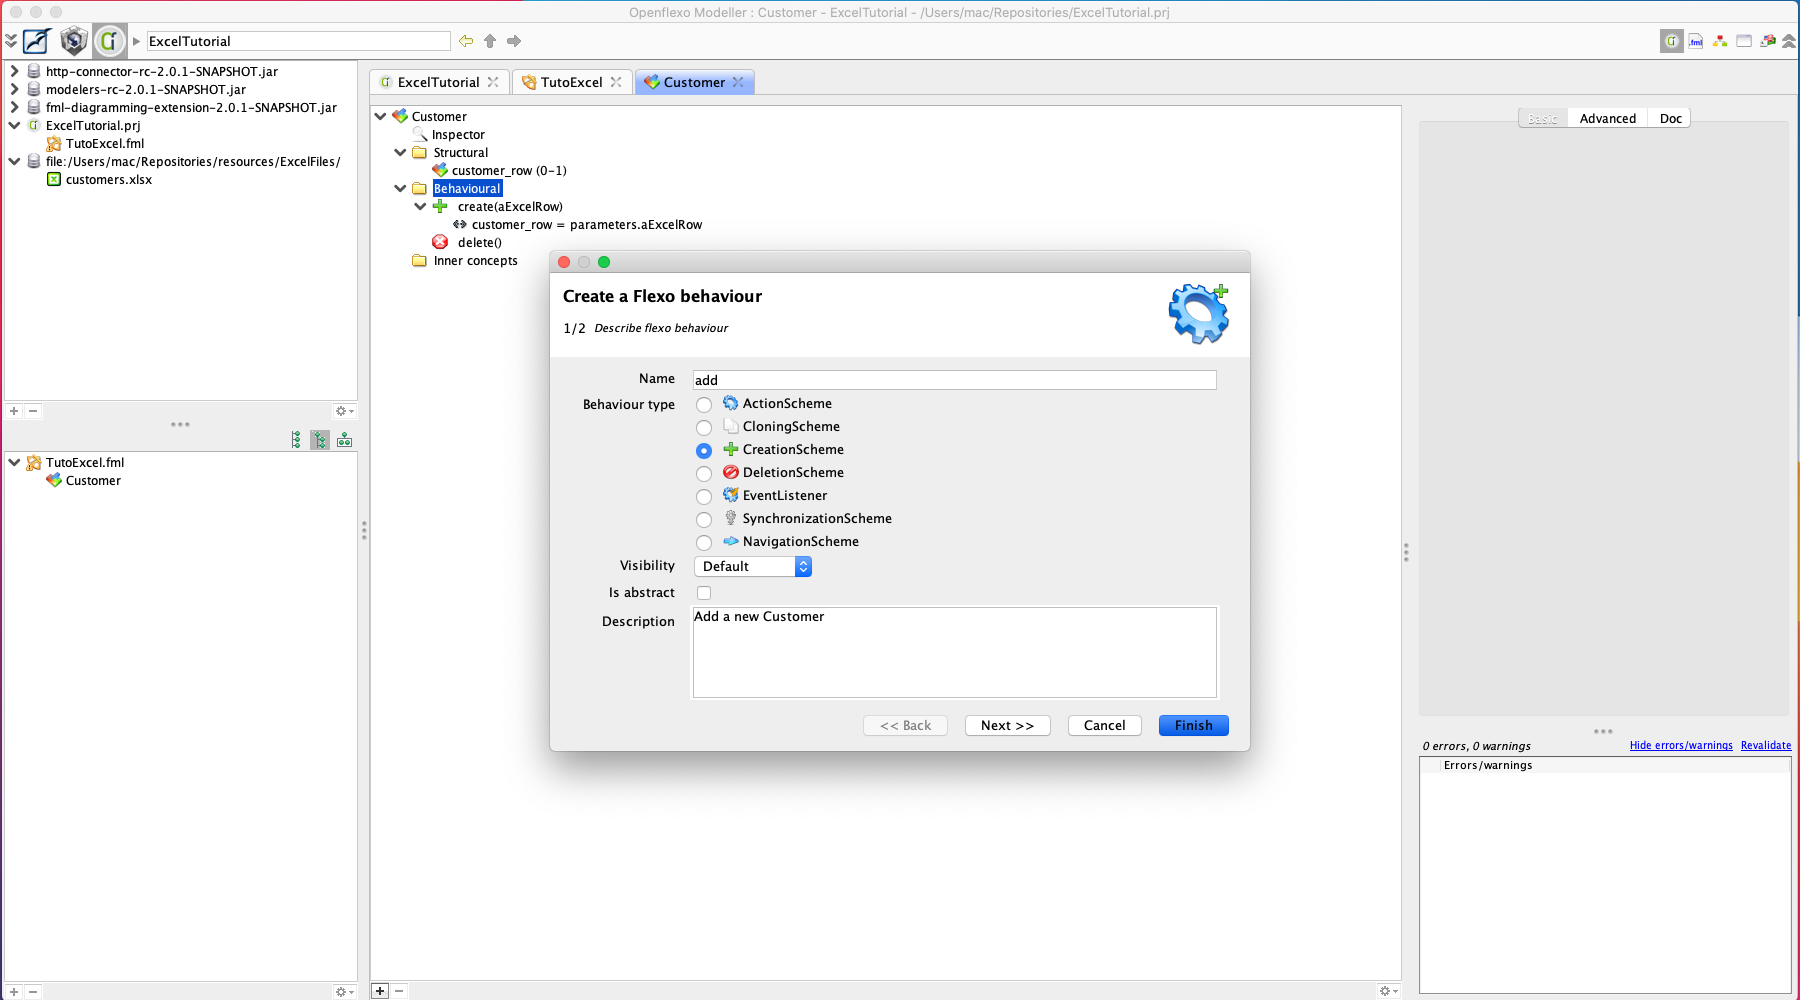
Give a name and a description for the instance and click Finish.
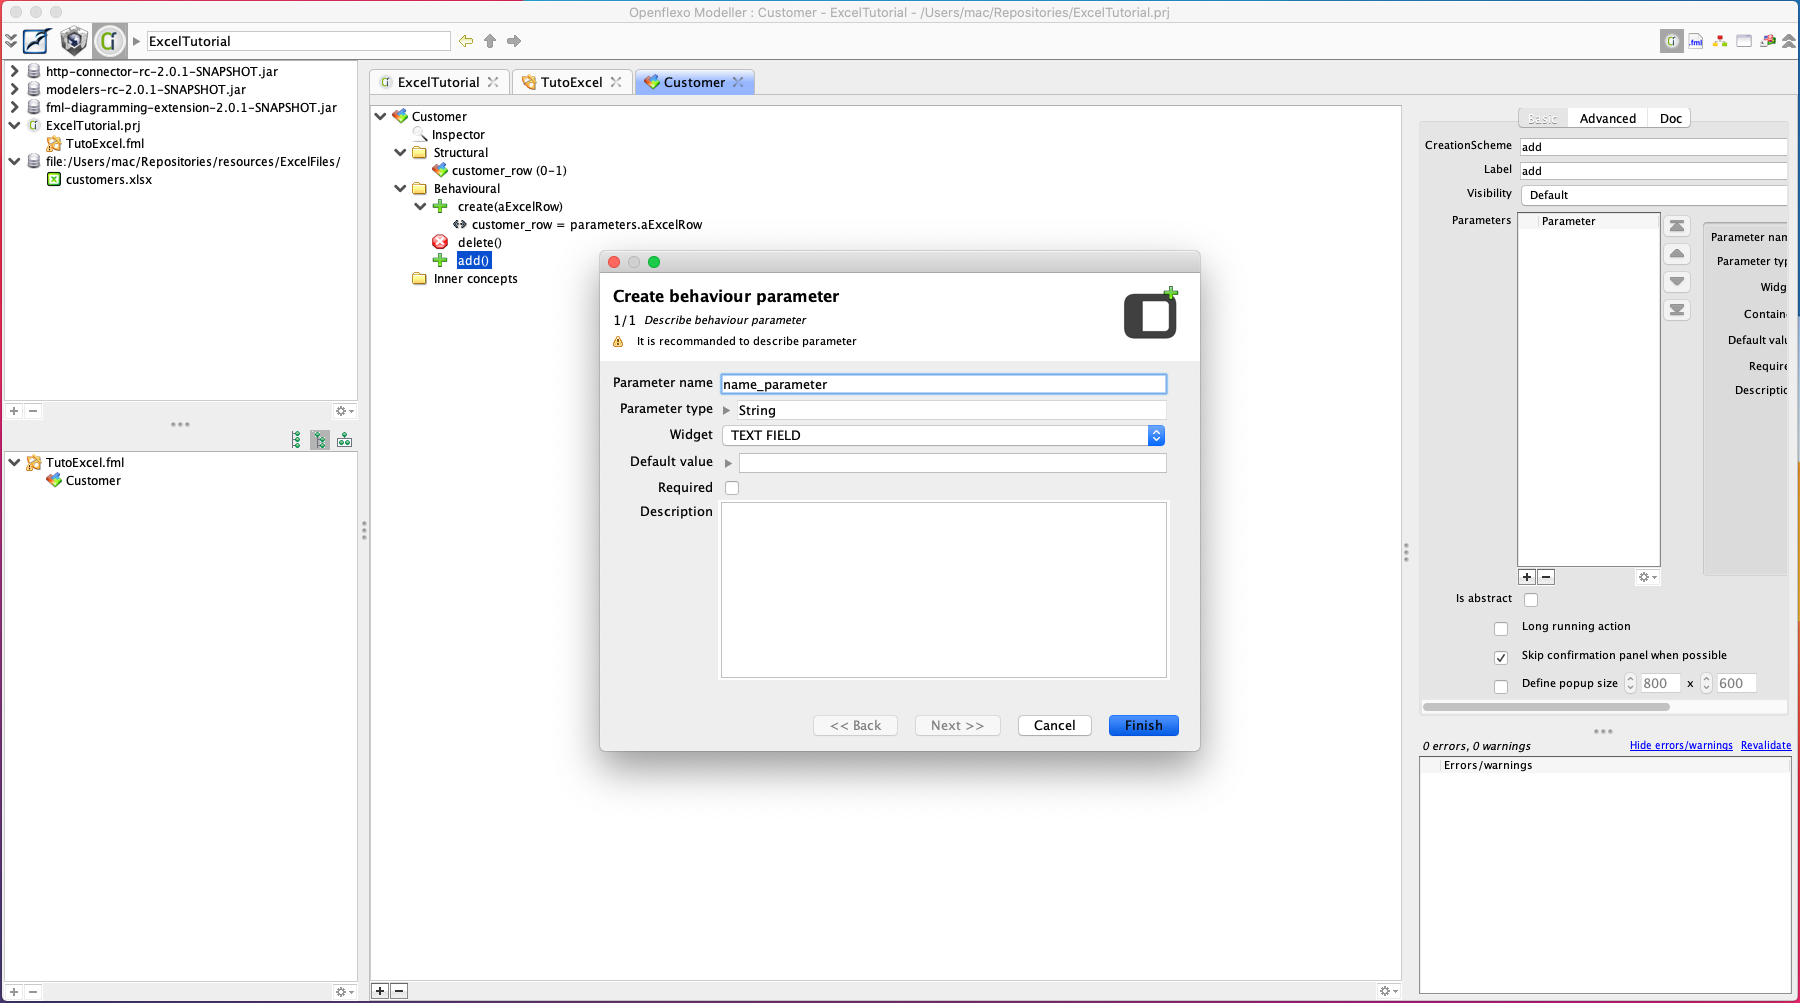
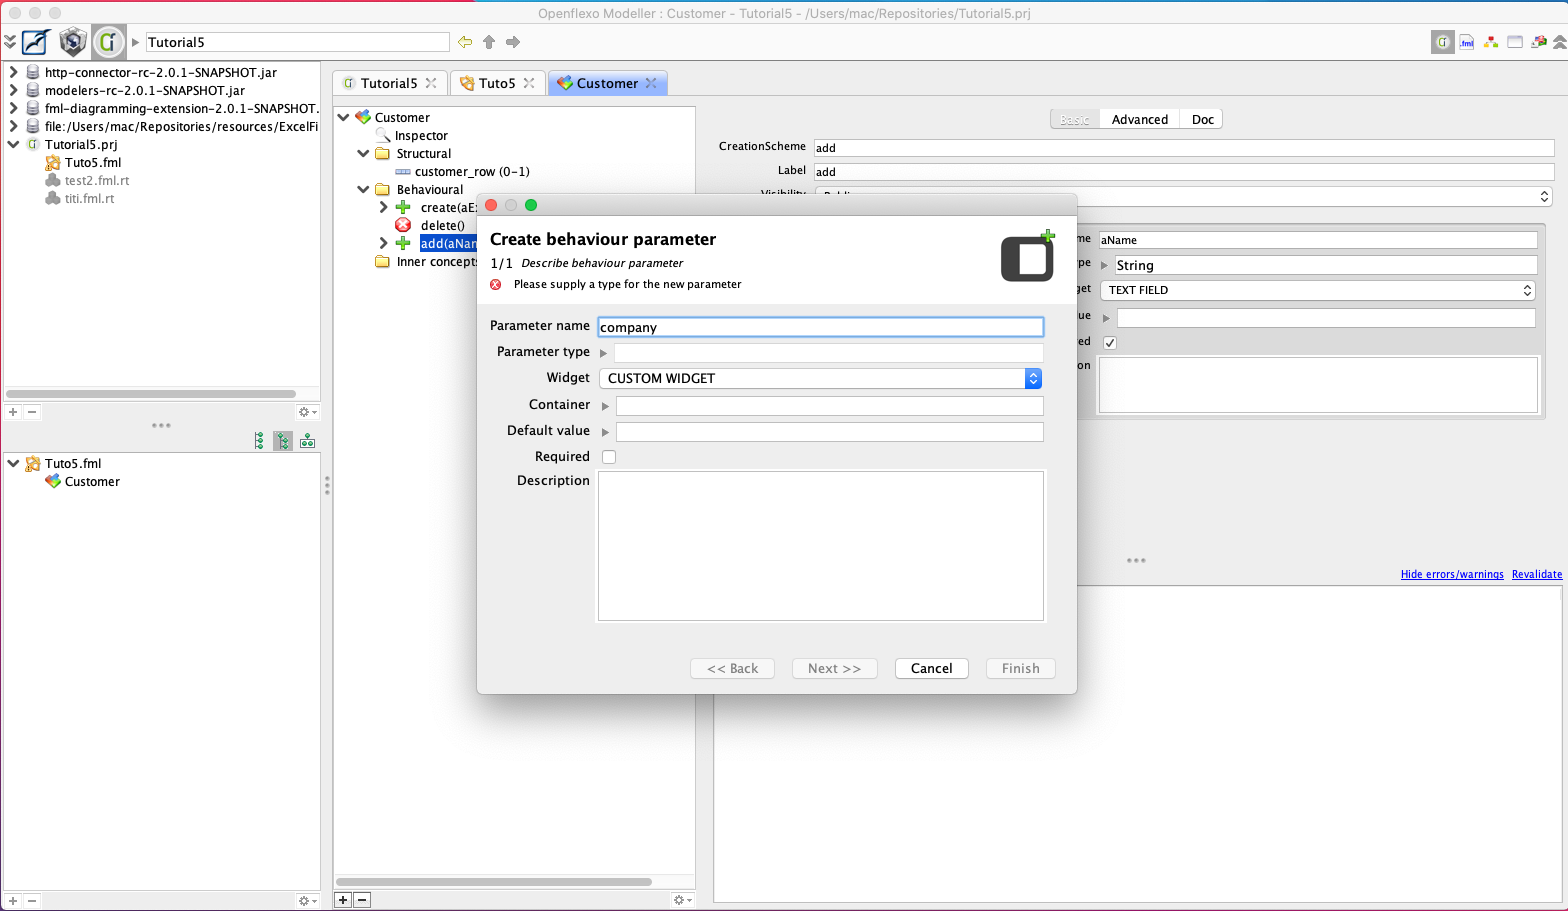
This action requires 5 parameters. First create the name parameter, its type is a String and the widget is a Text field. The widget correspond to the graphical UI that will be shown to the user in order to set the value. Do the same for the occupation and the company parameters.
Create also the address parameter, but set the widget to be a Text area, because there may be different lines. Finally create the the salary parameter, which is an Integer and can be assigned via an Integer widget.
When all is created, please check again the widgets selected for the parameters, and update if necessary.
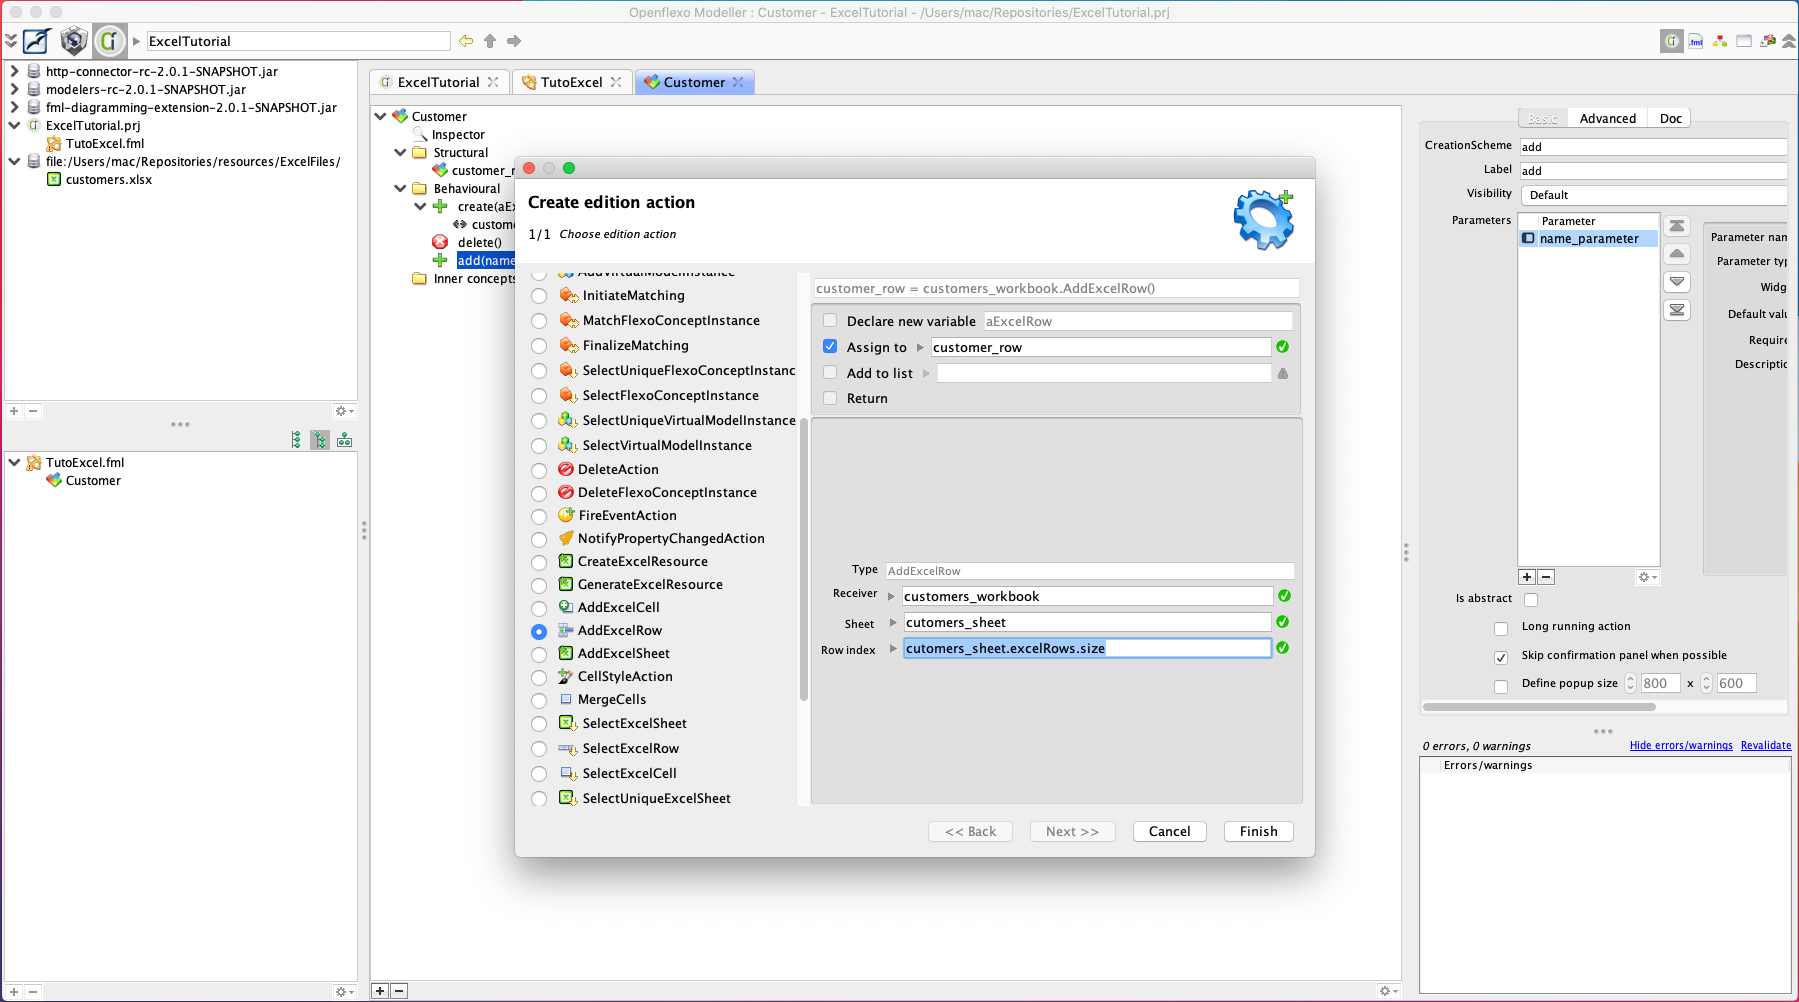
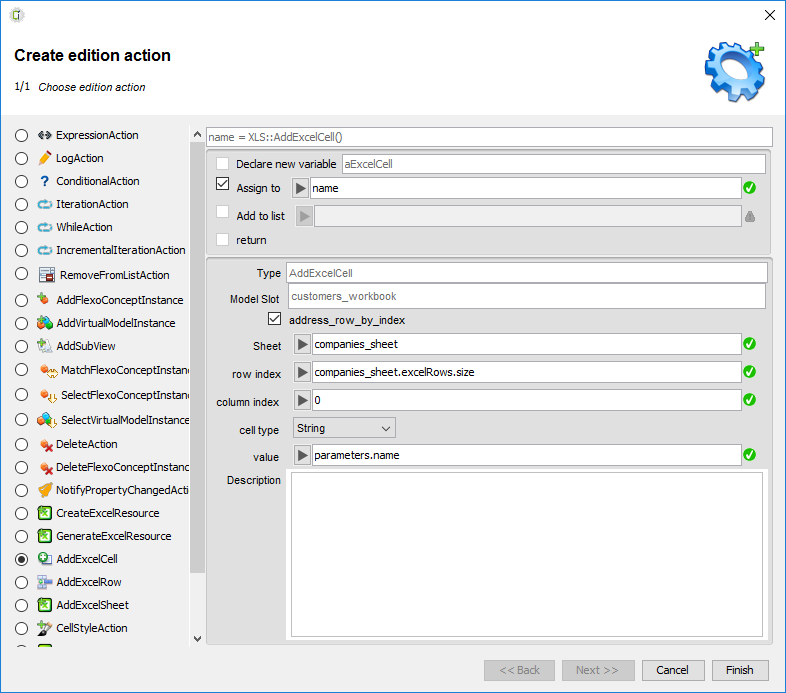
Then create a new action AddExcelRow to create a new row, assign it to customer_row . Set the sheet customers_sheet and the row index customers_sheet.excelRows.size that corresponds to the number of current rows. Note that while the row index starts from 0. Click Finish .
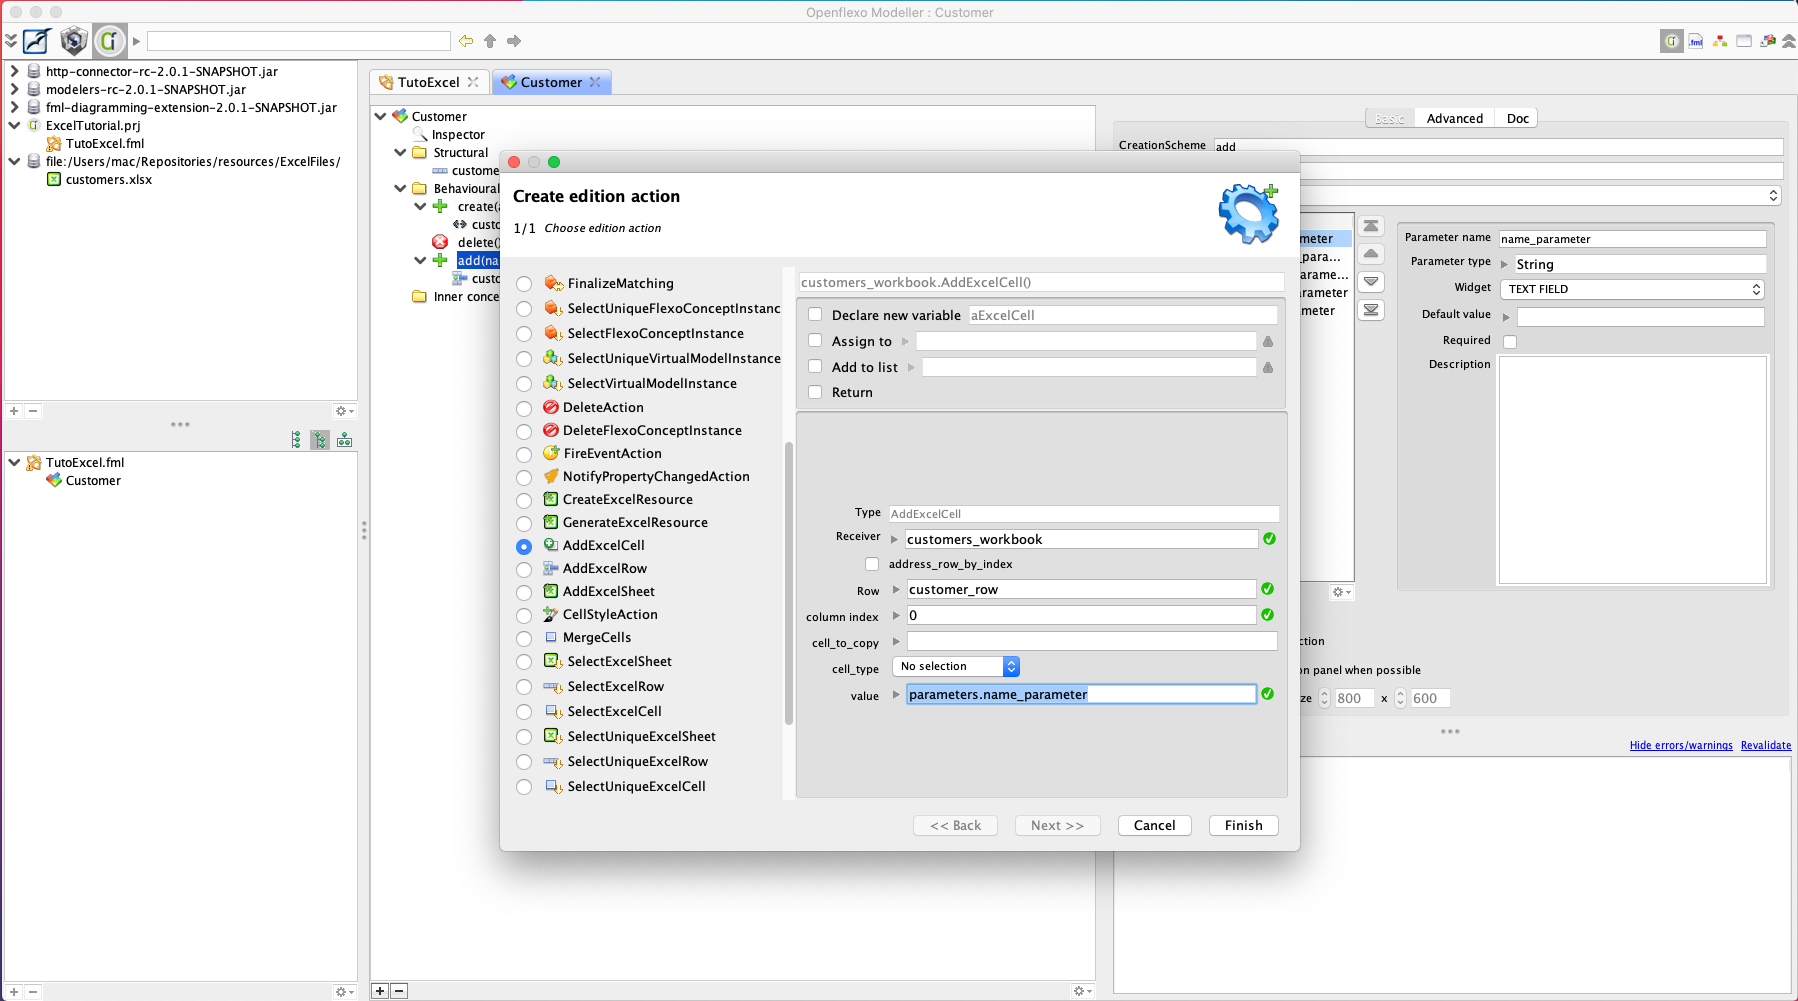
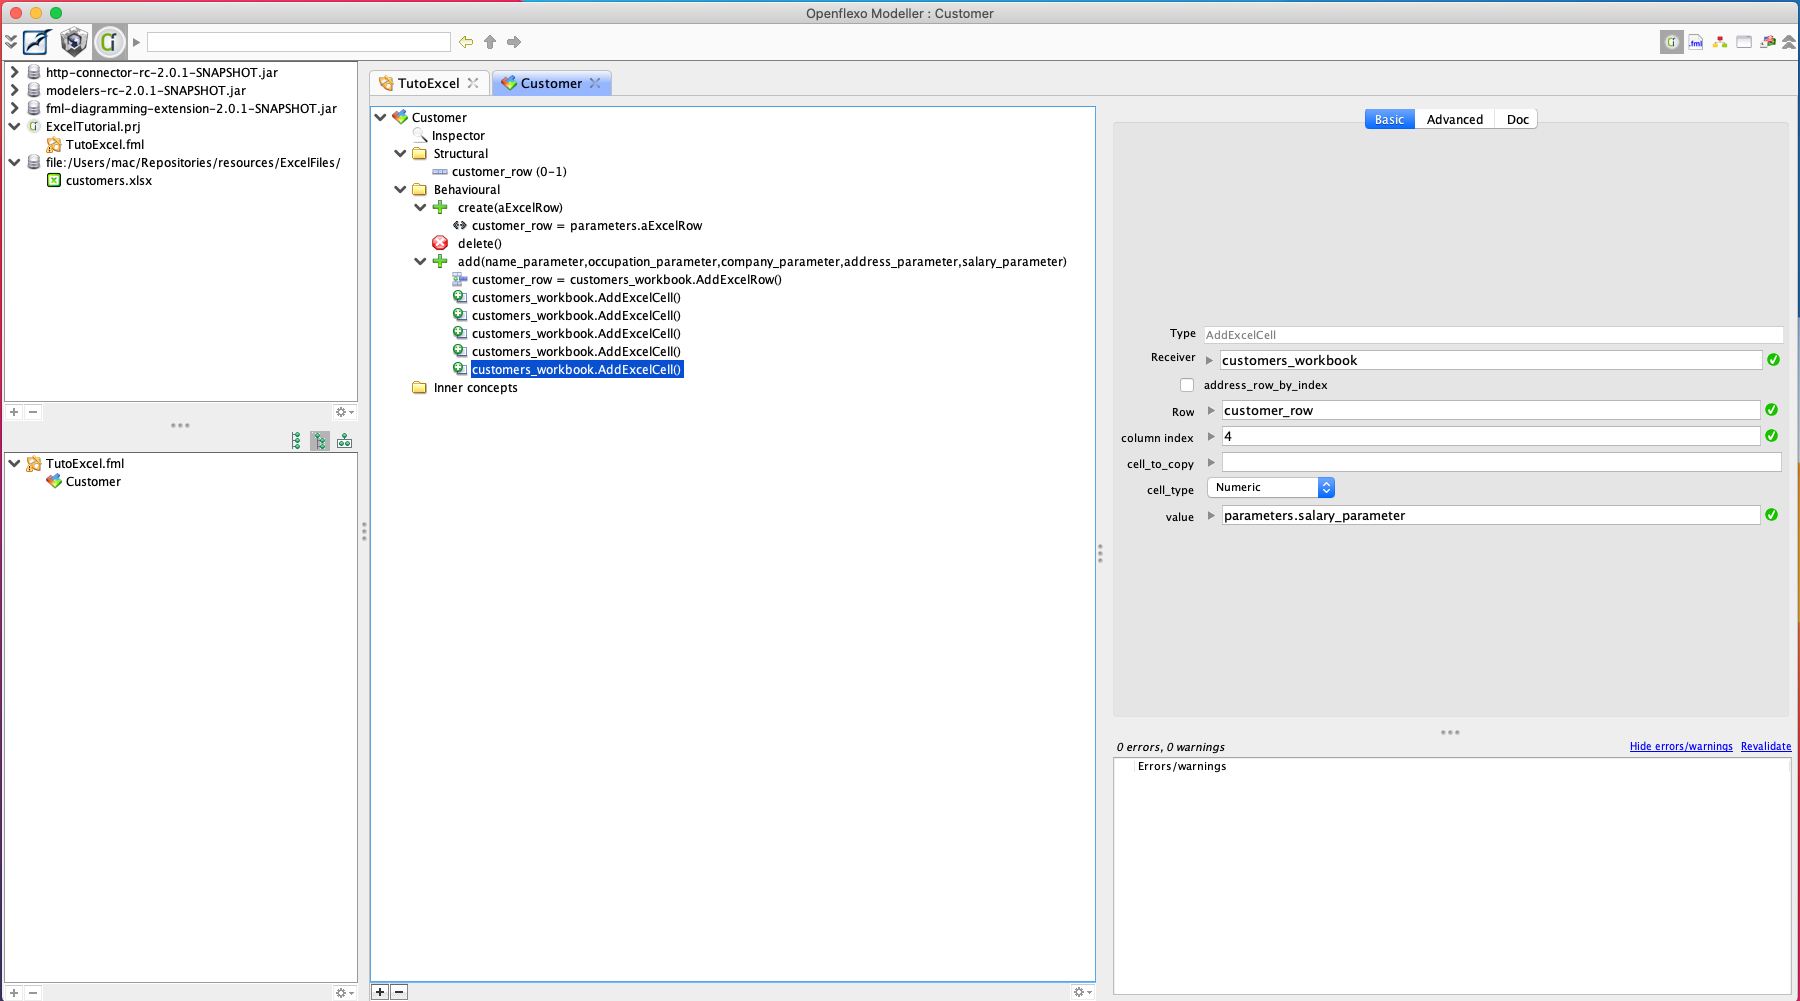
Then you need to create 5 AddExcelCell actions. For each set the row to customer_row . For the name set the value as parameters.name_parameter and the cellType to String and the columnIndex to 0, for the occupation set the value as parameters.occupation_parameter and the cellType to String and the columnIndex to 1, for the company set the value as parameters.company_parameter and the cellType to String and the columnIndex to 2, for the address set the value as parameters.address_parameter and the cellType to String and the columnIndex to 3, for the salary set the value as parameters.salary_parameter and the cellType to Numeric and the columnIndex to 4.
4.2.3.1 Add new customer
Call these schemes directly from the Virtual model, for that open the Virtual Model and in the Behavioral folder create a new ActionScheme .
Create 5 parameters, name_parameter, occupation_parameter, company_parameter, address_parameter of type String and salary_parameter of type Integer. Select the same widgets as before and set the required checkbox for each ones.
Please check if all widgets and required checkboxes are well set after the parameter creation.
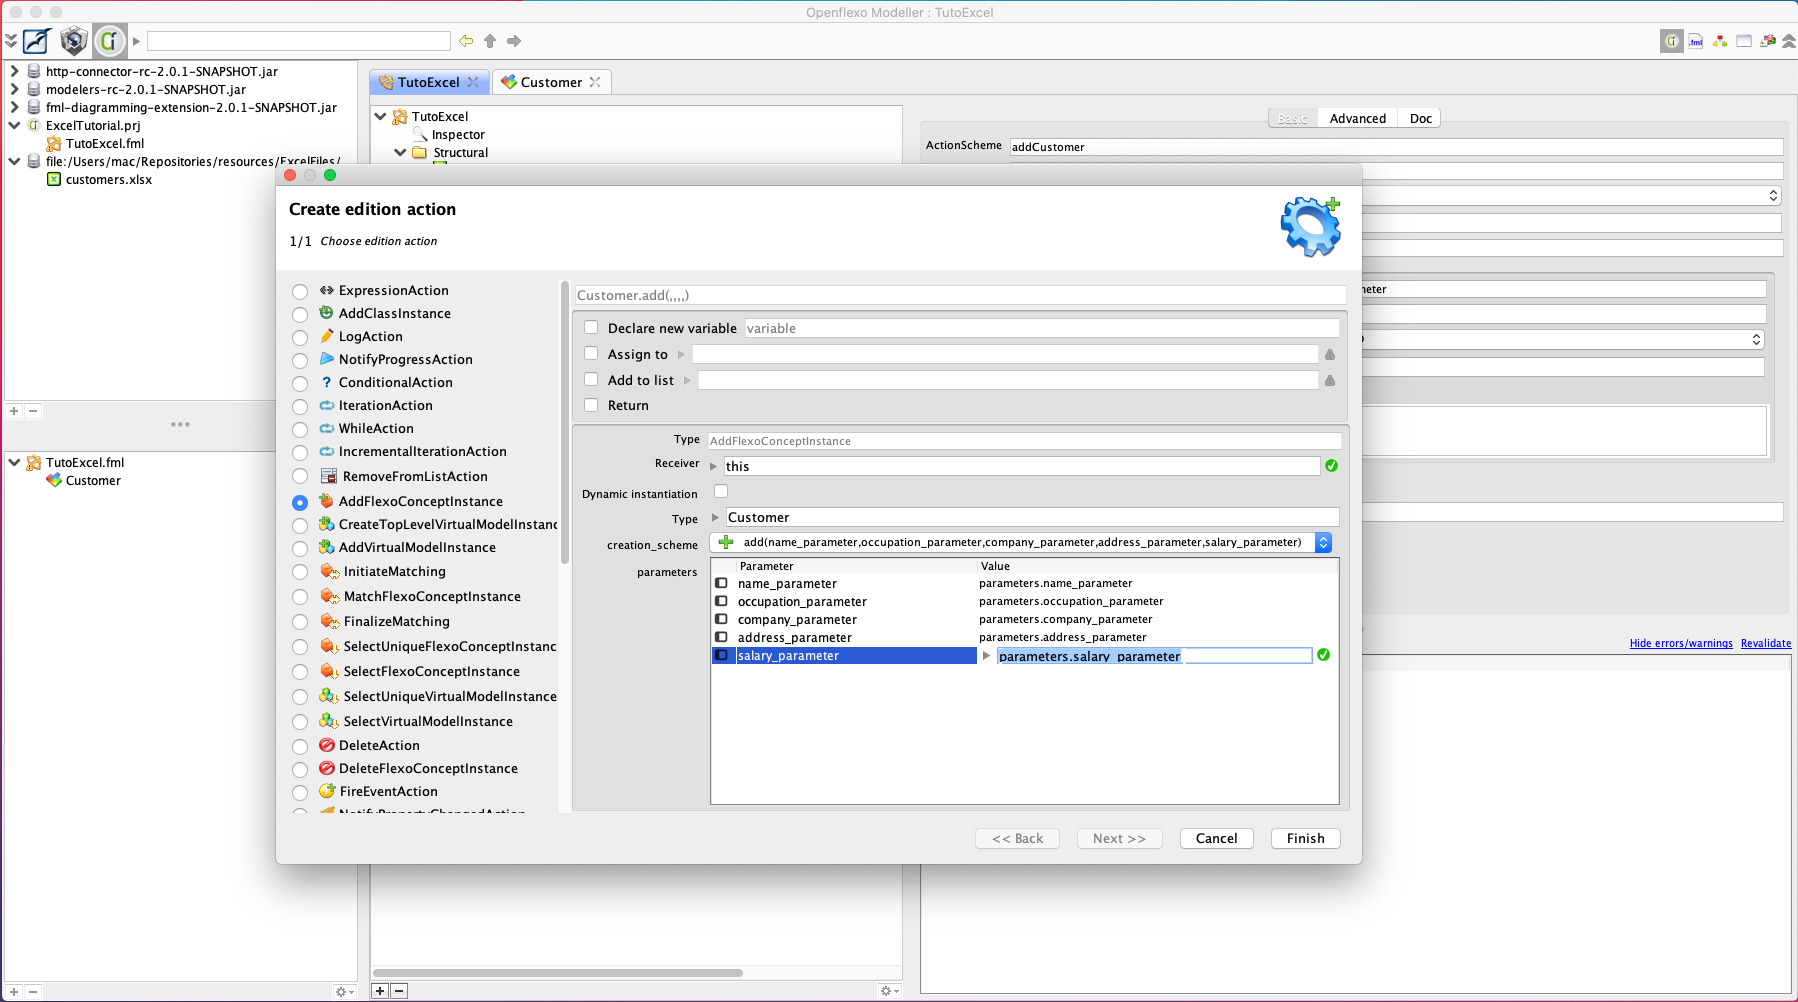
When this Scheme will be invoked ones will expect a new Customer to be instantiated and a row created. For that create a AddFlexoConceptInstance action within the ActionScheme which purpose is to call a CreationScheme and thus instantiate a Concept. Set the parameters as illustrated above.
4.2.3.2 Retrieve existing customers
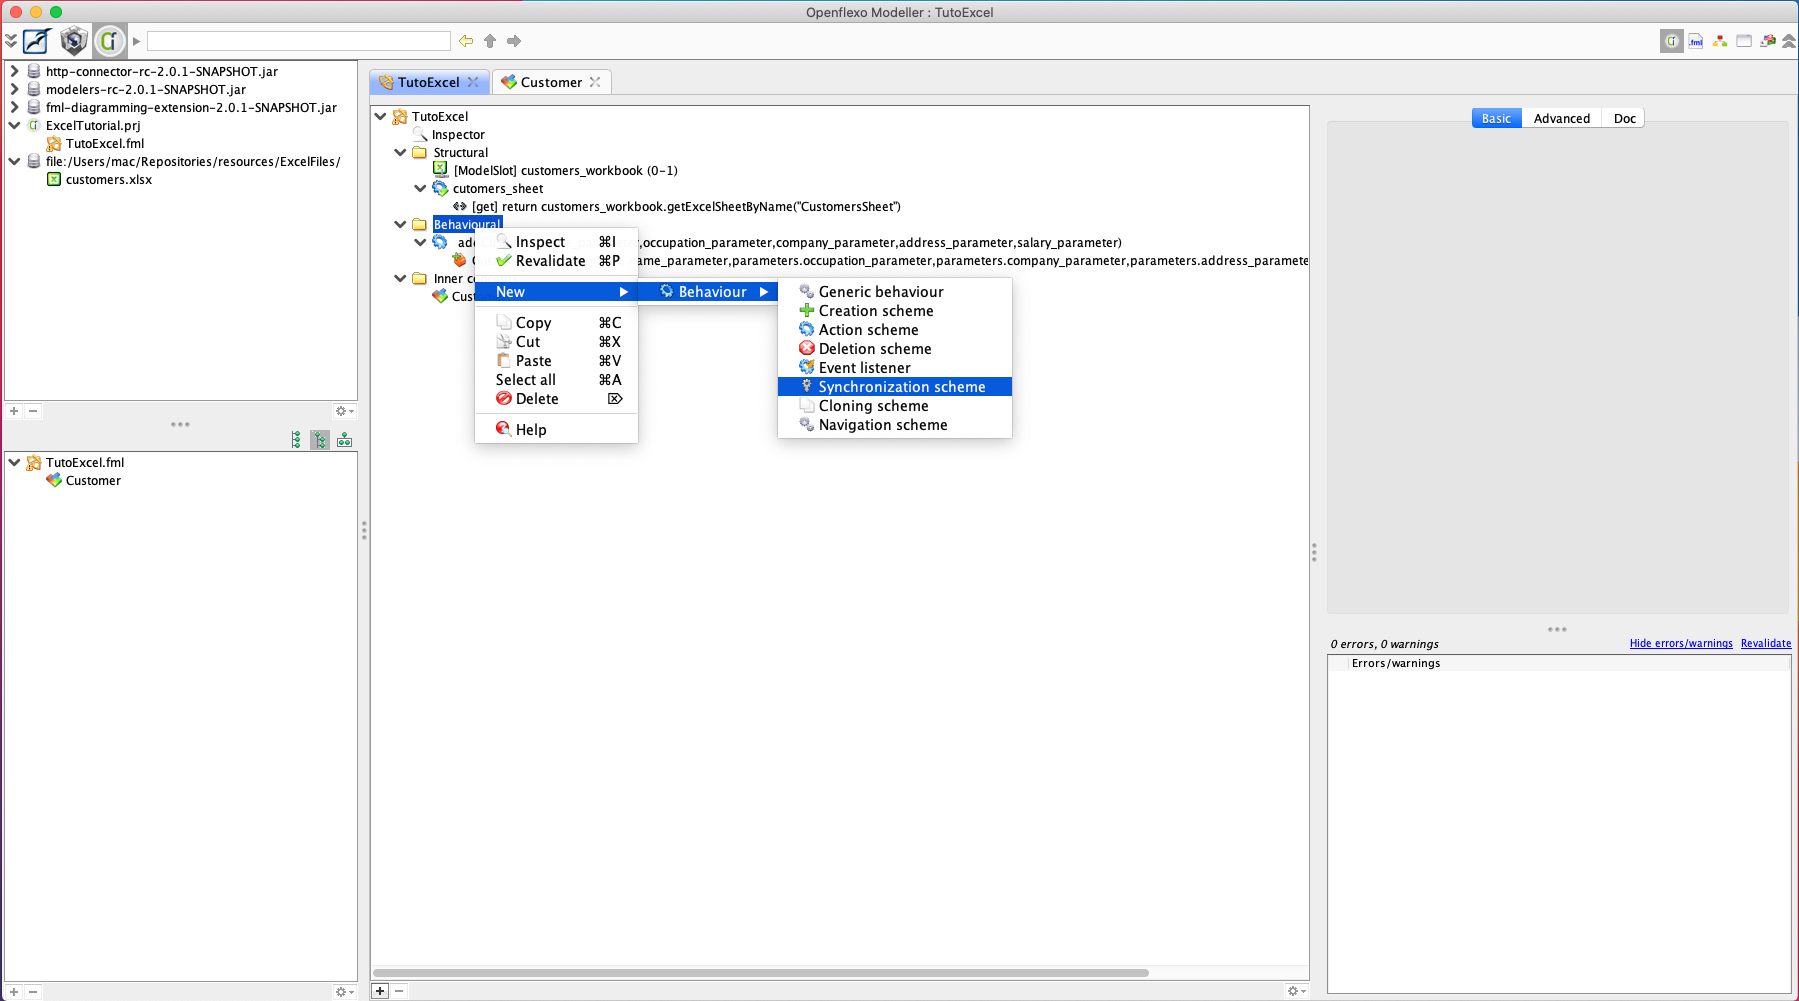
When an Excel sheet is loaded, it may already contains customers, and therefore new Customers have to be instantiated for each row, this can done by invoking the first Customer CreationScheme . For a Virtual Model , Synchronization Schemes are used to automatically execute actions at the end of Virtual model creation or loading . Create a Synchronization scheme , right click on Behavioral Folder > new > behavior > Synchronization Scheme.

Iterate over each row by using an Iteration action > FetchRequest > Select Excel row . Set the name of the iterator for instance row , and select the Excel sheet, here customers_sheet . Add a condition selected.rowIndex!=0 to not include the first row that is not a customer, but the name of the column.
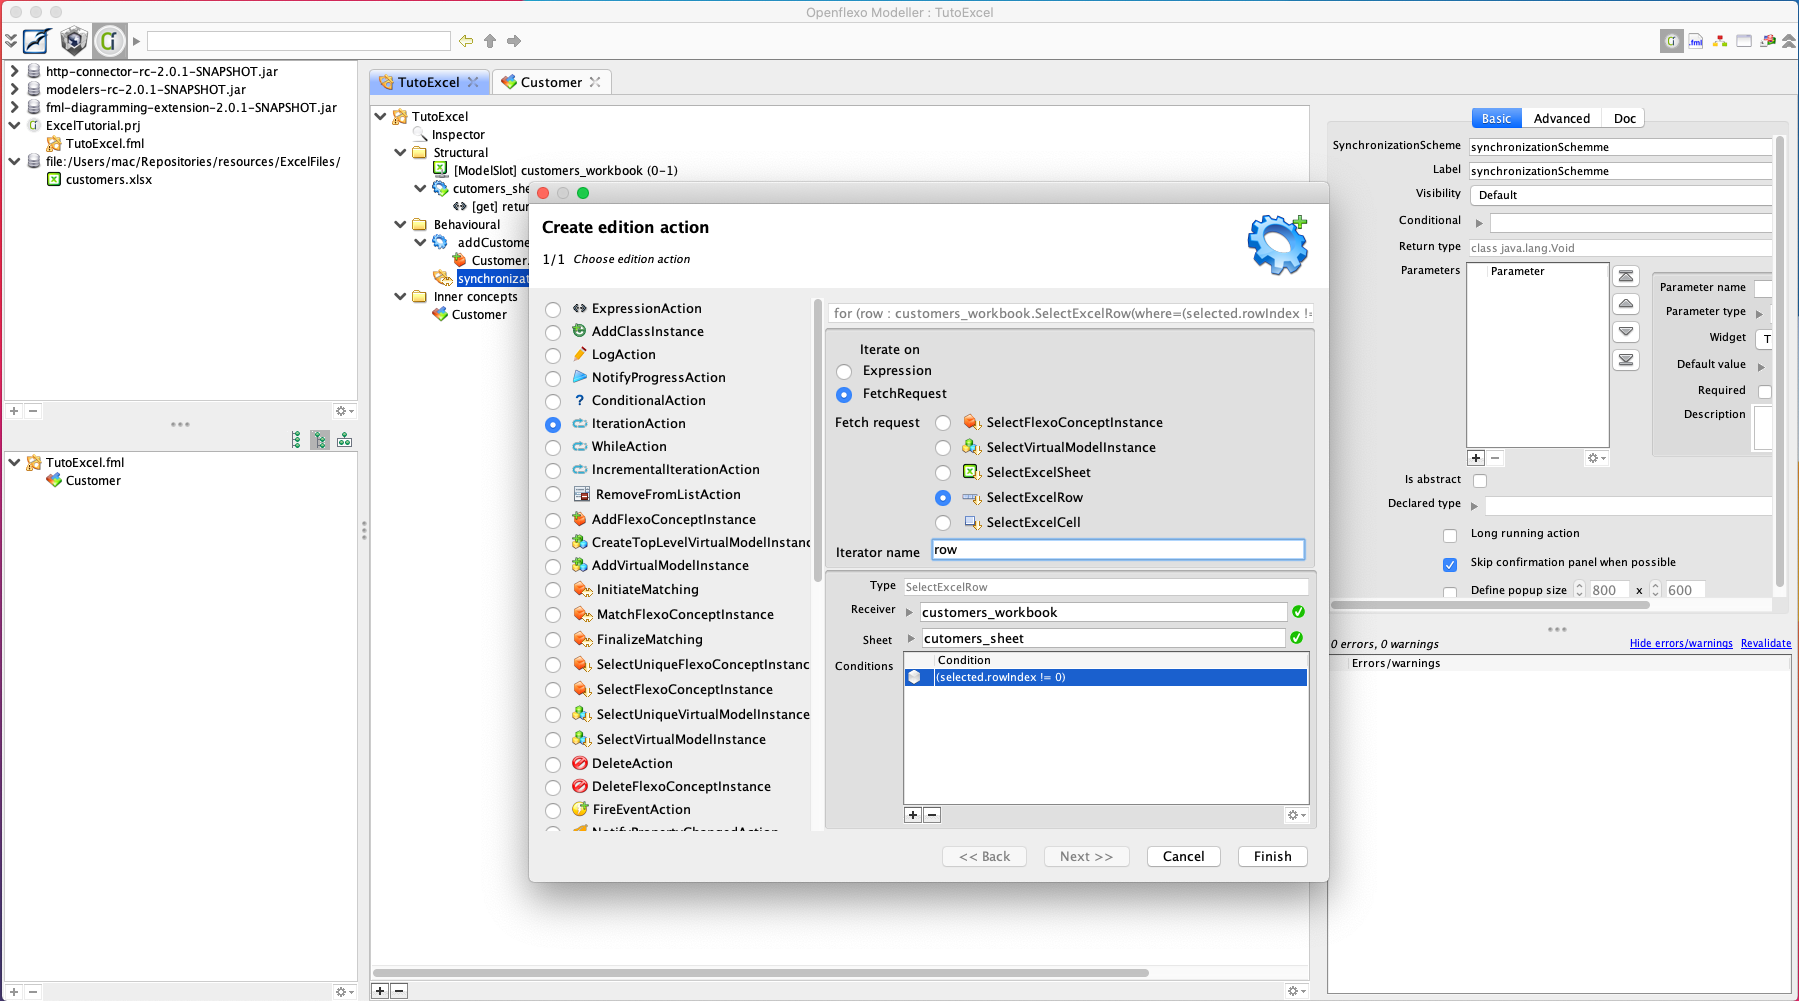
Then click on Finish .
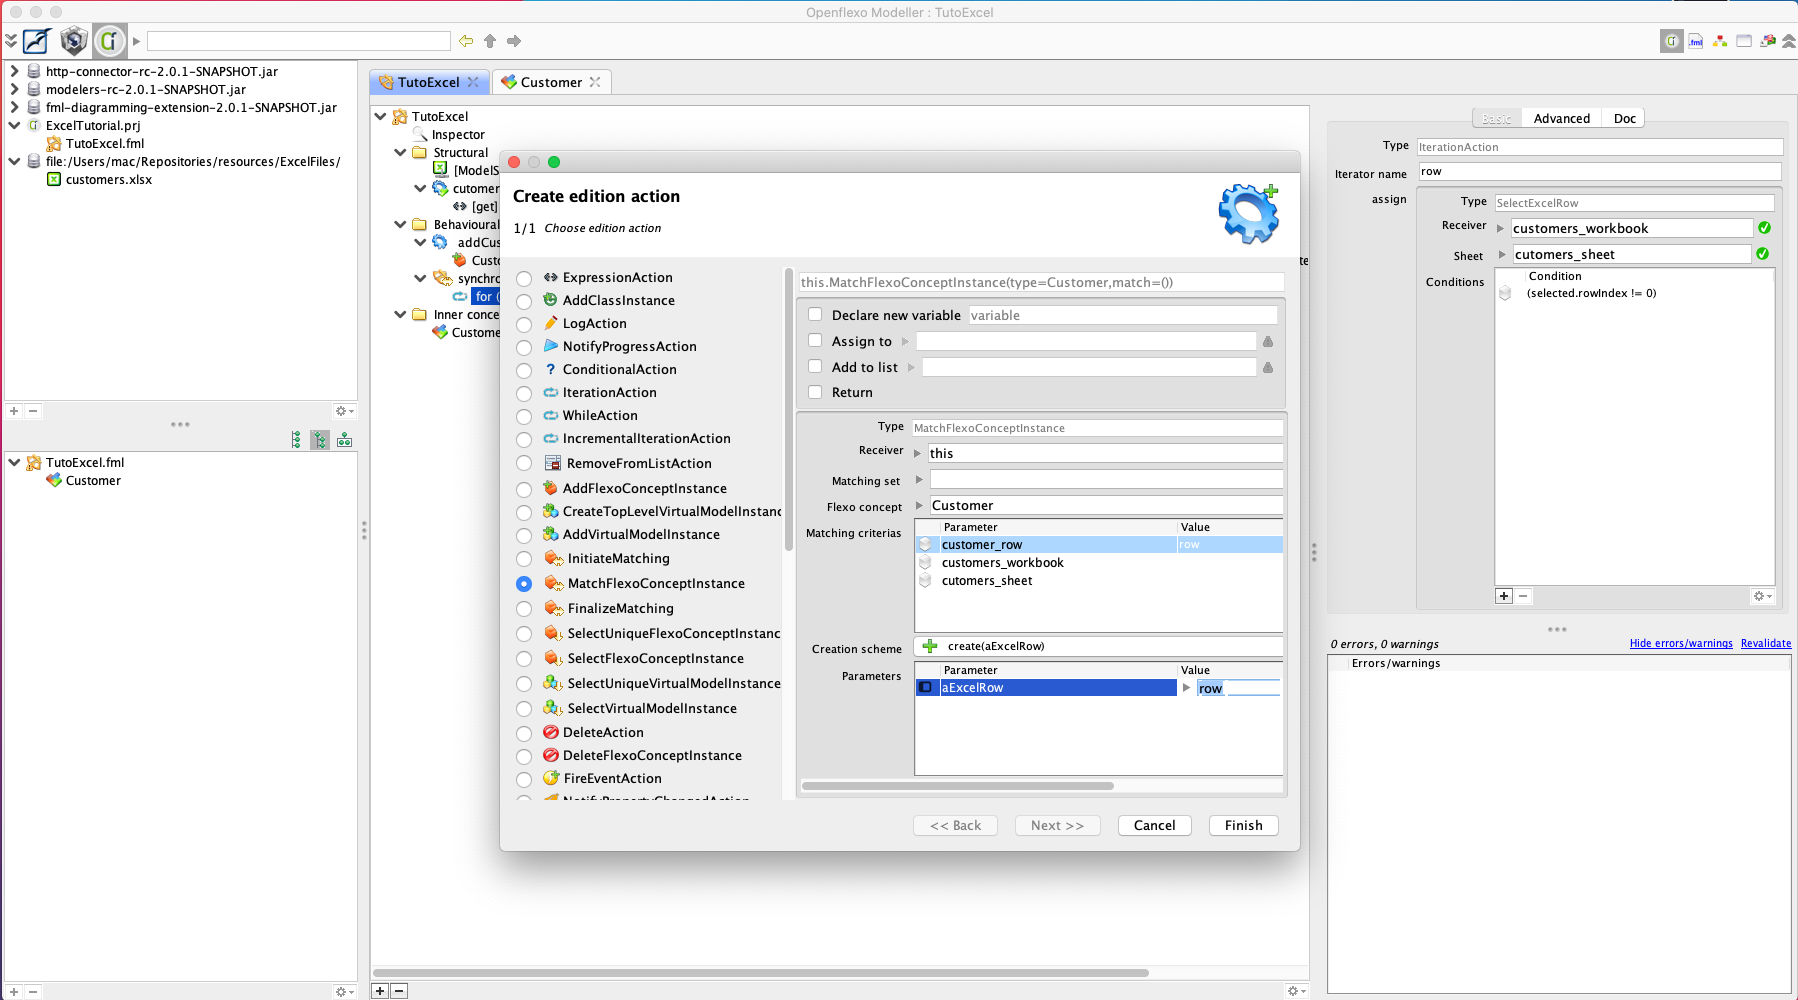
Add an internal action to the Iterator action in order to instantiate a Customer for each row found. Of course we want to avoid duplicated Customers, and therefore we can use the MatchFlexoConceptInstance action that role is to instantiate a Flexo Concept based on matching criteria. To do that select the Iteration action and click on the (+) and add action inside Iteration. Select the MatchFlexoConceptInstance and set the Virtual Model Instance , the concept, and the CreationScheme (“Creation”) as illustrated below. In the matching criteria select the row, which means that if an existing Customer is already assigned to this row then it will not be created again. Assign the row to the parameter value and click on Finish .
At this point of the tutorial, we dispose of two actions, the first one retrieves Customers from an excel sheet, and the second one creates new Customers. Save the virtual model, and let’s try it!
5 Test customer management tool
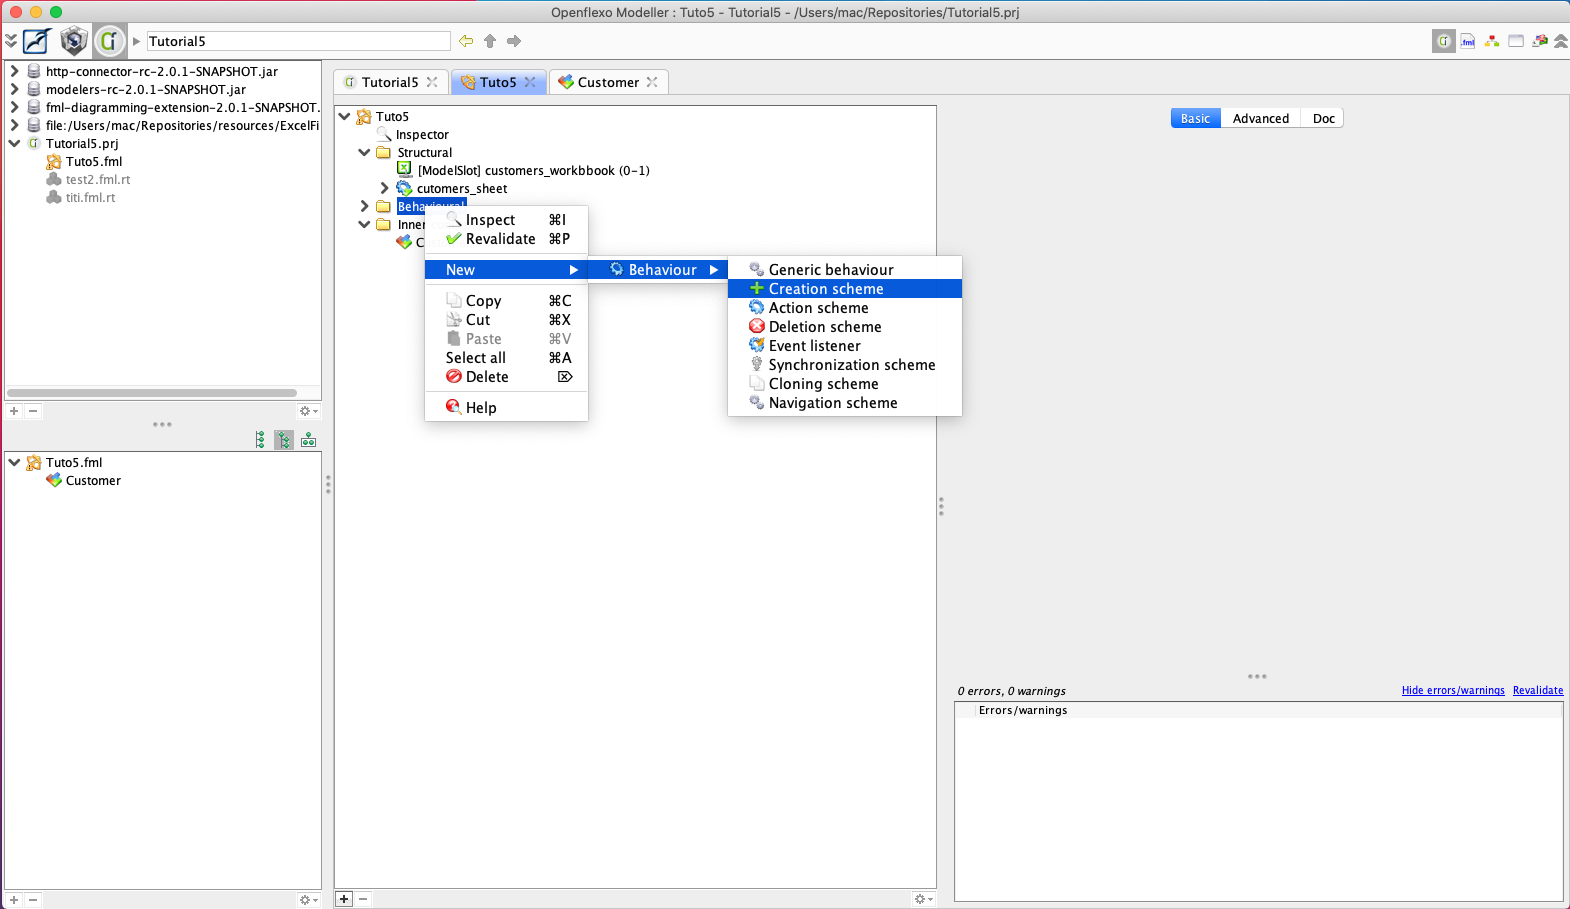
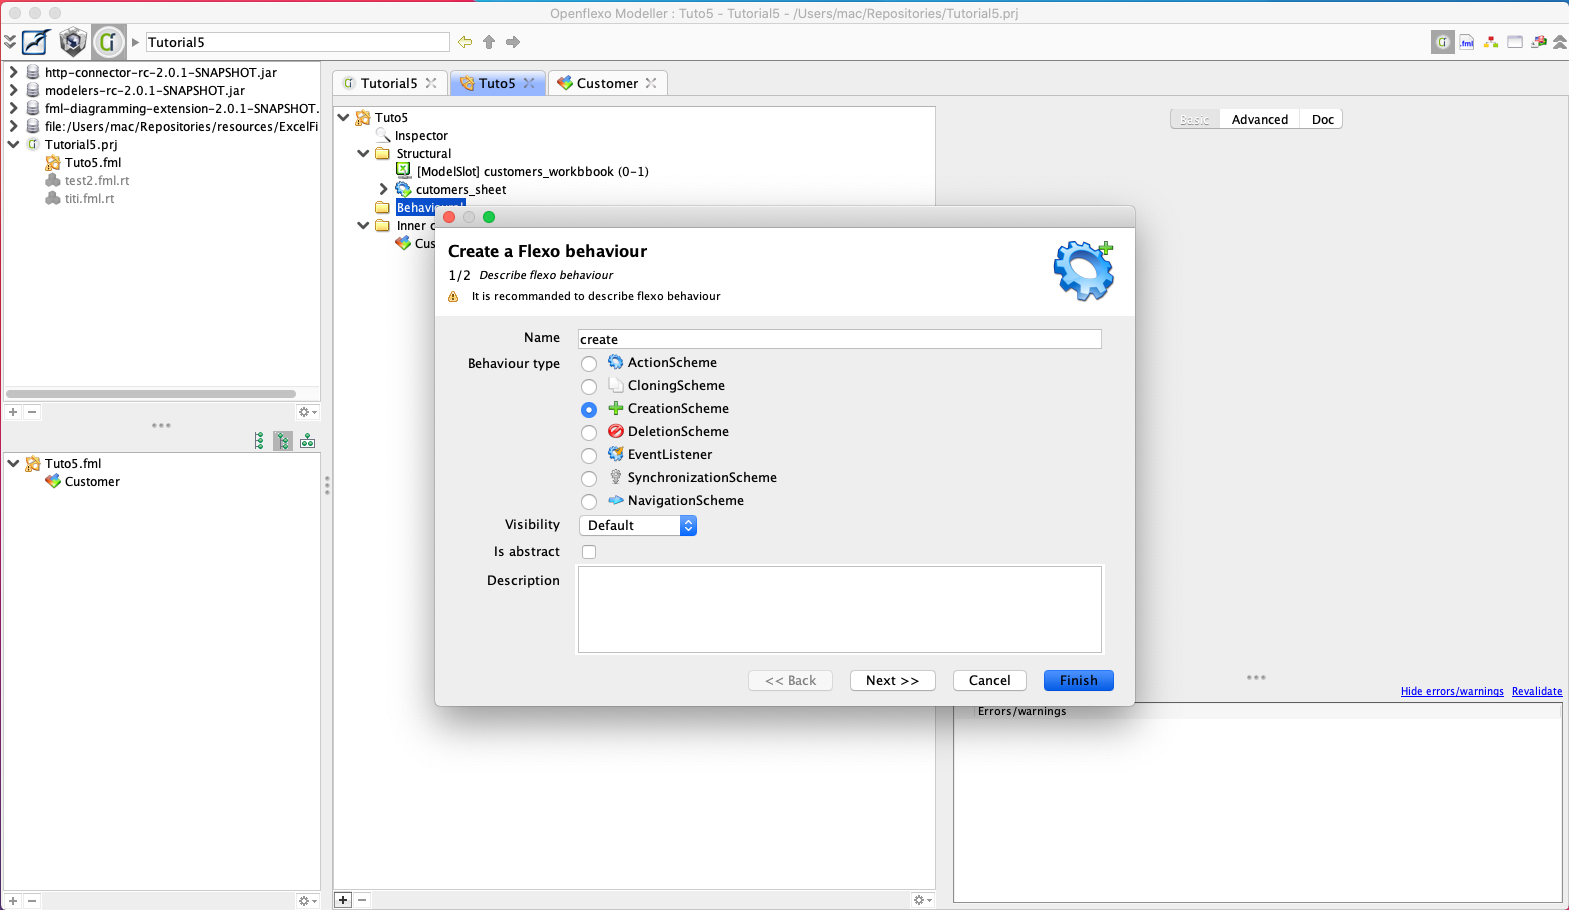
In order to our virtual model, we need first to add a creationScheme. To do so, right click on our behavioral folder select New > Behavior > Creation scheme.
From the wizard set the name and description then click Next.
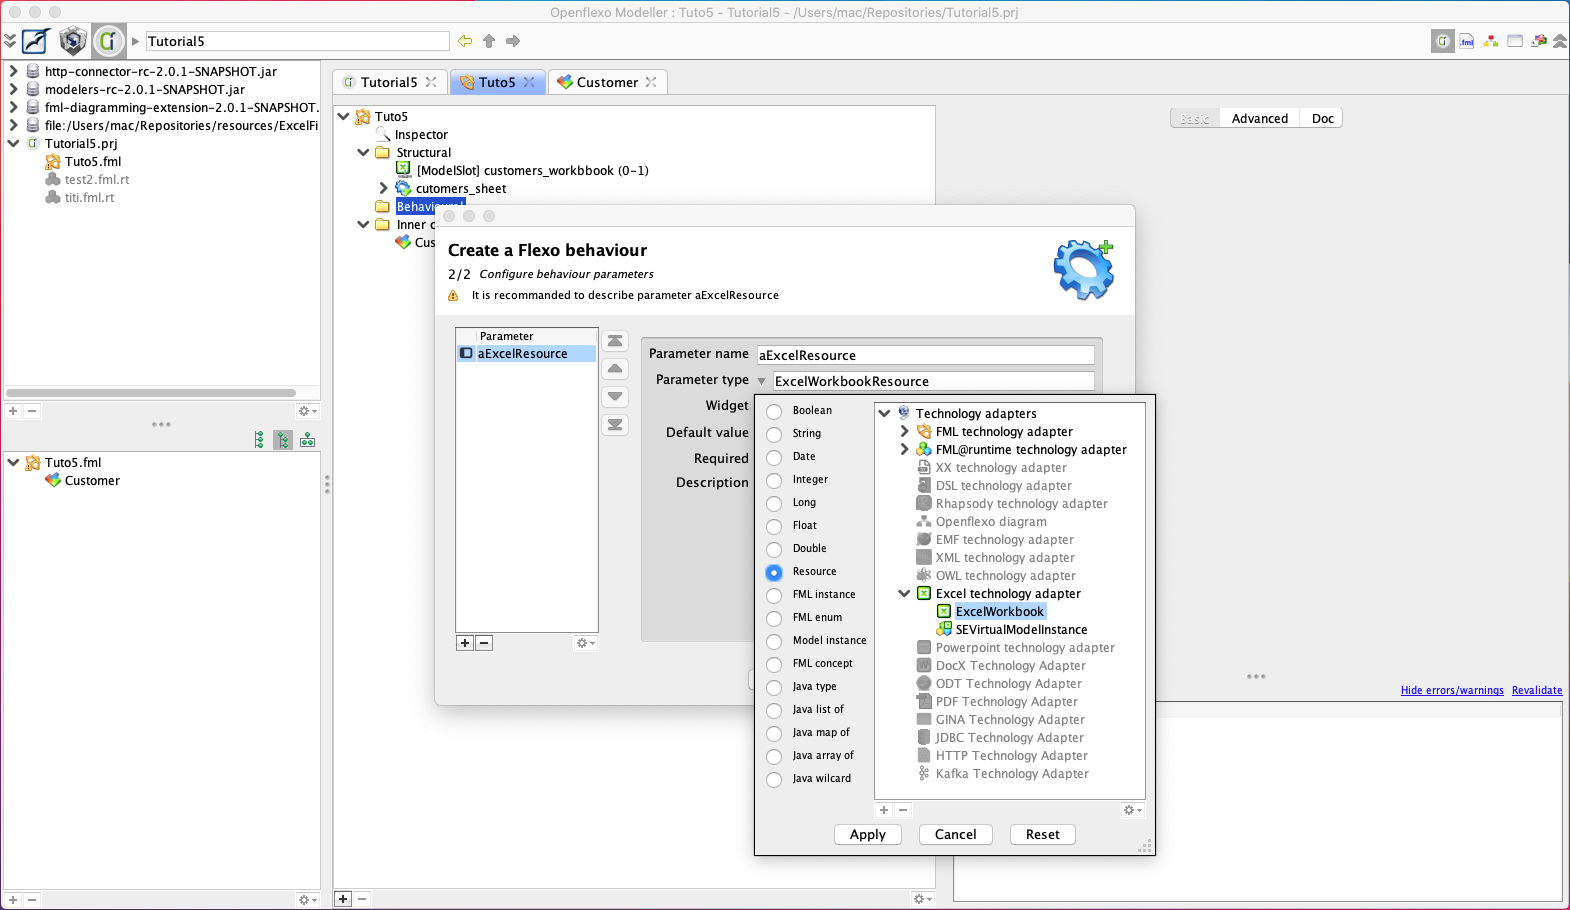
Add a parameter of type ExcelWorkbook then click Finish
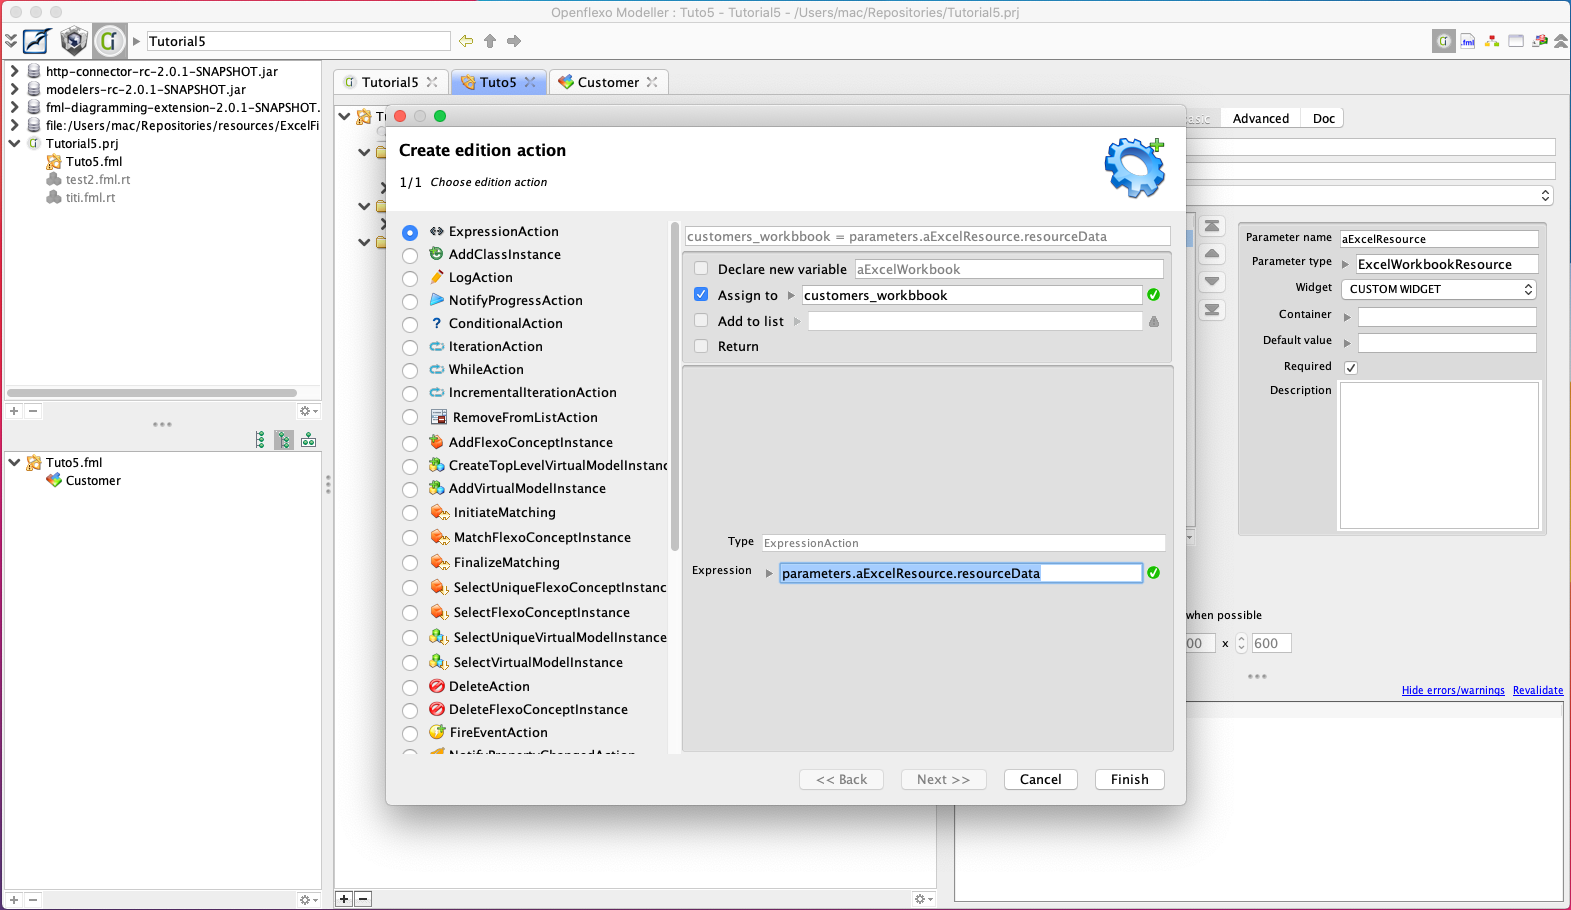
Right click on the creationScheme and select New > Add edition action then assign the excel_workbook to the parameter as shown in the figure.
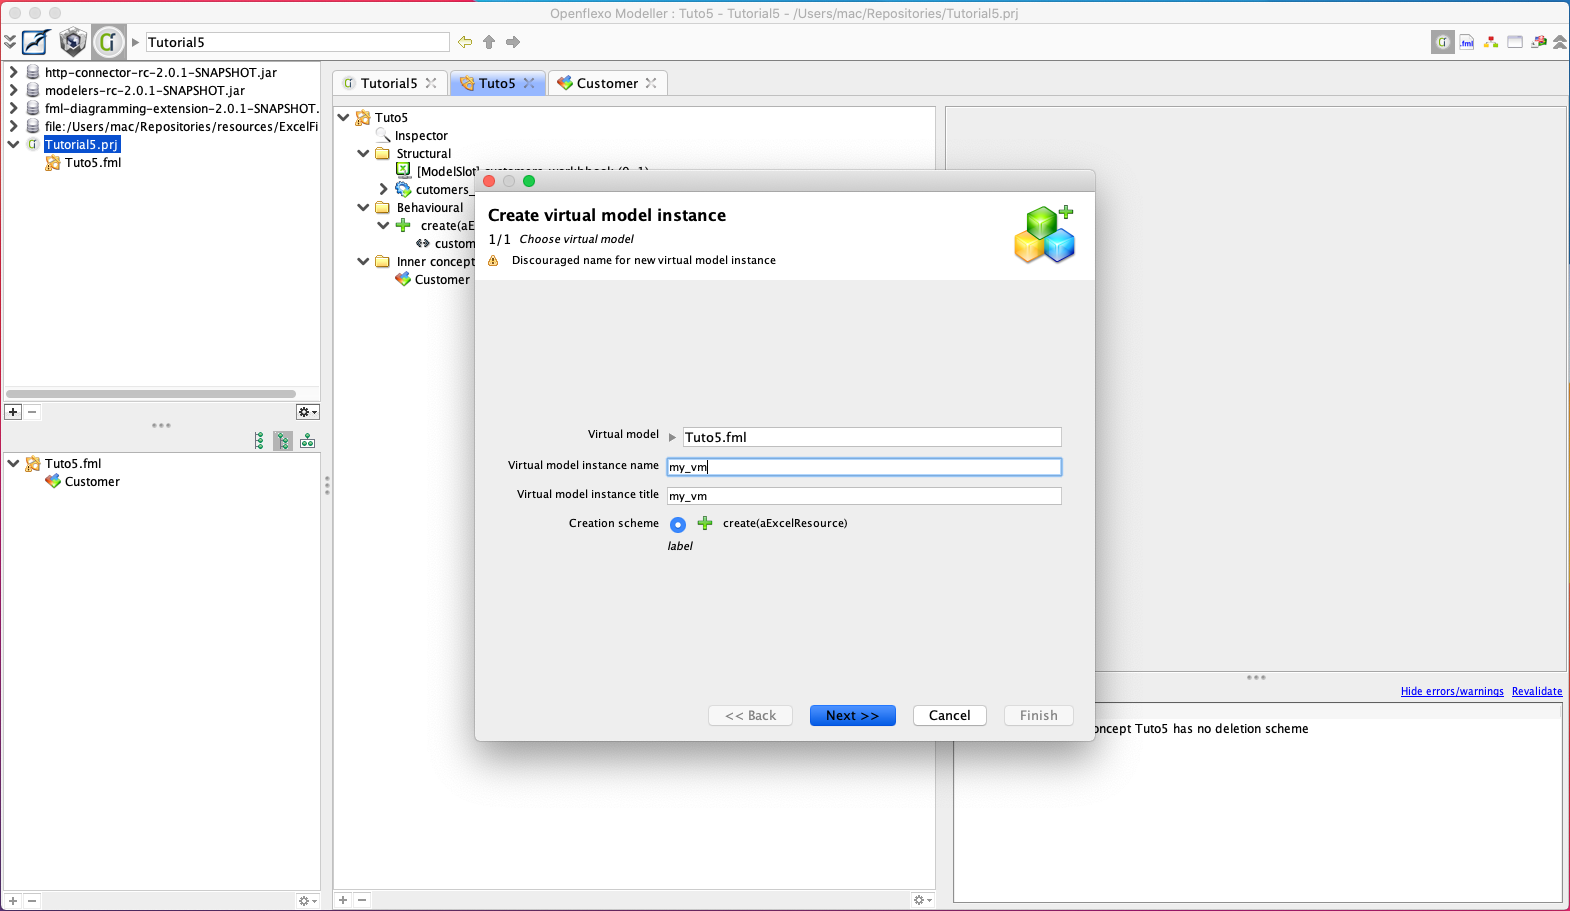
Now we need to create a virtual model instance to test our project, right click on the project and select New > Virtual model instance.

From the wizard give the instance a name then click Next.
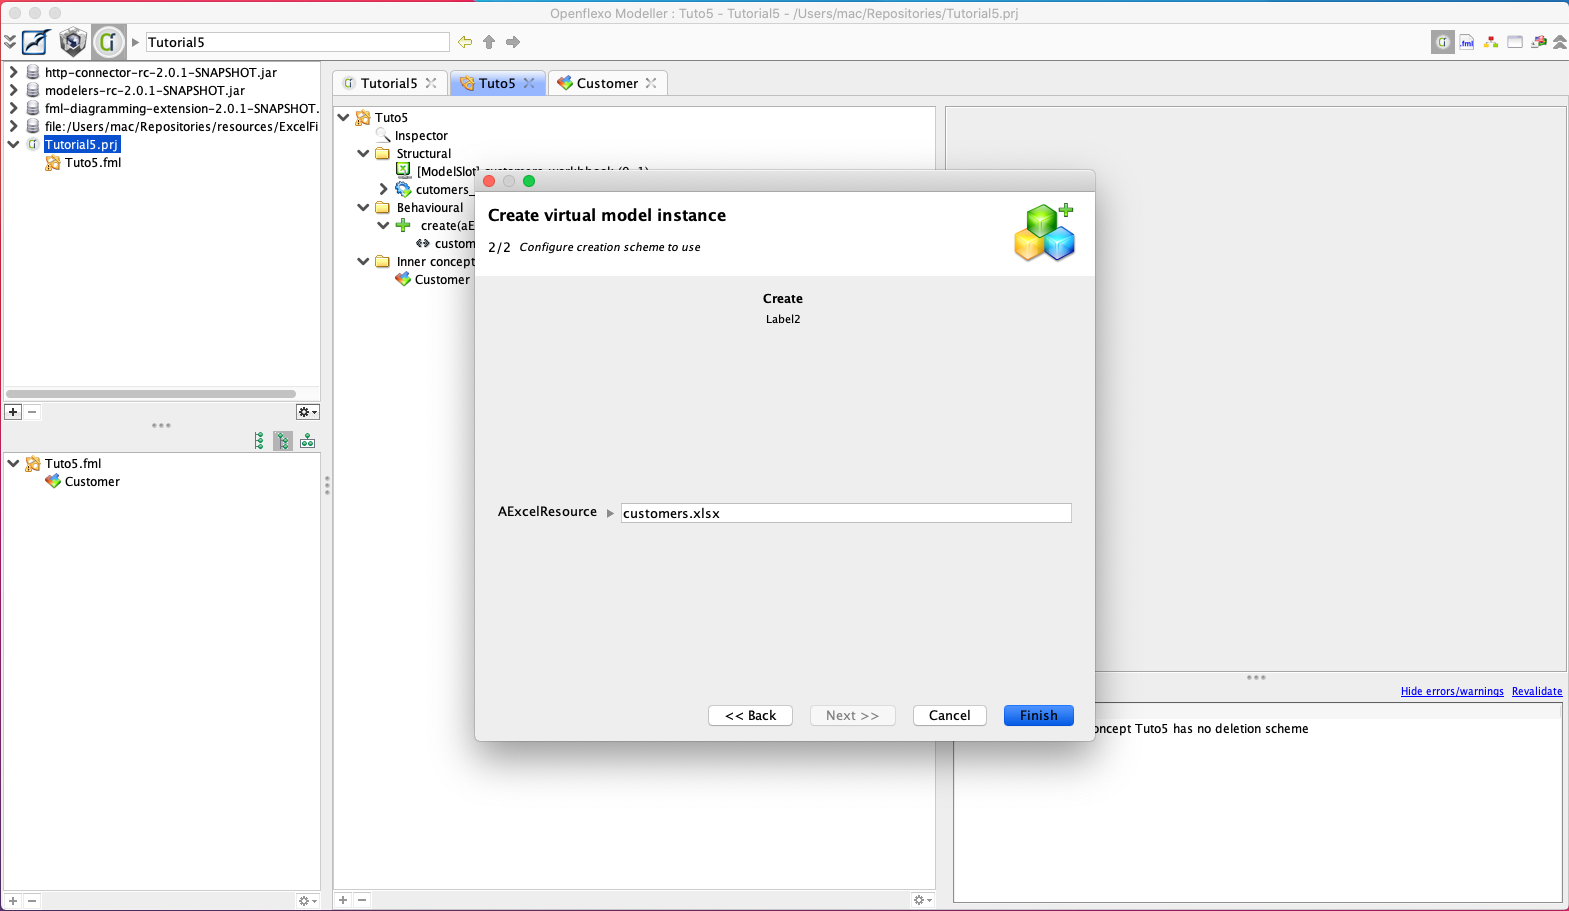
In the followed wizard choose the excel resource (customers.xlsx) then click Finish
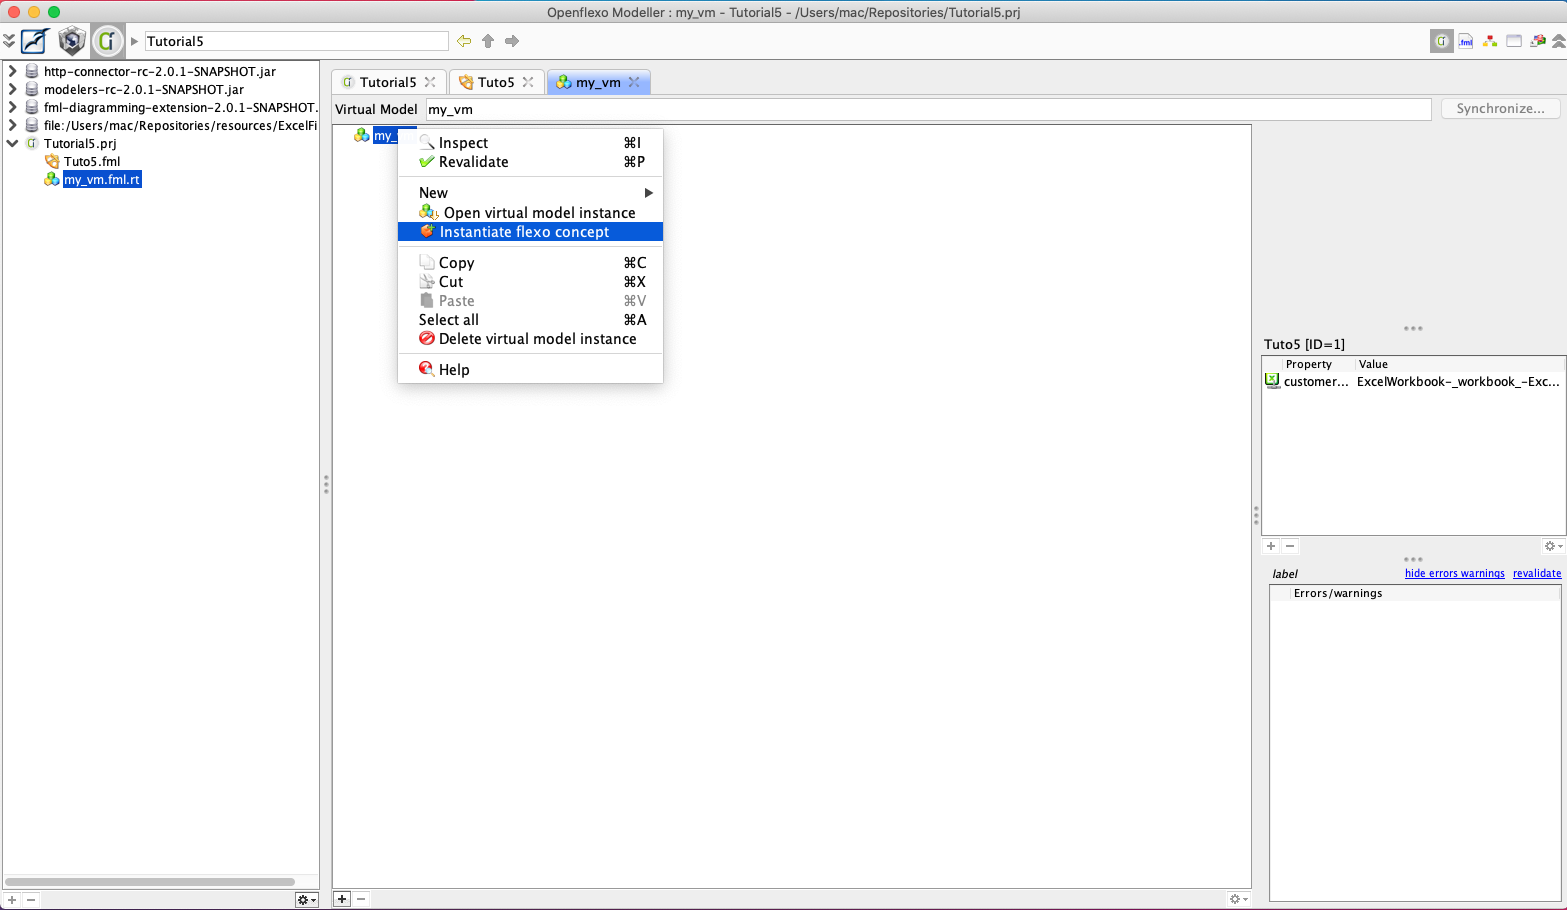
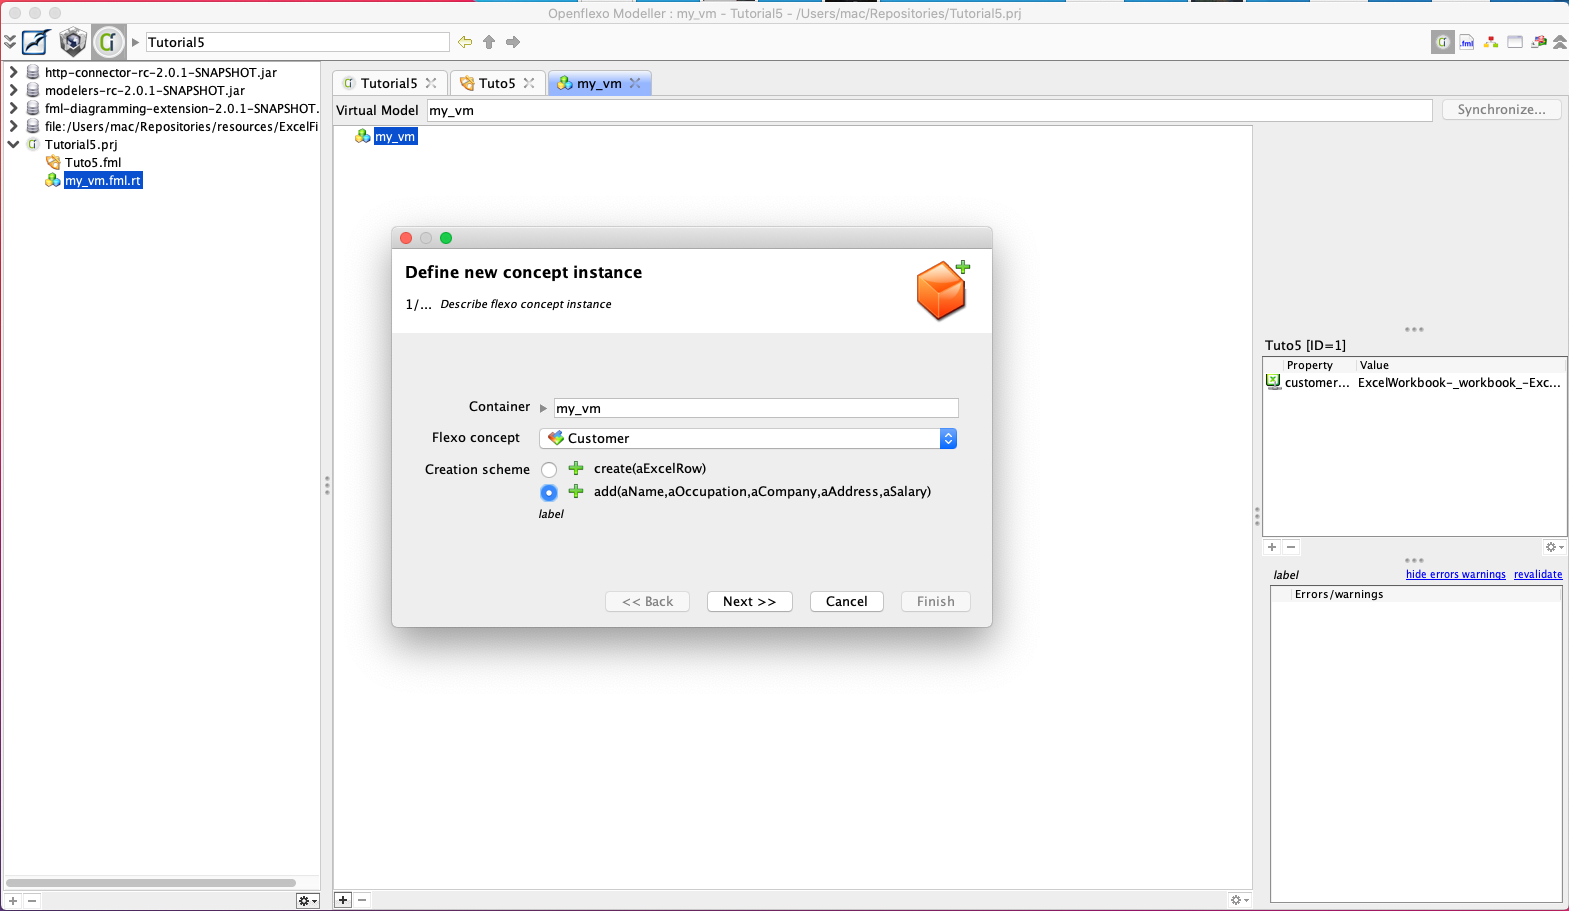
Once the virtual model instance is created, we need to create a flexo concept instance, right click on the virtual model instance and choose Instantiate flexo concept.
From the wizard choose Customer as the flexo concept and the add method (the one with 5 parameters) as the creation scheme and click Next.
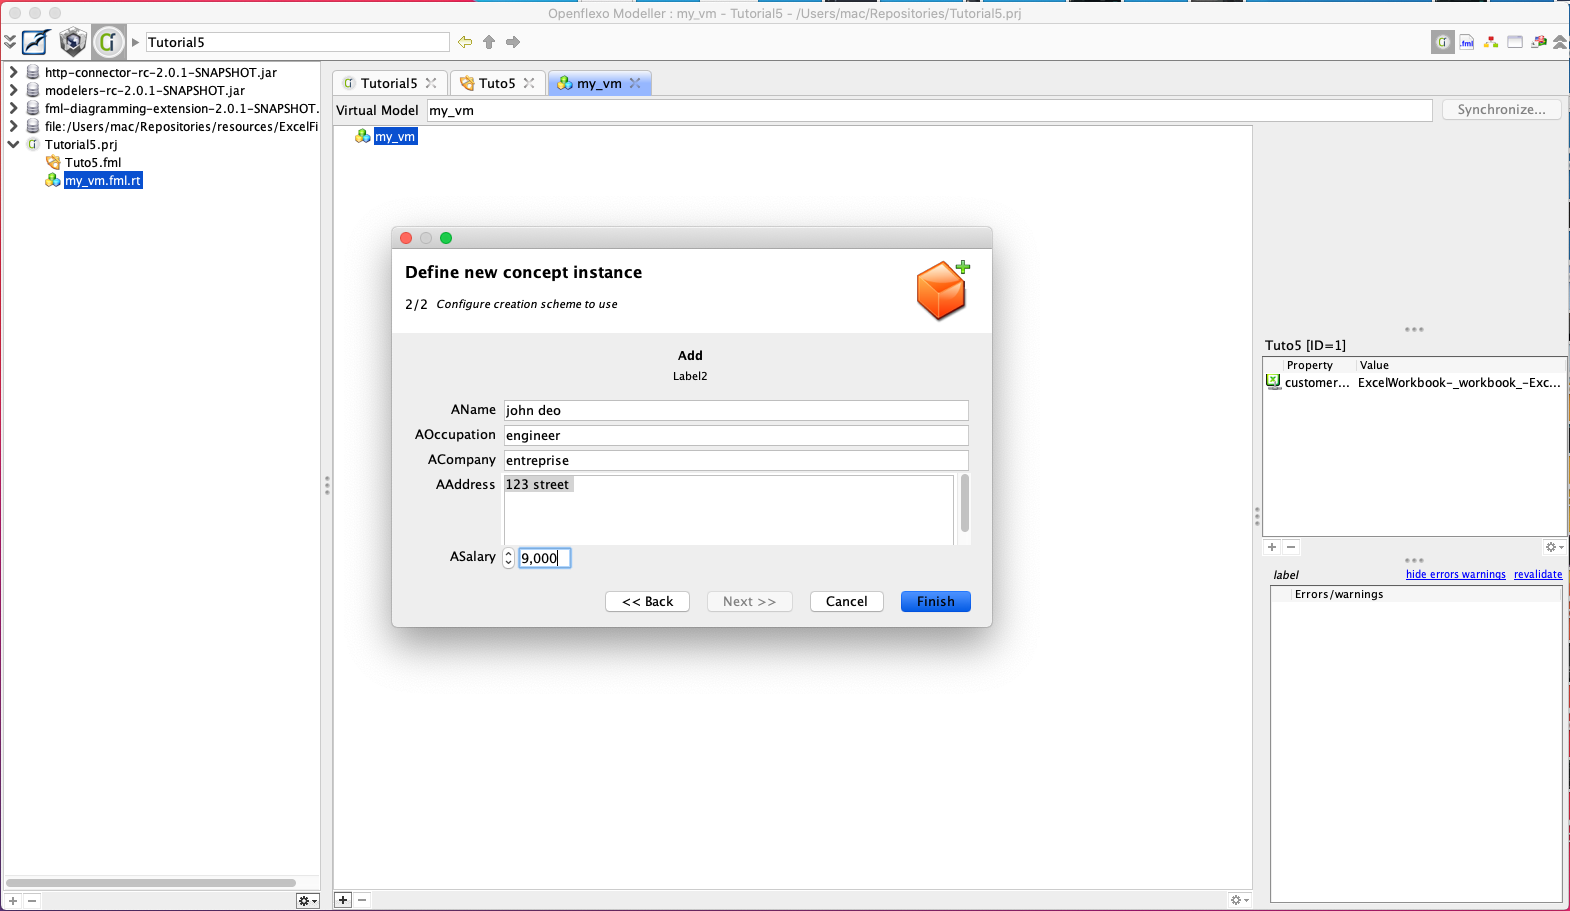
Fill in the parameters then click Finish.
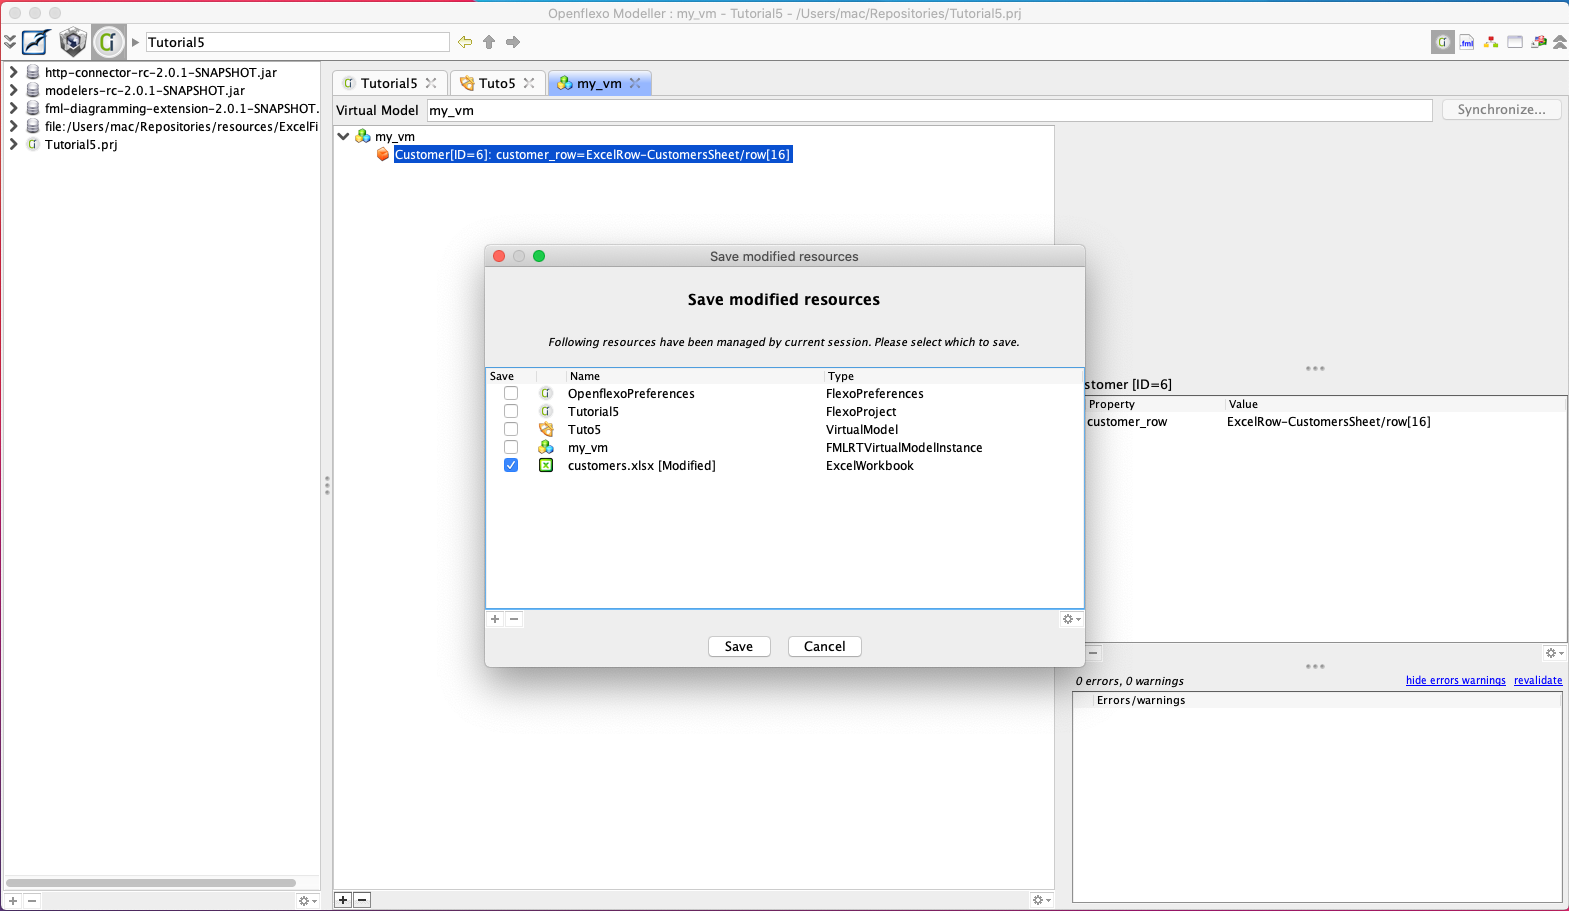
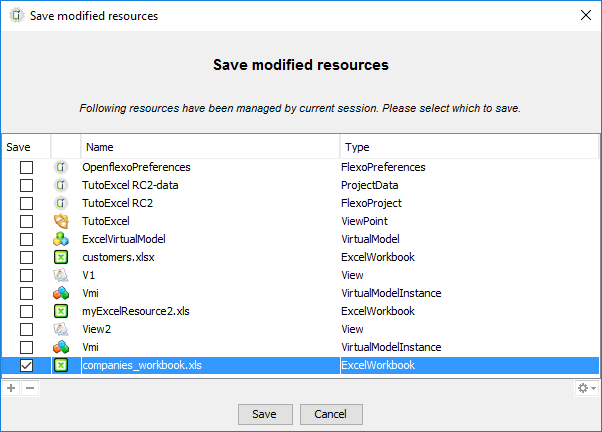
Once the instance is created, we need to save the project in order to update the excel file. From File and click Save current project then from the wizard click save (make sure the excel file is checked).
A new Customer instance is created, save Excel files(CTRL+S) and normally a new row appears in customers.xlsx. Check it by either switching to the Information space and open the file, or open it in from your file system. If you see the new customer then congratulation !
This part gave you a minimal but useful knowledge to start using the Excel technology adapter.
6 Part III: Federating Excel workbooks
In the previous sections we have tooled an Excel sheet containing customers. In this part of the tutorial we will learn how to create a new Excel Workbook , federate two workbooks and manipulate cells instead of rows. If you have not done the Part I and II, you can download the viewpoint of Part II from here : Tuto_Excel_RC2.prj.zip
6.1 Create Company Sheet
The second workbook contains a list of companies in which customers are employed. In the Virtual Model create a new BasicExcelModelSlot for the new companies workbook.

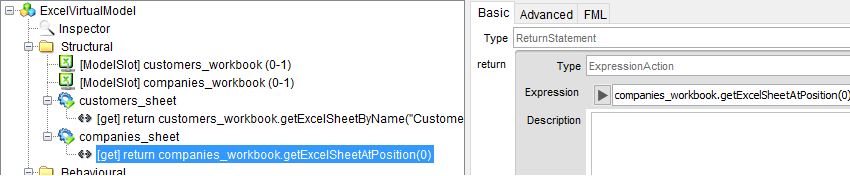
In the same way as Part II, create a property that references a sheet related to Companies named “companies_sheet” (see 3.3 for more details). In the screenshot below we used companies_workbook.getExcelSheetAtPosition(0) expression assuming that the sheet of interest is the first one.
6.2 Create Company concept
Then similarily to Part II, 4.1.1, create the Company Flexo concept. While for Customer we defined a reference to a row, here we will only define a reference to an Excel cell . Thus create a role relying on an Excel cell . 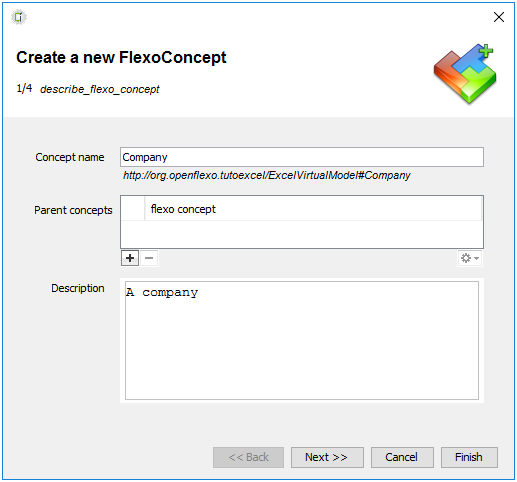
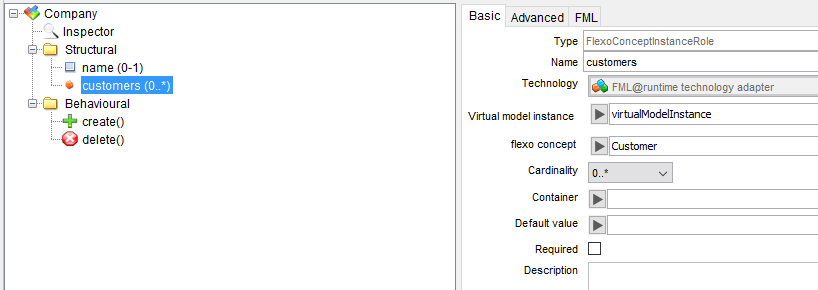
Create a list of Customers Flexo Concept Instance which are employed within this Company ( right click on Structal folder > new > Property > Flexo concept instance role).
Then Finish and select the list to set its cardinality to 0.* , its FlexoConcept type ( Customer), and Virtual model instance (virtualmodelinstance).
Create a reference to the name of the company, using an Expression. Right click on Structural > New > Property > create expression property. 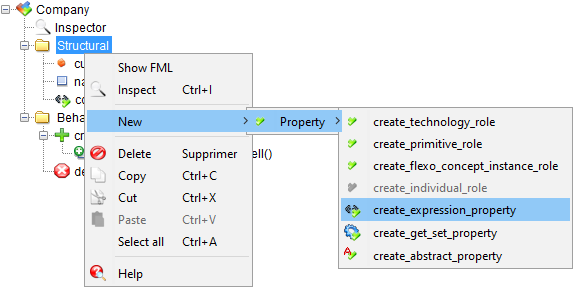
Set the expression : name_cell.cellValueAsString and a name like company_name .
6.2.1 Company Creation Scheme
Now define a creation scheme(you can reuse the default one already present) in order to instanciate a new Company from a name. Define a new String parameter called name_parameter for this Creation Scheme (see 4.2.1).
Create an AddExcelCell action and fill the information as below:
6.3 Update companies workbook
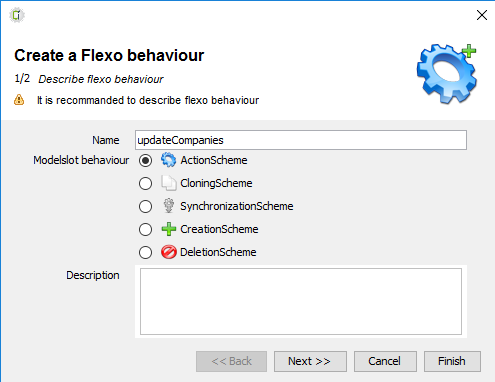
Now open the Virtual Model_ and create a new Action Scheme named updateCompanies. Its purpose is to browse all Customers, instanciate a new Company or retrieve it if already present, and add a Customer to the Company list of Customers.
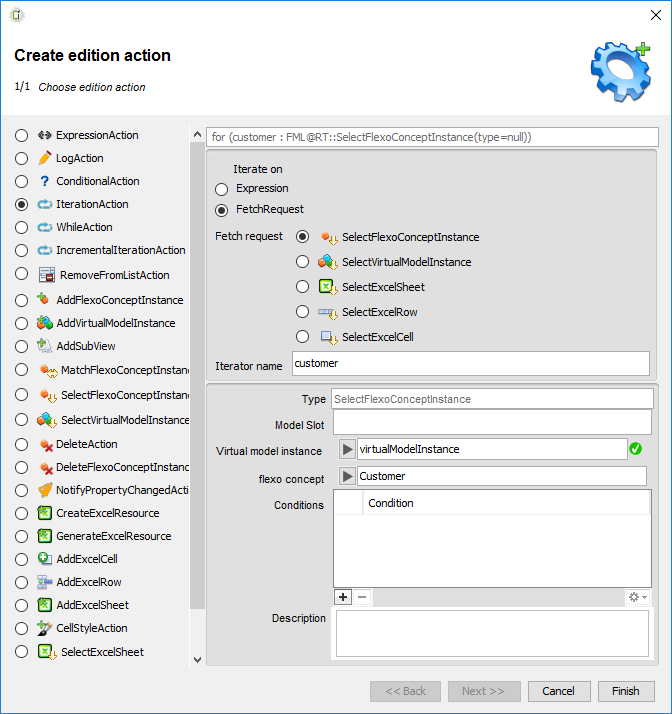
Inside create a new Iteration action to browse over all current Customers, fill the information as below:
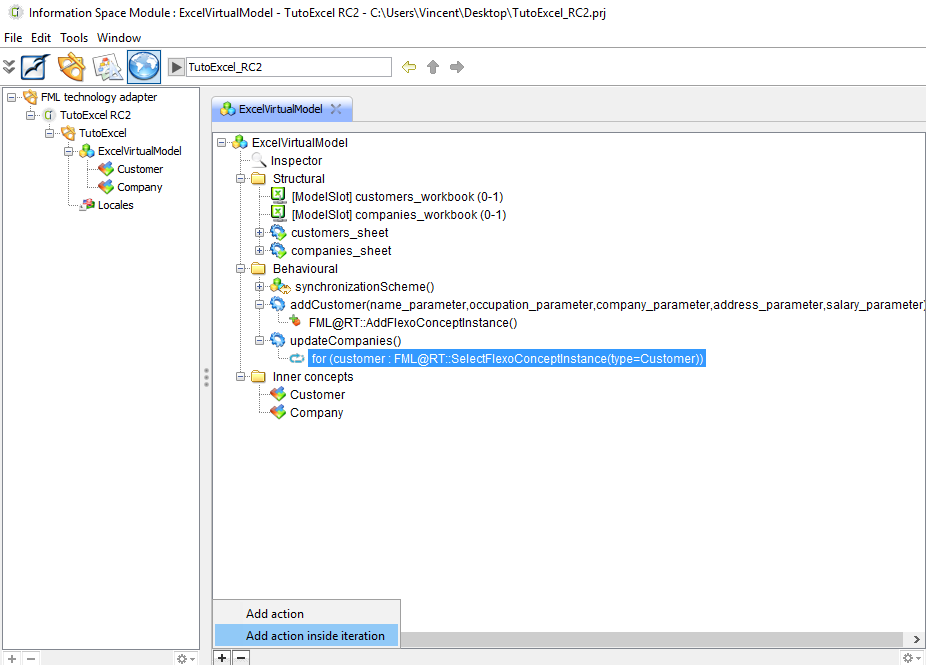
Select the Iteration Action and select (+) > Add action inside iteration.
Create a new MatchFlexoConceptInstance action in order to either retrieve or instanciate a Company. Fill the information as below:
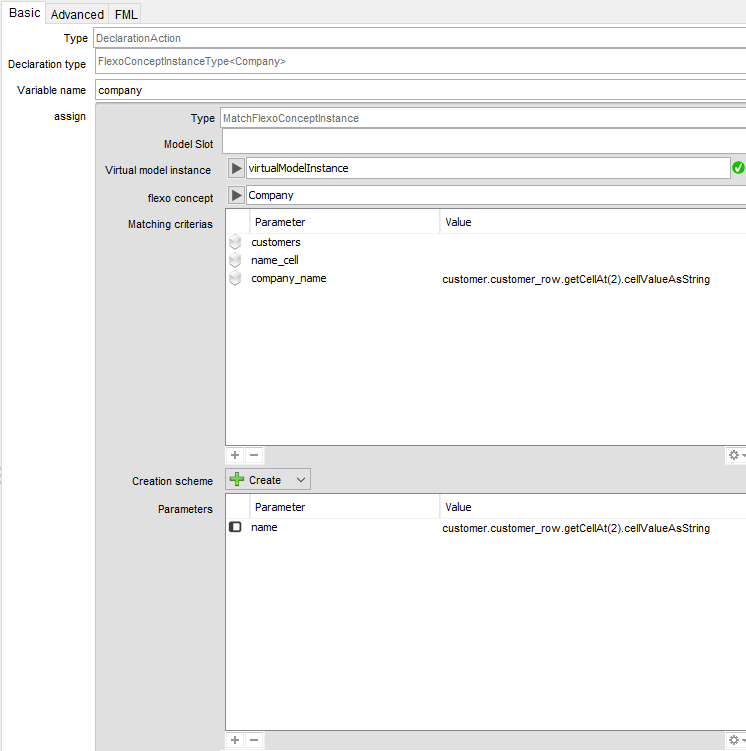
The company_name matching criteria indiquates that a new Company is instanciated only if there are no existing Companies with a company_name equals to company name of the Customer. If a Company already exists with that name, the action just retrieve it. The parameter value for name is customer.customer_row.getCellAt(2).cellValueAsString. Note that cellValueAsString is not mandatory in our case because we are manipulating strings. Click on Finish to create the action.
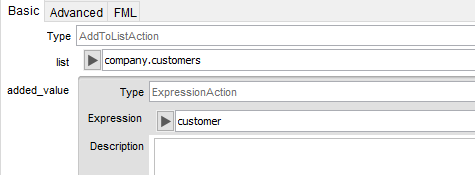
Finnaly add the Customer to the Company’s customers list, thus create an Expression Action and set the checkbox add to list. The list is company.customers and the object to add(expression) is customer.
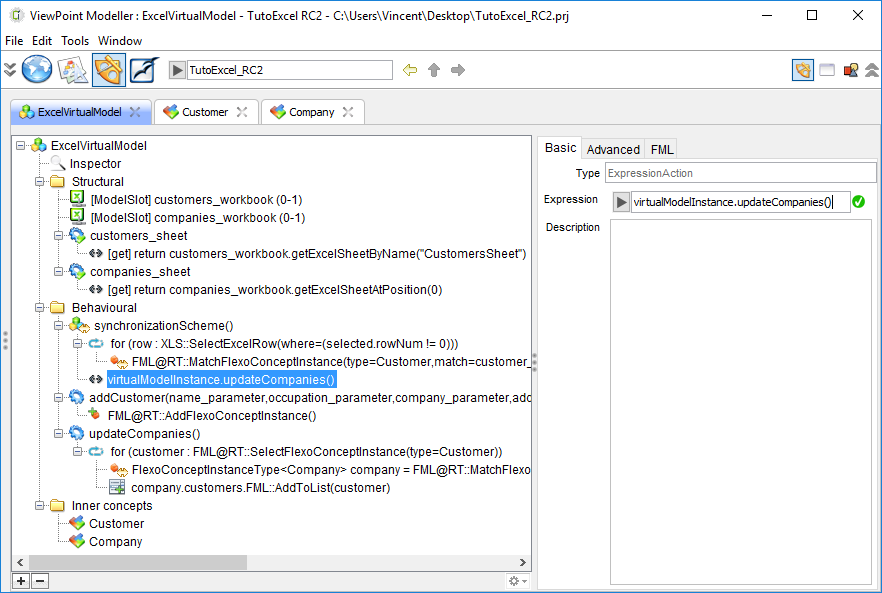
Now the action is ready and can be invoked from the Virtual Model Instance, however to call it during the synchonization, select the Synchonization Scheme created in Part II and add a this Expression Action (you need to select “specify complex binding”):
Now let’s try it.
6.4 Test company viewpoint
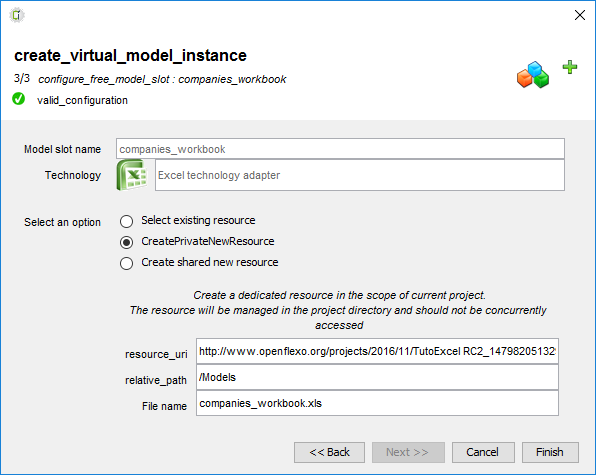
In the same way as in the section 5, switch to View editor and create a new View from this Viewpoint. Then create a new Virtual Model Instance, and for the first Excel Model slot select again the customers file. However now you also have to fill the second Excel Model slot related to companies. It is not created yet, so select create new resource. Give a name and a path for this new Excel file and select Finish.
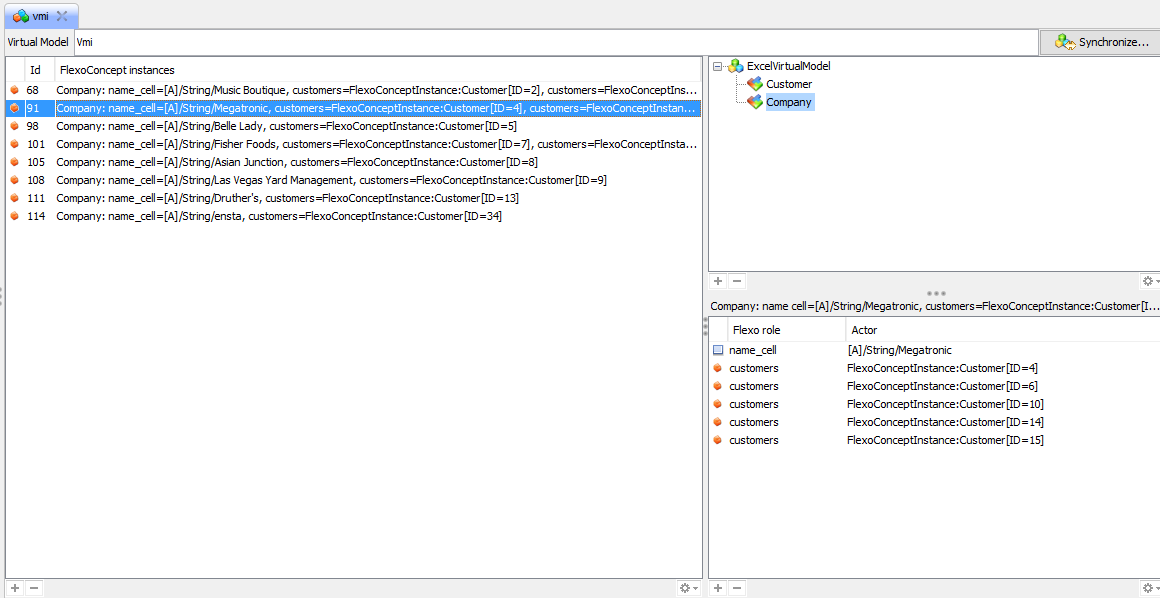
If everything had gone smouthly you should have now a set of Customers and a set of Companies Flexo concept instances. If you select a Company then you may see it is related to a set of Customers (bottom right panel).
Now save the companies Excel file:
And open it from the Infomation Space or from you file system:
7 Part IV: Advanced features
You can download the viewpoint of Part III from here : TutoExcel_RC2_PartIII.prj.zip. In this Part we will learn to use styles, and formulas.
7.1.1: Style of a row
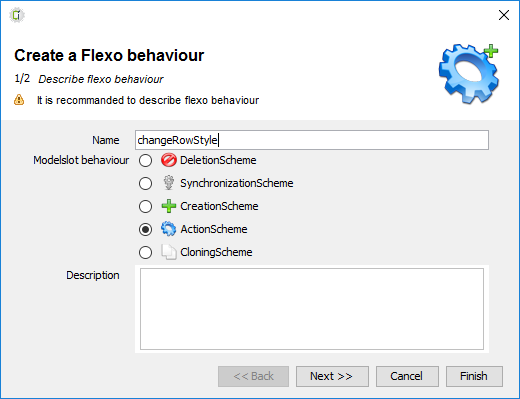
Create an action that fills a row with a color. For now the whole row style is affected, and it is not yet possible to set a begin/end cell. Open the virtual model, and in structural part, create a new Action Scheme named changeRowStyle.
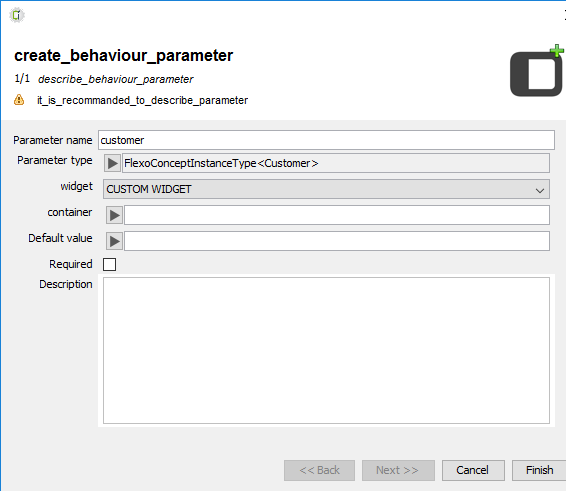
Give a name and provide a parameter which is a Customer (Flexo Concept).
Give a name to the parameter customer.
Then you have to create two CellStyleAction , the first one sets the style to a Solid Foreground:
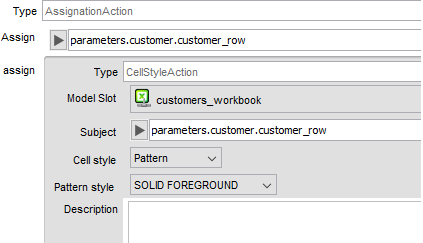
Set the subject (the row you want to be modified, here the given parameter), set the Cell Style as Pattern, and set the Pattern Style to SOLID_FOREGROUND.
Set also the Assign value which is the same as the Subject (this should change in futher software versions).
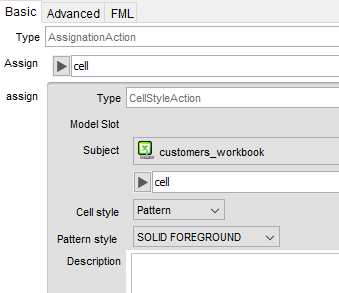
Click on Finish and create a new CellStyle Action with these information:
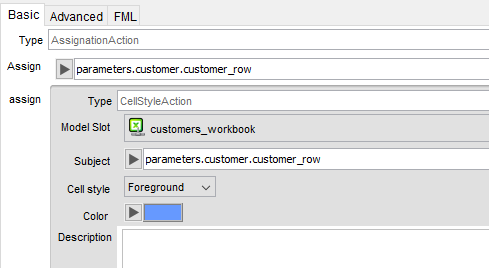
Click on Finish .
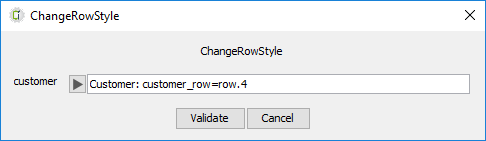
To check if it runs, switch to the View Editor , if you have not created a View and a Virtual Model Instance , create them (see Part II and III). Otherwize right click on the Virtual Model Instance and select the action ChangeRowStyle . Select a Customer to be colored and Validate.
Then save the customers.xlsx file, and open it from the file system.
7.1.2: Style of a cell
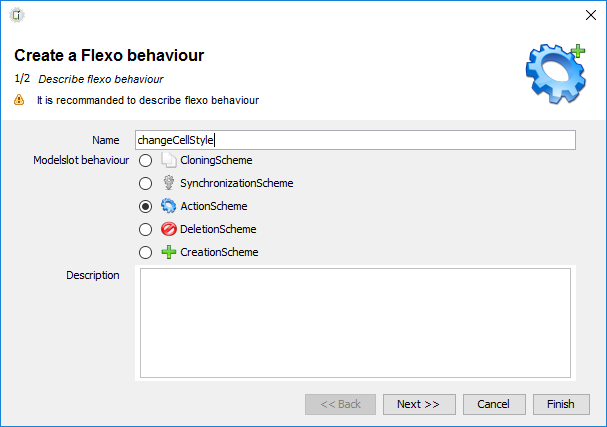
Styles can be also applied on particular cells. Let’s try to change the style of a cell. Create a new action within the Virtual Model called changeCellStyle.
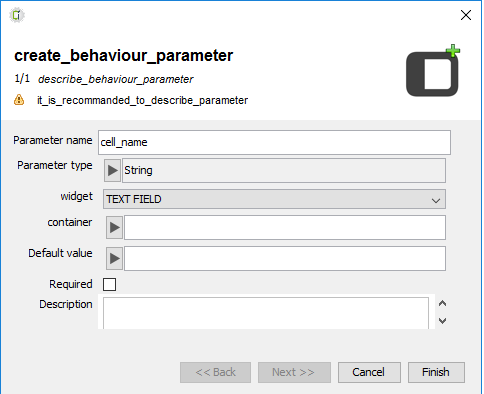
Add a parameter for this action named cell_name of type String. It will be formatted like this: “ROW_ID” + “COL_ID”. For instance “B15”, “AA10” etc… Don’t forget to set the checkbox “required”.
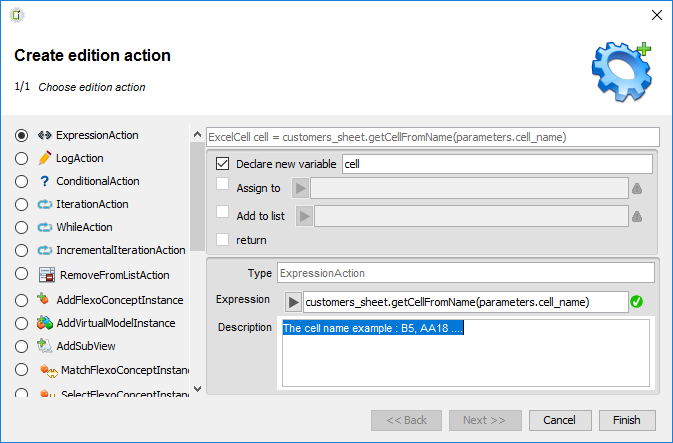
Create a new Expression Action as illustrated below to retrieve the corresponding cell, using the expession getCellFromName(String param) where param is in the format explained previously.
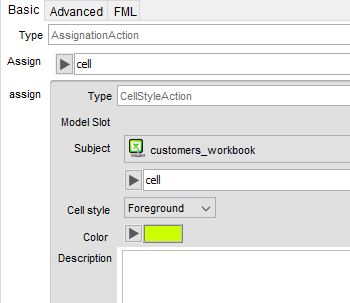
Create 2 CellStyleAction on the cell to modify its style:
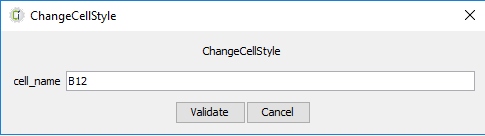
Finnaly try it in the View Editor. On the VirtualModelInstance right click > ChangeCellStyle. Change the style of cell B15 for instance, click Validate, and save the Excel file.
7.2: Working with Formulas
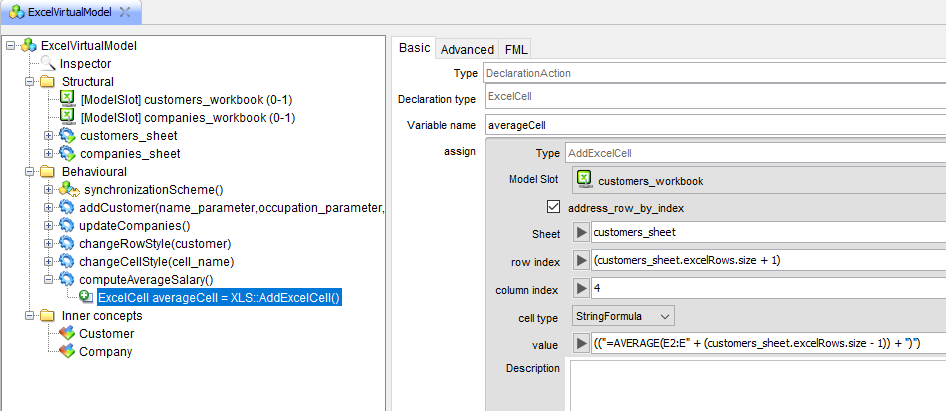
Create a new action in the Virtual Model named computeAverageSalary. Inside this action create an AddCellAction in which we will compute the average salary. Fill the information as below:
Test the action in the View Editor, and check you see the average salary in you Excel sheet.

The final viewpoint is available here: TutoExcel_RC2_PartIV.prj.zip.